This dryer repair kit consists of five commonly replaced dryer parts: one multi-rib belt (part #661570V and measures 93 1/2 inches long), four drum support rollers, one idler assembly, nine tri-rings,...
This drum support roller is sold individually. Most dryers require two. The tri-rings are included. This is a drum support roller for a dryer. It is a genuine replacement part. This part is sold separ...
This dryer lint filter is designed to capture lint and debris during the drying cycle, helping maintain airflow and prevent potential fire hazards. Measuring approximately 12.5 inches wide by 10.5 inc...
This thermostat may differ in appearance, but functions the same as the original part. This part controls the temperature of the inside of the dryer drum and prevents the dryer from overheating.
This is the moisture sensor for your dryer. It helps detect the amount of moisture in your clothes during the dryer cycle. If you notice your clothes are still wet after an automatic dryer cycle is do...
The dryer heating element generates the heat required for drying clothes. Constructed with a nickel-chrome coil, it resists electricity to produce heat. If the dryer no longer heats, inspect the therm...
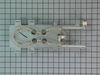
If you notice that your dryer is noisy or will not tumble, you may need to replace the tri ring. This part is triangular, and is less than an inch in size. Tri rings can be found both on the idler pul...
This 18 ml bottle of white appliance touch-up paint is used to cover scratches or marks on your appliance. The white touch-up paint can be used on refrigerators, microwaves, ranges, clothes dryers, an...
Brighten up your appliance with this easy-to-install 10-watt light bulb, perfect for dryers and refrigerators. It gives off a clear, steady light so you can easily see inside when the door is open. Wh...
$22.77
In Stock
Questions And Answers for MEDB200VQ0
Ask our experts a question about this model and we'll get back to you as soon as possible!
8 questions answered by our experts.
< Prev
1
2
Next >
Sort by:
Search filter:
Clear Filter
Your search term must have 3 or more characters.
Keep searches simple. Use keywords, e.g. "leaking", "pump", "broken" or "fit".
Sorry, we couldn't find any existing answers that matched.Try using some different or simpler keywords, or submit your new question by using the "Ask a Question" button above!
Doug
April 14, 2023
Looking for dryer door to replace damaged one.
For model number MEDB200VQ0
Hi Doug,
Thank you for your question. The part number for the door is PS11748366. We hope this helps!
We have replaced the thermal fuses. Worked fine for a week. Then it stopped working. It turns on but won’t work. Reviewing your website it could be a myriad of things. Suggestions?
For model number MEDB200VQ0
Hello Mary and thanks for writing.
Please clarify what you mean if you say turns on but won't work? Does it tumble with no heat or not even that much? Looking forward to your reply please always state model number. We do carry other spare parts for units such as yours, for example, Part Number: PS11753116 Good Luck with your repair.
My dryer seemed to take long to dry the clothes for a week or two & then quit producing any heat at all. How do i determine which of the 3 choices listed as potential problems is the solution i need?
For model number MEDB200VQ0
Hello Linda, thank you for your question. We would recommend testing the thermostats first. There are multiple thermostats that can cause that issue. They are PartSelect Number: PS11746386, PartSelect Number: PS11746740, and PartSelect Number: PS991443. To test these parts you would
Set your multimeter to the R X 1 setting. Take each of your meter's probes and touch one to each terminal. You are testing for continuity, and you should receive a reading of either zero or infinity. At room temperature, testing the thermostat should produce a reading of zero. But if a thermostat is tested when it is heated to its limit, a reading of infinity should be produced. We strongly recommend that you test your thermostat at room temperature. If the test you conduct with your thermostat does not produce these results, then you should replace the component. I hope this helps. Thank you and have a great day!
Was this helpful?
Thank you for voting!
Proc
April 22, 2022
Dryer gets hot but want blow out backorder dryer is the blower burn out
For model number MEDB200VQ0
Hello Proc, thank you for writing One solution that has worked in the past is to check the nut or Dryer Motor Pulley(item 52 on schematic Bulkhead Parts) PS11746332. It can un-screws itself, disconnecting it from the Blower Housing with Bearing ( item 44) PS11751272. If you need help placing an order, customer service is open 7 days a week. Please feel free to give us a call. We look forward to hearing from you.
Is this the circular seal that fits around the drum at the front of the machine?
For model number MEDB200VQ0
Hi, thank you for contacting us. According to our research, the part you are looking for is the drum seal, part number PS990009. Customer service is always available to help you place an order if you are having trouble doing so. Good luck with your repair.
After a few years of slamming the dryer door (at least that is what my husband says), the catch on the dryer door broke. Using pliers (I used needle nose) squeeze the outer edges of the catch together (vertically). With it compressed, it should slide out easily. My husband had jacked with ours prior to the repair, so the broken piece in the door was actually sideways and would not fit through the hole. Using a screwdriver, I pushed that piece into the door (it lives in the door somewhere now). I was then able to slide out the rest of the old catch. Compress the new catch and insert it into the hole in the door. Push it in until it clicks into place. DONE! Happy Drying!
The issue was the idler pulley. First I began opening up the front panel based on a youtube video but soon realized the model was slightly different and required a lot more items to remove. I saw the pulley in the back with nothing in the way so I put the front panel crap back on and removed the rear panel. There it was, very simple to remove and replace. I'm not looking forward to drum rollers though. Hopefully they're aren't as difficult as they appear.