This center crisper drawer rail supports the edges of refrigerator crisper drawers, ensuring smooth sliding and proper alignment. At 13.5 inches long, it fits between the drawers on the shelf frame. Q...
$76.21
In Stock
Order within the next 10 hrs and your part ships today!
This shelf frame is an essential component for maintaining the organization and functionality of your refrigerator’s crisper or pantry area. It serves as the sturdy base for the glass shelf above the ...
$144.12
In Stock
Order within the next 10 hrs and your part ships today!
Sold individually. Crisper drawer is an original equipment manufacturer (OEM) part that fits some bottom-freezer Kenmore, Amana, Crosley, Jenn-Air, KitchenAid, Maytag and Whirlpool refrigerators.
T...
$171.53
In Stock
Order within the next 10 hrs and your part ships today!
This part is snapped onto the top portion of the evaporator. The thermostat sends temperature information to the processor. The defrost heater must be replaced when replacing the thermostat.
$98.95
In Stock
Order within the next 10 hrs and your part ships today!
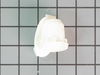
This light switch may also be known as a refrigerator door switch or a light switch kit, and is compatible with your refrigerator. The function of the refrigerator door switch is to turn on the light ...
$38.96
In Stock
Order within the next 10 hrs and your part ships today!
If the glass shelf over your fridge’s crisper drawers is cracked or missing, this replacement is a quick fix. It’s made of strong glass and fits right into the frame above the drawers, helping you kee...
$228.38
In Stock
Order within the next 10 hrs and your part ships today!
I removed the ice maker from the refrigerator, by removing one screw on the underside bracket and loosening the two screws at the top side, then lifting the ice maker off the loosened screws. I then unplugged the electrical harness that supplies power from the refrigerator to the ice maker. I then disassembled the ice maker by removing the front cover which is snapped in place, then removing two recessed screws at the front. I removed the broken part, I then reassembled the ice maker with the new part. I replaced the two recessed screws at the front and snapped on the cover. Then I reinstalled the ice maker in the refrigator by plugging in the harness, slipping the ice maker over the loosened screws in the refrigerator and replacing the screw that was removed from the underside bracket. Tightening all the screws completed the project.
I used a flat-head screwdriver to pop out the old light rocker switch. Then, I unplugged the wires, plugged them into the new light rocker switch, and then popped the new switch into the hole. That's it! Lights began working again.


.gif "SUPPLEMENTAL INFORMATION Diagram and Parts List for PMB2227PHW0 Maytag Refrigerator")