Models > MAT14PDAXW1

MAT14PDAXW1 Maytag Washer - Overview

Sections of the MAT14PDAXW1

[Viewing 11 of 11]

Manuals & Care Guides for MAT14PDAXW1

Click to download
Keep searches simple, eg. "belt" or "pump".
Suspension Spring – Part Number: WP63907
Suspension Spring
★★★★★
★★★★★
(4)
PartSelect #: PS11743345
Manufacturer #: WP63907
The suspension spring supports the outer tub and keeps the tub steady during loads that could cause an unbalance. If this part breaks, is worn down or has stretched out and lost its spring, it could c...
$10.20
  In Stock
Order within the next 6 hrs and your part ships today!
Touch-Up Paint - White – Part Number: 72017
Touch-Up Paint - White
★★★★★
★★★★★
(16)
PartSelect #: PS385132
Manufacturer #: 72017
This 18 ml bottle of white appliance touch-up paint is used to cover scratches or marks on your appliance. The white touch-up paint can be used on refrigerators, microwaves, ranges, clothes dryers, an...
$10.20
  In Stock
Order within the next 6 hrs and your part ships today!
Tub Wear Pads - Package of 3 – Part Number: 285744
Tub Wear Pads - Package of 3
★★★★★
★★★★★
(8)
PartSelect #: PS334620
Manufacturer #: 285744
This package of pads contains three tub wear pads.
$21.49
  In Stock
Order within the next 6 hrs and your part ships today!
Centerpost Gasket – Part Number: W10814296
Centerpost Gasket
★★★★★
★★★★★
(5)
PartSelect #: PS11723081
Manufacturer #: W10814296
Also known as Main Outer Tub Seal. This part helps to prevent leaking from the bottom of the tub.
$7.34
  In Stock
Order within the next 6 hrs and your part ships today!
Push Button – Part Number: WPW10424308
Push Button
★★★★★
★★★★★
(1)
PartSelect #: PS11754596
Manufacturer #: WPW10424308
This push button is just over three inches long. It is all black in color and is made of plastic.
$24.02
  In Stock
Order within the next 6 hrs and your part ships today!
Foot, Front - Single – Part Number: WPW10001130
Foot, Front - Single
★★★★★
★★★★★
(3)
PartSelect #: PS11747965
Manufacturer #: WPW10001130
Sold Individually.
$9.50
  In Stock
Order within the next 6 hrs and your part ships today!
Leveling Spring – Part Number: 8316845
Leveling Spring
★★★★★
★★★★★
(2)
PartSelect #: PS394983
Manufacturer #: 8316845
This spring is used on the leveling components in a washer. Please note, this spring may differ in appearance, but functions the same as original.
$14.20
  In Stock
Order within the next 6 hrs and your part ships today!
Washer – Part Number: WP3949550
Washer
PartSelect #: PS11742027
Manufacturer #: WP3949550
This part goes on the agitator retaining bolt.
$9.81
  In Stock
Order within the next 6 hrs and your part ships today!
Hose Clamp – Part Number: WP596669
Hose Clamp
PartSelect #: PS11743008
Manufacturer #: WP596669
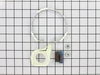
This hose clamp extends from half an inch to an inch in diameter. It is made entirely of metal and is intended for use with Maytag brand washing machines.
$11.68
  In Stock
Order within the next 6 hrs and your part ships today!
Suspension Pads - Package of 3 – Part Number: 285219
Suspension Pads - Package of 3
PartSelect #: PS334456
Manufacturer #: 285219
This is a pack of three suspension pads for your washer. The suspension pads in your washer are found underneath the tub and prevent the rotating metal parts from grinding on one another. If your susp...
$35.63
  In Stock
Order within the next 6 hrs and your part ships today!
Suspension Spring Retainer – Part Number: WPW10145155
Suspension Spring Retainer
★★★★★
★★★★★
(2)
PartSelect #: PS11749057
Manufacturer #: WPW10145155
This is a replacement suspension spring retainer for your washer. The retainer holds the suspension spring in place while the washer is operating. If you notice movement, or an unusual noise or shakin...
$9.42
  In Stock
Order within the next 6 hrs and your part ships today!
Hose Clamp – Part Number: WP285655
Hose Clamp
PartSelect #: PS11740613
Manufacturer #: WP285655
This hose clamp is sold individually.
$14.15
  In Stock
Order within the next 6 hrs and your part ships today!

Questions And Answers for MAT14PDAXW1

Be the first to ask our experts a question about this model!

Common Symptoms of the MAT14PDAXW1

[Viewing 9 of 9]
Leaking
Fixed by
these parts
Fixing Fixing Fixing
Show All
Will not agitate
Fixed by
these parts
Fixing Fixing
Show All
Shaking and Moving
Fixed by
these parts
Fixing Fixing Fixing
Show All
Spins slowly
Fixed by
these parts
Fixing Fixing Fixing
Show All
Will Not Start
Fixed by
these parts
Fixing
Show All
Touchpad does not respond
Fixed by
these parts
Fixing
Show All
Burning smell
Fixed by
these parts
Fixing
Show All
Will not drain
Fixed by
these parts
Fixing
Show All
Lid or door won’t close
Fixed by
these parts
Fixing
Show All
Keep searches simple. Use keywords, e.g. "leaking", "pump", "broken" or "fit".
washer shakes violently on spin cycle
Remove the washing machine cabinet. Use a large flat head screwdriver to pry/wedge the tub suspension apart and gain access to the pad locations one at a time. My old pads were completely gone, so there was no need to remove them. Clip the new pads into place and re-install the cabinet.

This completely solved the violent chaking problem. There was no need to replace springs.
Parts Used:
Tub Wear Pads - Package of 3 Suspension Pads - Package of 3
  • aaron from peoria, AZ
  • Difficulty Level:
    Easy
  • Total Repair Time:
    15 - 30 mins
  • Tools:
    Screw drivers
61 of 66 people found this instruction helpful.
Was this instruction helpful to you?
Thank you for voting!
Ring Balancer had come loose and broke releasing the liquid inside that helps balance the basket.
First I removed the screws on top and at the bottom that holds the controls in place to the washer itself. I then removed the control panel and disconnected it off of the washer. I then released the two metal holders that keep the back of the washer in place with the front frame of the washer. I slid the metal exterior forward and away from the rest of the washer exposing the basket. I removed the top layer that holds the ring balancer in place and then was able to reach the ring balancer itself. I removed the old one and discarded it replacing it with the new ring balancer. I pressed it down onto the top of the basket as if you were putting a top back on to a tuppaware dish. I then put the top layer back on and then proceeded to put the exterior of the washer sliding it back in to place. The whole process took maybe about 45-55 minutes and it went relatively smooth especially after knowing how to remove each piece from observing a maintenance job one day.
Parts Used:
Balance Ring - Top of Inner Tub - White
  • Al from Spring, TX
  • Difficulty Level:
    Really Easy
  • Total Repair Time:
    30 - 60 mins
  • Tools:
    Screw drivers
59 of 79 people found this instruction helpful.
Was this instruction helpful to you?
Thank you for voting!
The washer wouldn't spin or agitate.
Frist I disconnected the water lines and power cord. Then I leaned the washer back against the wall. Removed the 2 pump retainers and then the pump. Next removed the 2 screws from the motor retainers and pulled off the retainers and motor. Then removed the 3 bolts from the Gear case. Then removed the cap from the top of the agitator with a flat screw driver. Then removed the bolt from the top of the gear shaft. and removed the auger and agitator assembly. Then removed the gear case from the washer. Next removed the slip ring and then the clutch from the top of the gear case. Next removed the 1/4" screws from cover of gear case and removed the cover. Found the top gear bad. Ordered the new gear and pinion kit. Couldn't find any part #'s to match what PartSelect had. Ordered the gear that they should that fit most washers. The pics they had up looked the same as the one that was bad. Had the new gear in 3 days put it back together and it still wouldn't work right. Took it apart again and looked at it and found a small clip on the bottom side of the gear was upside down. Fliped it over put the gear back in and ran the washer with the gear case out and it worked. Put it back together again. And learned a good lesson always watch how you take things apart for when it's time to put it back together!
Parts Used:
Gearcase
  • david from Monroe, MI
  • Difficulty Level:
    Very Difficult
  • Total Repair Time:
    More than 2 hours
  • Tools:
    Nutdriver, Pliers, Screw drivers, Socket set
49 of 52 people found this instruction helpful.
Was this instruction helpful to you?
Thank you for voting!