This temperature sensor, also referred to as a thermistor, is a genuine replacement component compatible with various appliance models. It works in coordination with the control board to monitor inter...
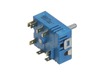
This rotary switch helps you control the heat on your range’s surface burners. It adjusts the temperature smoothly, so you can cook with precision. If your burner isn’t responding, only works on one s...
Is your LG range oven stove not heating quite like it used to? The Radiant Surface Element could be just what you need. This genuine LG part is specifically designed to provide heat directly to your r...
This genuine heating element fits select LG ovens and ranges, providing heat for broiling and baking. Located at the top of the oven, it ensures even cooking and reliable performance. It replaces olde...
Don't let a faulty heater ruin your meal prep plans! Improve your cooking experience with this high-quality Radiation Heater from LG. This particular part is a critical component of certain LG range m...
Struggling with a faulty knob on your LG range stove oven? Say hello to this genuine LG Knob Assembly'a quick fix to help bring back the impeccable control over your cooking temperatures. This OEM com...
$103.51
In Stock
Questions And Answers for LSE4611ST
Ask our experts a question about this model and we'll get back to you as soon as possible!
1 question answered by our experts.
< Prev
1
Next >
Sort by:
Search filter:
Clear Filter
Your search term must have 3 or more characters.
Keep searches simple. Use keywords, e.g. "leaking", "pump", "broken" or "fit".
Sorry, we couldn't find any existing answers that matched.Try using some different or simpler keywords, or submit your new question by using the "Ask a Question" button above!
Doug
January 4, 2025
More than one burner comes on when only one is selected, is this a control board issue?
For model number LSE4611ST
Hello Doug, Thank you for contacting us. Researching your model, this is usually caused by an issue with the relay board part# PS12581391 or the main control board part# PS12715670. Check both boards for any loose or damaged wiring connections or visible damage to the boards. You can test the wiring connections with a multimeter. Good luck with your repair.
Unplugged oven electric and turned gas off. Removed all back covers from the unit. Removed the cover on the inside covering the burner and fan in the back of the convection oven. Removed the nut securing the fan to motor shaft with helper holding the motor. Removed the three electrical wires attached to motor, making note where they go. Removed screws mounting the motor to oven. Removed motor cooling fan and shaft spacer from old motor. Fit in same orientation on new motor. Replace all parts in reverse order, restore gas and electric, turn on and test.
Dropped a hammer on the range while removing a ceiling light. Viewed a How-To video on Google. Ordered the needed parts. Followed the steps from the How-To video. Reinstall was a bit tricky by myself - could have used an extra set of hands. I have a few words of caution: 1) Put something between the range top and range - like a sheet or drop cloth - to prevent a dropped screw from falling into a crevice in the stove. I dropped a screw and was unable to retrieve it, even with a magnet. 2) Makes sure you remove all bumpers, screws, clips, etc. from the item being replaced and put them on the new item if the new item does not come with replacement bumpers, screws, etc.
Go onto youtube, such as https://www.youtube.com/watch?v=-ITkrwhDNMQ and watch similar videos for DYI. The process is very similar to other models.
Once the door is removed, place oven door on a towel or soft place so it does not scratch the door. Unscrew the screws and make sure you notice where each screw goes, so you know the process of where each screw goes when you re-assemble.
Once the inner cover is removed, remove the insulation, too so you don't damage it. Use Wet/Dry Shop Vac to clean the shattered glass. (WORD OF ADVICE: I did not remove the insulation and the suction of the Shop Vac removed part of the insulation, so now instead of a quick turn around repair turns into a few weeks repair, because the insulation is on back order 10-14 days from the supplier. DON"T MAKE THE SAME MISTAKE!)
Once the glass has been removed, the new inner glass is replaced, begin by re-assemble the oven door with the correct screws and attached the oven door to the range.