


LRFVC2406S (ASTCNA1) LG Refrigerator - Overview
Sections of the LRFVC2406S
[Viewing 9 of 9]


Keep searches simple, eg. "belt" or "pump".


Handle Screw
PartSelect #: PS8752913
Manufacturer #: MJB63190001
This handle screw, also known as a mounting bolt, is a mounting screw to help secure the door handle to your refrigerator door. If your handle is loose, you may just need to tighten the screw. If your...
$18.96
In Stock

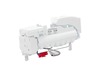
Refrigerator DC Motor Assembly
PartSelect #: PS16662422
Manufacturer #: EAU65058502
Say hello to the DC Motor Assembly by LG ? your trusted partner in giving your refrigerator a fresh lease of life. This bona fide OEM part is tailor-made to slot perfectly into chosen LG refrigerator ...
$114.93
In Stock


Ice Maker Assembly Kit
PartSelect #: PS12724823
Manufacturer #: AEQ73110219
This ice maker assembly is designed for use in select LG refrigerator models and includes all the essential components needed to produce and store ice efficiently. The unit features an ice mold, water...
$237.82
In Stock


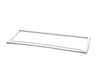
Holder,Pipe
PartSelect #: PS3535430
Manufacturer #: MEG61879201
This pipe holder secures tubing or piping in place to maintain proper alignment and routing. Its durable construction supports stable installation and reliable operation.
$18.96
In Stock

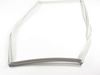
Door Gasket
PartSelect #: PS11758511
Manufacturer #: MDS38201426
Freezer door gasket is on the inner door panel and creates a seal around the door to prevent warm air from entering the freezer compartment.
$113.73
In Stock


FAN ASSEMBLY
PartSelect #: PS16546769
Manufacturer #: ADP73273402
This fan assembly circulates air to regulate temperatures and support efficient operation. Proper airflow improves performance and helps protect internal components. Replacing a failing fan assembly r...
$56.26
In Stock

Questions And Answers for LRFVC2406S
We're sorry, but our Q&A experts are temporarily unavailable.
Please check back later if you still haven't found the answer you need.
Common Symptoms of the LRFVC2406S
[Viewing 9 of 9]Door Sweating
Fixed by
these parts
these parts
Show All
Ice maker won’t dispense ice
Fixed by
these parts
these parts


Show All
Leaking
Fixed by
these parts
these parts


Show All
Door won’t open or close
Fixed by
these parts
these parts

Show All
Ice maker not making ice
Fixed by
these parts
these parts
Show All
Noisy
Fixed by
these parts
these parts


Show All
Frost buildup
Fixed by
these parts
these parts

Show All
Ice maker dispenses too much ice
Fixed by
these parts
these parts
Show All
Freezer section too warm
Fixed by
these parts
these parts
Show All
Keep searches simple. Use keywords, e.g. "leaking", "pump", "broken" or "fit".
The door gaskets had become hard and curled up - would not seal properly
Watch YouTube videos on this topic if you are uncertain before tackling the job. The right door was easy to replace. Just pull the gasket with your fingers and it will come off easily. Place new gasket over door and use fingers to press it inside the groove few inches at a time. Pay attention to gasket orientation.
The left door is a bit harder because you need to remove the mullion at the door edge using a screw driver. Remove two screws on the center hinge and then slide the mullion up to disengage. Then unplug the wires to remove the mullion. Replace the gasket as described above and replace the mullion reversing the directions shown above.
Could not believe how easy it was!
Parts Used:


-
Vispi from SUGAR LAND, TX
-
Difficulty Level:Really Easy
-
Total Repair Time:15 - 30 mins
-
Tools:Screw drivers
4 of 4 people
found this instruction helpful.
Was this instruction helpful to you?
Thank you for voting!
The door basket/ shelf broke
Slide the old one out
Slide the new one in.
Could not have been easier.
Slide the new one in.
Could not have been easier.
Parts Used:
-
Karen from BRADENTON, FL
-
Difficulty Level:Really Easy
-
Total Repair Time:Less than 15 mins
3 of 3 people
found this instruction helpful.
Was this instruction helpful to you?
Thank you for voting!
Door stopper broke
-
ROGER from SCHELLSBURG, PA
-
Difficulty Level:Really Easy
-
Total Repair Time:Less than 15 mins
-
Tools:Screw drivers
5 of 9 people
found this instruction helpful.
Was this instruction helpful to you?
Thank you for voting!