This air filter helps keep your fridge smelling fresh and your food lasting longer. It uses carbon to trap odors and clean the air inside your refrigerator. If you notice bad smells or your fridge tel...
$67.74
In Stock
Order within the next 4 hrs and your part ships today!
The Water filter reduces contaminants such as lead, iron, and chlorine from drinking water. This OEM filter is a genuine part manufactured by LG for use in refrigerators. We recommend you replace eve...
$102.71
In Stock
Order within the next 4 hrs and your part ships today!
This handle screw, also known as a mounting bolt, is a mounting screw to help secure the door handle to your refrigerator door. If your handle is loose, you may just need to tighten the screw. If your...
$18.96
In Stock
Order within the next 4 hrs and your part ships today!
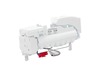
This ice maker assembly is designed for use in select LG refrigerator models and includes all the essential components needed to produce and store ice efficiently. The unit features an ice mold, water...
$237.82
In Stock
Order within the next 4 hrs and your part ships today!
This fan assembly circulates air to regulate temperatures and support efficient operation. Proper airflow improves performance and helps protect internal components. Replacing a failing fan assembly r...
$56.26
In Stock
Order within the next 4 hrs and your part ships today!
Questions And Answers for LRFVC2406S
Be the first to ask our experts a question about this model!
✖
Ask a Question
Ask our experts a question on this model and we'll respond as soon as we can.
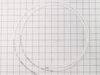
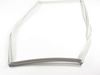
Watch YouTube videos on this topic if you are uncertain before tackling the job. The right door was easy to replace. Just pull the gasket with your fingers and it will come off easily. Place new gasket over door and use fingers to press it inside the groove few inches at a time. Pay attention to gasket orientation.
The left door is a bit harder because you need to remove the mullion at the door edge using a screw driver. Remove two screws on the center hinge and then slide the mullion up to disengage. Then unplug the wires to remove the mullion. Replace the gasket as described above and replace the mullion reversing the directions shown above.