Models > LMV1813ST

LMV1813ST (LMV1813ST/01) LG Microwave - Overview

Sections of the LMV1813ST

[Viewing 7 of 7]
Keep searches simple, eg. "belt" or "pump".
Light Bulb - 120V 30W – Part Number: 6912W1Z004B
Light Bulb - 120V 30W
★★★★★
★★★★★
(3)
PartSelect #: PS3530415
Manufacturer #: 6912W1Z004B
$20.36
  In Stock
Damper – Part Number: 4900W1A001B
Damper
★★★★★
★★★★★
(2)
PartSelect #: PS3524148
Manufacturer #: 4900W1A001B
This metal vent damper door closes off the exhaust duct when the fan is not running to stop outside air from entering the microwave unit, and opens when the fan turns on to allow air to vent away from...
$17.95
  In Stock
Air Duct Bracket – Part Number: 4810W1A151A
Air Duct Bracket
PartSelect #: PS3523851
Manufacturer #: 4810W1A151A
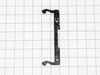
This bracket holds the metal or plastic flapper that closes off the exhaust duct when the fan is not running and opens when the fan turns on. If the exhaust fan on your microwave does not appear to be...
$27.08
  In Stock
TRAY,GLASS – Part Number: MJS47373304
TRAY,GLASS
★★★★★
★★★★★
(2)
PartSelect #: PS16746541
Manufacturer #: MJS47373304
This tray rotates in your microwave ensuring more even temperatures.
$77.55
  In Stock
Charcoal Filter – Part Number: 5230W1A003C
Charcoal Filter
★★★★★
★★★★★
(1)
PartSelect #: PS3527524
Manufacturer #: 5230W1A003C
This charcoal filter in manufactured to fit a microwave. It removes food odors from the air circulating through your appliance vent. Youi may need to replace this part if you notice odor when cooking ...
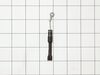
  No Longer Available
Locker – Part Number: 4026W2A019A
Locker
★★★★★
★★★★★
(2)
PartSelect #: PS3522838
Manufacturer #: 4026W2A019A
The locker, or door latch assembly fits to the inside of the microwave door, and keeps the door closed. If the door on your microwave oven doesn’t appear to close properly, you may have a problem with...
$10.42
  In Stock
Motor, AC Synchronous – Part Number: 6549W1S013H
Motor, AC Synchronous
★★★★★
★★★★★
(1)
PartSelect #: PS3529216
Manufacturer #: 6549W1S013H
If the turntable on your microwave does not rotate, or you can hear a grinding noise, the problem may be with the motor. The motor is typically located below the floor of the oven, and is accessed thr...
$46.69
  In Stock
Micro Switch – Part Number: 6600W1K001R
Micro Switch
PartSelect #: PS3598700
Manufacturer #: 6600W1K001R
$17.18
  Special Order
Rivet – Part Number: 4051W3A001A
Rivet
PartSelect #: PS3522869
Manufacturer #: 4051W3A001A
$9.59
  In Stock
Diode (Cable, Assembly) – Part Number: 6851W1A002E
Diode (Cable, Assembly)
PartSelect #: PS3529603
Manufacturer #: 6851W1A002E
$30.27
  In Stock
Spring – Part Number: 4970WRA001G
Spring
★★★★★
★★★★★
(1)
PartSelect #: PS3524607
Manufacturer #: 4970WRA001G
$10.42
  In Stock
Holder,Cook Auxiliary – Part Number: 4930W1A069A
Holder,Cook Auxiliary
PartSelect #: PS3524335
Manufacturer #: 4930W1A069A
$18.17
  In Stock

Questions And Answers for LMV1813ST

Ask our experts a question about this model and we'll get back to you as soon as possible!

3 questions answered by our experts.
  • 1
Sort by:
Sorry, we couldn't find any existing answers that matched.Try using some different or simpler keywords, or submit your new question by using the "Ask a Question" button above!
Jarvis
June 25, 2021
My fuse keeps blowing less than a second after I turn the microwave on to cook. Can you help me with this problem please?
For model number LMV1813ST
PartSelect logo
Hello Jarvis, Thank you for the question. Normally this is an indication that one or more of the three door switches will need to be replaced. We hope this helps!

1 person found this helpful.

Was this helpful?
Thank you for voting!
Related Parts:
Don
April 7, 2022
How do I replace the light bulbs that light up the surface under the microwave
For model number LMV1813ST
PartSelect logo
Hi Don, Thank you for your question. Before replacing the light bulbs, please unplug the microwave from the electrical outlet. To remove and install a light bulb under the microwave, you will first need to remove the reflector cover. Unthread the screws securing it and then unthread the light bulb from the socket. Install the new light bulb and reinstall the reflector. Then plug the microwave back in. If you have any questions, please let us know. We are open 7 days a week. We look forward to hearing from you!

Was this helpful?
Thank you for voting!
Related Parts:
Donald
October 25, 2022
My microwave keeps showing power 100 number and will not work.
For model number LMV1813ST
PartSelect logo
Hello Donald, thank you reaching out. The power 100 indicates that the microwave is currently on 100% power. You can change that by pressing the power button and change into the desired power level. If the keypad is not working, keypad or the control board might be faulty. We would recommend replacing the control board, part number PS3534000. If you require assistance to place an order, please contact customer service. We hope that helps!

Was this helpful?
Thank you for voting!
  • 1

Common Symptoms of the LMV1813ST

[Viewing 5 of 5]
No heat
Fixed by
these parts
Fixing Fixing Fixing
Show All
Won’t turn on
Fixed by
these parts
Fixing Fixing Fixing
Show All
Door not closing properly
Fixed by
these parts
Fixing Fixing
Show All
Tray won’t turn
Fixed by
these parts
Fixing Fixing
Show All
Doesn’t shut off
Fixed by
these parts
Fixing Fixing
Show All
Keep searches simple. Use keywords, e.g. "leaking", "pump", "broken" or "fit".
Microwave would not rotate or heat up food.
After watching a few youtube videos, I used a phillips SD to take controll pannel off to access the switches that sense when microwave door is closed. Swapped out all 3 switched and mocrowave works like new. $20 fix (shipping included)
Parts Used:
Switch,Micro Switch,Micro
  • Joshua from WHITE LAKE, MI
  • Difficulty Level:
    Very Easy
  • Total Repair Time:
    15 - 30 mins
  • Tools:
    Screw drivers
44 of 60 people found this instruction helpful.
Was this instruction helpful to you?
Thank you for voting!
One of the switches in a component that door activates when shut.
I replaced the whole component with all three switches in it even though only one switch was bad . Taking out one switch out of the holder unit would probably have damaged the unit that was holding the switches. Easy install and it works great again .
Parts Used:
Holder Assembly,Locker
  • Jimmy from OZARK, MO
  • Difficulty Level:
    Easy
  • Total Repair Time:
    30 - 60 mins
  • Tools:
    Pliers, Screw drivers
9 of 9 people found this instruction helpful.
Was this instruction helpful to you?
Thank you for voting!
Microwave would not power up.
Fun and easy fix for my kids.

The countdown timer was working but no "cooking" happening. Did not hear the familiar sound of the heating part working.

Determined it might be some simple switches for under $15 dollars. Bought one of each. They allow the microwave to turn on/activate by signaling that the door is properly latched. My wife noticed that it was failing and then failed over the course of about a day. Several times where it worked, then did not work. The timer was counting down one time and then when she opened the door the microwave heating component turned on. Guess it had activated the switch as she was opening the door.

Procedure to repair
- Unplug
- Remove two screws on front top - allows you to remove the vent. Realized there was a charcoal filter there that I had never replaced so ordered that after the fix.
- Remove two screws to pull off the front right panel (area where your microwave buttons are) One at the top under the before mentioned vent and one under the microwave on the far right corner.
- Have someone hold the panel because wiring is to short to place it on a ledge while connected or take a picture and remove connections. I simply held it while my daughter undid the micro switches.
- Carefully remove micro switches. There were two "orange" button ones so I chose the top one to replace along with the green button one that I had ordered, so I simply pulled an orange from the bottom and a green from the top latch area. You may have remove the part that holds the switches since it was a little tough with the wires in the way and not knowing how the switches stay put.
- plug in new switches and place in the brackets that hold them in place
- reverse everything you did.
Viola - a working microwave vs purchasing a brand new for several hundred dollars or having to call in a technician.I love that my young kids did this project with me and we actually got it running. Don't like to have to throw away more items at the landfill.

Semi-Handy Man
Parts Used:
Switch,Micro Switch,Micro
  • Dusty from SNOWMASS VLG, CO
  • Difficulty Level:
    Easy
  • Total Repair Time:
    15 - 30 mins
  • Tools:
    Screw drivers
11 of 17 people found this instruction helpful.
Was this instruction helpful to you?
Thank you for voting!