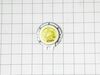
The turntable support assembly is also known as a roller guide, fits under the cooking tray and is used to support the tray and to engage the rotating coupler. If your cooking tray will not turn, or r...
Is your LG microwave no longer cooking evenly? You may need a new Glass Cooking Tray. This authentic LG tray helps rotate the food at the center of your microwave, getting it heated perfectly every ti...
Ask our experts a question about this model and we'll get back to you as soon as possible!
1 question answered by our experts.
< Prev
1
Next >
Sort by:
Search filter:
Clear Filter
Your search term must have 3 or more characters.
Keep searches simple. Use keywords, e.g. "leaking", "pump", "broken" or "fit".
Sorry, we couldn't find any existing answers that matched.Try using some different or simpler keywords, or submit your new question by using the "Ask a Question" button above!
James
June 26, 2023
Push latch won't open door
For model number LCRT2010BD
Hello James, thank you for getting in touch. According to our research, the issue might be caused by a faulty or damaged door release lever, part number PS3629126. A faulty lever may cause the door to not open if it does not engage properly. We hope this information helps!
My 8 year old daughter cleaned the inside of the microwave with enough water to rival a tsunami. Resulted in a clean microwave with a fried out motor that no longer revolved. Part came quickly. Took cover and bottom off to get to the part. One screw held it on and a plug. Removed those, put on new part and she was good to go. No trip to home depot today.
Over the stove microwave installed in top cabinet row. 1. Unplug device. 2. Two people to remove from wall/cabinet (remove two, large, top mounting screws and rotate entire microwave down and off the wall mount). Should be some wood spacers between top of device and bottom of cabinet. 3. Remove screws from sheet metal cover. 4. Remove one screw holding blowers in place and rotate out of the way, in order to gain access to 2 of 5 screws that hold the magnetron in place. 5. Unplug magnetron and remove the 5 screws. 6. Drop in new magnetron and re-assemble microwave in reverse order (steps 5-3). 7. Two people restore micro to wall/cabinet. Replace wood spacers, re-install two, large mounting screws (finger-tight). Test device. Secure the two large screws.
Note: also had to replace turntable. Removed top cover using secure driver set. Placed microwave on it's front, using a soft towel. Removed edge screws from bottom plate (leaving 4 screws in center attached to heavy transformer). Separated bottom plate from body of microwave (leaving transformer wires still attached) exposing Synchronous motor. Removed two screws holding motor and electrical plug. Swapped new motor in its place. Re-attached bottom plate with its screws. Placed microwave onto it normal position. Re-attached top cover with its secure screws. Installed new turntable inside.


 – Part Number: 6851W1A002E")