This 18 ml bottle of white appliance touch-up paint is used to cover scratches or marks on your appliance. The white touch-up paint can be used on refrigerators, microwaves, ranges, clothes dryers, an...
Glass ONLY. This inner door glass is a heat resistant part that fits into a stove, oven, wall oven, cooktop, or range as the inner glass panel of the appliance door.
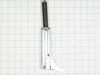
This single oven rack is used to provide a durable surface for your cookware inside the oven for baking/broiling. The oven rack measures approximately 24.76” x 15.78”, is made of metal and is chrome i...
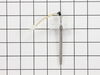
This 5-watt 12-volt halogen light bulb provides light in the oven cavity when the door is open or the switch is turned on. The light assembly is a little over 1” long. If the light is not coming on th...
This is a multi-use and multi-appliance screw. It can be used on a microwave, refrigerator, range/oven, air conditioner, dehumidifier, washer, or dryer. The measurements of this screw are 8 x 1/2 inch...
Ask our experts a question about this model and we'll get back to you as soon as possible!
6 questions answered by our experts.
< Prev
1
2
Next >
Sort by:
Search filter:
Clear Filter
Your search term must have 3 or more characters.
Keep searches simple. Use keywords, e.g. "leaking", "pump", "broken" or "fit".
Sorry, we couldn't find any existing answers that matched.Try using some different or simpler keywords, or submit your new question by using the "Ask a Question" button above!
Greg
January 15, 2020
The microwave doesn't shut off when i open the door and the timer doesn't reset. I purchased (2) w10211972 interlock switches. I had instructions from a service manual but it was for the wrong year (year code s instead of k) and can not figure out how to get to the switches. Can you provide the relevant pages from the service manual or other instructions to make this repair?Thank you, greg
For model number KEMC308KSS04
Hi Greg, Thank you for your question. Any manuals that we have would be located directly underneath your list of diagrams after you search your model number on our site and it comes up. Before you begin any repair please unplug the appliance from the electrical outlet. Use a Phillips head screw driver to unthread the screws securing the grill. With the screws removed, open the microwave oven door then the slide the grill to the left and lift it up to remove. Next remove the control panel mounting screw then lift the control panel up to detach. Then remove the screw holding the inner access panel and then release the panel from the retaining clips. Now remove the screws holding the switch assembly. Depress the release tab and the actuator to detach the switch you are replacing. Disconnect the wire connector to fully release the old switch. Install the new door switch by first connecting the wire connector. Now position the new switch in the assembly snap it into place. Realign the switch assembly on the frame and secure it with the screws. Reinstall the inner access panel securing it with the screw. Now insert the control panel tabs to the slots in the frame and push the panel down. Secure it with the mounting screw. Insert the tabs of the grill into the frame and slide it to the right. Shut the oven door and then secure the grill with the screws. Plug the power cord back in and the microwave should now work. Thank you and have a great day.
1 person found this helpful.
Was this helpful?
Thank you for voting!
Hans
August 8, 2023
If purchasing the Magnetron (W11346197) asreplacement, is it advisable to at the same time buy/renew the Diode and/or thge Fuse?
If so, what are the respective parts numbers?
Thank you
For model number KEMC308KSS04
Hello Hans, thank you for your question! The compatible magnetron for your model is part number PS11742458. It is not necessary to replace these three parts all together. You can only replace the magnetron if it is faulty. We hope that helps!
a square light saying probe comes on. When you press bake on the display a message saying "put probe in" appears. The temp is stuck at 160 degrees.
I tried taking off the breaker switch and putting it back on. Also tried using a q tip with vinegar and blow drying probe hole in oven. It sometimes rectifies itself but the doesn't last longer than a day or two before it beeps and reverts to the probe light and message.
For model number KEMC308KSS04
Hello Kavita, thank you for your question. You will need to replace the Probe PS11747165. Good luck with your repair.
Thanks Greg. Can this oven work like a normal oven which does not have a probe feature if the probe is permanently disconnected? If so can you guide me as to how to disconnect the probe feature please.
For model number KEMC308KSS04
Hello Kavita, Thank you for the question. You just need to unplug the Probe if you do not wish to use the Probe feature and use the oven as a normal non probe oven. For more specialized assistance or to speak with someone about this, we would suggest calling KitchenAid . We hope this helps!
Was this helpful?
Thank you for voting!
Joe
January 21, 2020
Need parts no 46 and 39 for microwave door switch housing brackets. No switch but complete housing wit cam
For model number KEMC308KSS04
Hello Joe, Thank you for contacting us. I have researched the model you have provided and have found the part you are looking for is PartSelect Number PS10057152 for #39 and #46. These parts are only sold as a Switch kit. We hope this helps.
Easily removed the door from the oven by releasing clips attached to the door hinge -- very nicely engineered. Removed about 6 philips head screws to allow the door assembly to be taken apart for access to the glass. Lifted out the broken glass, cleaned the inside of the door, installed the new glass, reassembled the door (a two minute project), and reattached the door to the oven. Cleaning the inside of the door took longer than the actual repair!
This built-in oven was slid out of it's space and set on a box. I removed the back cover with nut driver and located the safety overload device. removed nuts and used pliers to remove wires and replace them. The power must be off to do this repair.Replaced the cover and slid back into place. This could be a lot more difficult if your power cord or gas line is not long enough to make it out of your wall space. Or of your oven is attached well to the frame.
Removed the oven door by following the straightforward instructions in the user's manual. Removed philips head screws to take the door assembly apart. Removed clips holding the two inner door glass plates, and the two plates. Removed the clamp holding the broken glass plate, then the glass and associated glass fragments. Then cleaned and re-installed the three glass plates and their clamps in reverse order. Re-assembled the door and re-attached to the oven. Only cautionary note is to be careful when removing, handling and re-installing the various glass plates. Watch out for fragments from the broken plate; they can cut you and/or fall on the floor.