KBRA22KLSS01 KitchenAid Refrigerator - Overview

Sections of the KBRA22KLSS01

[Viewing 7 of 7]

Manuals & Care Guides for KBRA22KLSS01

Click to download
Keep searches simple, eg. "belt" or "pump".
Refrigerator Crisper Frame – Part Number: WPW10568041
Refrigerator Crisper Frame
★★★★★
★★★★★
(50)
PartSelect #: PS11756423
Manufacturer #: WPW10568041
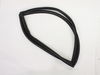
This shelf frame is an essential component for maintaining the organization and functionality of your refrigerator’s crisper or pantry area. It serves as the sturdy base for the glass shelf above the ...
$133.01
  In Stock
Touch-Up Paint - White – Part Number: 72017
Touch-Up Paint - White
★★★★★
★★★★★
(23)
PartSelect #: PS385132
Manufacturer #: 72017
This 18 ml bottle of white appliance touch-up paint is used to cover scratches or marks on your appliance. The white touch-up paint can be used on refrigerators, microwaves, ranges, clothes dryers, an...
$15.95
  In Stock
Refrigerator Door Switch – Part Number: W11384469
Refrigerator Door Switch
★★★★★
★★★★★
(34)
PartSelect #: PS12728638
Manufacturer #: W11384469
Door switch turns the light off when you close the door.
$48.68
  In Stock
Refrigerator Condenser Fan Motor Kit – Part Number: 833697
Refrigerator Condenser Fan Motor Kit
★★★★★
★★★★★
(20)
PartSelect #: PS395284
Manufacturer #: 833697
This condenser fan motor operates in a clockwise fashion and carries carries 2W and 115V. It comes with screws, a mounting nut for the blade and a cushion. This part provides forced-air cooling for the condenser coil.
$110.99
  In Stock
Defrost Thermostat Kit – Part Number: 12001937
Defrost Thermostat Kit
★★★★★
★★★★★
(14)
PartSelect #: PS2003451
Manufacturer #: 12001937
This part is snapped onto the top portion of the evaporator. The thermostat sends temperature information to the processor. The defrost heater must be replaced when replacing the thermostat.
$97.30
  In Stock
Door Switch – Part Number: W11396033
Door Switch
★★★★★
★★★★★
(17)
PartSelect #: PS12731166
Manufacturer #: W11396033
This light switch may also be known as a refrigerator door switch or a light switch kit, and is compatible with your refrigerator. The function of the refrigerator door switch is to turn on the light ...
$37.27
  In Stock
Freezer Evaporator Fan Motor 115v 60hz – Part Number: WPW10128551
Freezer Evaporator Fan Motor 115v 60hz
★★★★★
★★★★★
(21)
PartSelect #: PS11748697
Manufacturer #: WPW10128551
This evaporator fan motor is located in the back of the freezer, and circulates air over the refrigerator coils. These coils will covert the heat into cool air, which is then circulated.
$95.44
  In Stock
Refrigerator Water Fill Cup & Bearing – Part Number: WP628356
Refrigerator Water Fill Cup & Bearing
★★★★★
★★★★★
(1)
PartSelect #: PS11743318
Manufacturer #: WP628356
This icemaker water inlet cup is three inches long. It is all white in color and is made of plastic.
$51.12
  On Order
Evaporator Fan Blade – Part Number: WP2169142
Evaporator Fan Blade
★★★★★
★★★★★
(2)
PartSelect #: PS11738973
Manufacturer #: WP2169142
If your refrigerator or freezer is too warm, or making noises, you may need to replace the fan blade. The fan blade attaches to the evaporator motor, which is in the freezer section, to help circulate...
$47.08
  In Stock
Screw - 10-16 x 1 – Part Number: WP3387230
Screw - 10-16 x 1
★★★★★
★★★★★
(2)
PartSelect #: PS11741409
Manufacturer #: WP3387230
This screw is sold individually.
$10.62
  In Stock
Dishwasher Screw – Part Number: WPW10348409
Dishwasher Screw
★★★★★
★★★★★
(1)
PartSelect #: PS11753384
Manufacturer #: WPW10348409
Sold individually.
$10.09
  In Stock
Refrigerator Defrost Timer 120v 60hz – Part Number: WP67001036
Refrigerator Defrost Timer 120v 60hz
★★★★★
★★★★★
(1)
PartSelect #: PS11743439
Manufacturer #: WP67001036
If there is ice build-up in the freezer you may need to replace the defrost timer.
$162.13
  In Stock

Questions And Answers for KBRA22KLSS01

Be the first to ask our experts a question about this model!

Common Symptoms of the KBRA22KLSS01

[Viewing 20 of 20]
Light not working
Fixed by
these parts
Fixing Fixing Fixing
Show All
Fridge too warm
Fixed by
these parts
Fixing Fixing Fixing
Show All
Noisy
Fixed by
these parts
Fixing Fixing Fixing
Show All
Freezer section too warm
Fixed by
these parts
Fixing Fixing Fixing
Show All
Freezer not defrosting
Fixed by
these parts
Fixing Fixing Fixing
Show All
Ice maker not making ice
Fixed by
these parts
Fixing Fixing Fixing
Show All
Will Not Start
Fixed by
these parts
Fixing Fixing Fixing
Show All
Fridge runs too long
Fixed by
these parts
Fixing
Show All
Fridge and Freezer are too warm
Fixed by
these parts
Fixing Fixing
Show All
Frost buildup
Fixed by
these parts
Fixing Fixing Fixing
Show All
Leaking
Fixed by
these parts
Fixing Fixing Fixing
Show All
Door won’t open or close
Fixed by
these parts
Fixing Fixing Fixing
Show All
Freezer too cold
Fixed by
these parts
Fixing Fixing Fixing
Show All
Door Sweating
Fixed by
these parts
Fixing Fixing
Show All
Ice maker won’t dispense ice
Fixed by
these parts
Fixing Fixing
Show All
Ice maker dispenses too much ice
Fixed by
these parts
Fixing
Show All
Door latch failure
Fixed by
these parts
Fixing
Show All
Too warm
Fixed by
these parts
Fixing Fixing
Show All
Not dispensing water
Fixed by
these parts
Fixing
Show All
Fridge too cold
Fixed by
these parts
Fixing
Show All
Keep searches simple. Use keywords, e.g. "leaking", "pump", "broken" or "fit".
Sometimes the condenser fan would start causing the refrigerator to overheat.
Unplug the appliance.
Removed the screws holding the back panel.
Removed the fan blade.
removed 3 screws holding the condenser fan.
Remove the 3 metal brackets attached to the fan.
(First note which studs the brackets are attached to. Attach the 3 metal brackets to the new fan. (New screws were supplied)
Cut and strip the wire about two inches from the fan.
Cut and strip the new wire. I cut the new wire in half (about 6 inches.) Connect the two wires, twist and used 2 wire nuts. Tie wrap the wire to the wire harness. Mount the new fan (three screws)
Screw the back panel back on.
Mount the new
Parts Used:
Refrigerator Condenser Fan Motor Kit
  • Tom from Franklin, WI
  • Difficulty Level:
    A Bit Difficult
  • Total Repair Time:
    15 - 30 mins
  • Tools:
    Nutdriver, Pliers
183 of 219 people found this instruction helpful.
Was this instruction helpful to you?
Thank you for voting!
The Bearing Cup Assembly was broken and ice would jamb against it during the ice making cycle.
I removed the ice maker from the refrigerator, by removing one screw on the underside bracket and loosening the two screws at the top side, then lifting the ice maker off the loosened screws. I then unplugged the electrical harness that supplies power from the refrigerator to the ice maker. I then disassembled the ice maker by removing the front cover which is snapped in place, then removing two recessed screws at the front. I removed the broken part, I then reassembled the ice maker with the new part. I replaced the two recessed screws at the front and snapped on the cover. Then I reinstalled the ice maker in the refrigator by plugging in the harness, slipping the ice maker over the loosened screws in the refrigerator and replacing the screw that was removed from the underside bracket. Tightening all the screws completed the project.
Parts Used:
Refrigerator Water Fill Cup & Bearing
  • David from Chester, CA
  • Difficulty Level:
    Really Easy
  • Total Repair Time:
    Less than 15 mins
  • Tools:
    Nutdriver, Screw drivers
108 of 138 people found this instruction helpful.
Was this instruction helpful to you?
Thank you for voting!
Lights inside refrigerator not working
I used a flat-head screwdriver to pop out the old light rocker switch. Then, I unplugged the wires, plugged them into the new light rocker switch, and then popped the new switch into the hole. That's it! Lights began working again.
Parts Used:
Refrigerator Door Switch
  • Clint from Rayville, MO
  • Difficulty Level:
    Really Easy
  • Total Repair Time:
    Less than 15 mins
  • Tools:
    Screw drivers
135 of 247 people found this instruction helpful.
Was this instruction helpful to you?
Thank you for voting!