


JVM2070WHC01 General Electric Microwave - Overview
Sections of the JVM2070WHC01
[Viewing 1 of 1]
Keep searches simple, eg. "belt" or "pump".

Halogen Light Bulb - 120V 20W
PartSelect #: PS2351821
Manufacturer #: WB25X10019
This halogen light bulb is a replacement part for the bulb behind the top grill in your microwave. It is sold individually.
$33.98
Special Order

Grease Filter
PartSelect #: PS227998
Manufacturer #: WB06X10288
This metallic vent hood filter collects grease particles in the air from cooking. This part is sold individually.
No Longer Available


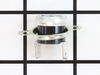
SWITCH - WB24X10047
PartSelect #: PS9861939
Manufacturer #: WG02F01561
$41.18
In Stock
Order within the next 9 hrs and your part ships today!


MICROSWITCH - WB27M884
PartSelect #: PS9862181
Manufacturer #: WG02F05644
$16.79
In Stock
Order within the next 9 hrs and your part ships today!


Stirrer Motor
PartSelect #: PS237771
Manufacturer #: WB26X10037
This motor has a square-shaped shaft. This part operates the stirrer fan in the microwave.
$62.51
Special Order
Questions And Answers for JVM2070WHC01
We're sorry, but our Q&A experts are temporarily unavailable.
Please check back later if you still haven't found the answer you need.
Common Symptoms of the JVM2070WHC01
[Viewing 3 of 3]Won’t turn on
Fixed by
these parts
these parts


Show All
No heat
Fixed by
these parts
these parts
Show All
Noisy
Fixed by
these parts
these parts

Show All

Keep searches simple. Use keywords, e.g. "leaking", "pump", "broken" or "fit".
Dirty filter - replacement filter installed
-
Laura from Sugar Grove, IL
-
Difficulty Level:Really Easy
-
Total Repair Time:Less than 15 mins
537 of 612 people
found this instruction helpful.
Was this instruction helpful to you?
Thank you for voting!
Lens cracked and bulbs burned out
First I removed the single screw holding the lens assembly in place. Then I lowered the assembly and tilted it until it came out. To remove the existing cracked glass lens there were four tabs bent down on it. By hand I lifted each tab just enough to remove the broken lens. I then replaced the broken lens with the new one and re-bent the tabs down by hand to secure them to the new lens.
The lens assembly, now removed, revealed the cavity that contained the two halogen bulbs. Since they were both burned out for days, they weren't hot so I could pull each one out by hand. The bulbs are secured by two straight heavy gauge wire leads and provided a little resistance but come out fairly easily. Make a mental note of the angle they came out so it will be easier to replace them with new ones.
You're not supposed to touch halogen bulbs with your bare hands, so I used the bubble wrap they came in as a means to hold the bulb while installing it.
Be sure to insert the bulbs at the same angle they came out so the pins do not get bent.
Once both bulbs are in place, replace the lens cover assembly by putting the end opposite where the screw hole goes in first on the right, then swing it up until flush and screw it down.
Parts Used:
-
Mark from GRAND BLANC, MI
-
Difficulty Level:Really Easy
-
Total Repair Time:Less than 15 mins
222 of 306 people
found this instruction helpful.
Was this instruction helpful to you?
Thank you for voting!
Under the vent light bulbs needed to be replaced
Turned of f the circuit breaker to the microwave. Unscrewed the cover (1 screw!) popped out the old bulbs and plugged in the new ones, using the bubblewrap as a handle to be sure my skin didn't touch the light bulbs so the oil from my hands didn't damage or shorten the life of the new bulbs. Turned the circuit back on. That's it!
Parts Used:
-
Robert from Naples, ME
-
Difficulty Level:Really Easy
-
Total Repair Time:Less than 15 mins
-
Tools:Screw drivers
66 of 87 people
found this instruction helpful.
Was this instruction helpful to you?
Thank you for voting!