This 40-watt microwave light bulb is a genuine replacement component designed to provide interior illumination for compatible GE microwave models. Engineered to withstand the high temperatures within ...
This part is the replacement flat cab mounting bolt for your microwave. The bolt is approximately 4 inches long. It is designed to hold the microwave in place in your cabinet. The main reason to repla...
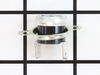
There are two different couplers (also known as a turntable shaft) that can be used for this tray - a male D-shaped shaft and a female D-shaped shaft. The couplers are sold separately.
Ask our experts a question about this model and we'll get back to you as soon as possible!
2 questions answered by our experts.
< Prev
1
Next >
Sort by:
Search filter:
Clear Filter
Your search term must have 3 or more characters.
Keep searches simple. Use keywords, e.g. "leaking", "pump", "broken" or "fit".
Sorry, we couldn't find any existing answers that matched.Try using some different or simpler keywords, or submit your new question by using the "Ask a Question" button above!
Roger
October 16, 2022
My GE Microwave stopped working suddenly ! I want to try and replace fuse. Your site says the fuse is discontinued. Can I put a generic fuse in ? If so , 15 OR 20 AMP ?
Thx
For model number JVM1730BMC01
Hello Roger, thank you for your question. The fuse for your model is on our site as part PS239811 and you may order it there or call in to order it. Good luck with your repair.
I’m looking for charcoal filters for my microwave. I removed the panel on top of the microwave and there isn’t a filter there so I have no idea what I’m looking for. Any help would be appreciated. Thank you.
For model number JVM1730BMC01
Hello Sandra, thank you for contacting us. Your model has a grease filter, part number PS952418. It collects grease particles in the air from cooking and is located at the bottom base. Please reach out to customer service if you need help placing an order. Glad to be of help!
Above the stove mounted microwave. I dropped the lens cover from under the bulb and tried to remove the bulb. The bulb separated from the base. I tried to remove the base with a pliers and the lamp socket broke. I ordered the parts and dropped the bottom cover of the unit down (5 screws). Removed 1 screww from the lamp socket, unplugged the wires and took it out. Simply replaced socket, fastened bottom cover of microwave, installed new bulb and closed lens cover.
At first I tried to use pliers to unscrew the base,very uncomfortable working position,upside down and backwards(the microwave is installed over the range top)very limited space for your body and arms to manuver and you really cant see the base,all of this took place after the breaker was turned off ofcourse,finally figured out that you can drop the entire bottom housing of the microwave by unscrewing 6 screws and the light sockets are easily accessable once you lower it,take out 1 retaining screw ,remove the entire socket and unscrewed the broken base and replaced the bulbs,I said bulbs,there is no sense in having to replace another bulb in who knows how long since only one had burned out but they were both the same age
Had to take unit off wall and disassemble the main casing.then disconnected the wires from the magnetron.took the mounting nuts off but wasn't able to remove the magnetron until I loosened the transformer out of the way .Then it came out easy.Installed the magnetron ,tightened the nuts,installed the transformer back in, connected the the wires back on and installed the casing on ,screwed the screws and got help to install the unit to the wall again.....Tested the unit before putting back on the wall to make sure it heated....The parts were exac same type and wasn't too hard to do...