This 40-watt microwave light bulb is a genuine replacement component designed to provide interior illumination for compatible GE microwave models. Engineered to withstand the high temperatures within ...
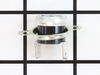
There are two different couplers (also known as a turntable shaft) that can be used for this tray - a male D-shaped shaft and a female D-shaped shaft. The couplers are sold separately.
First I unplugged the microwave. :) Then, I removed the 6 screws found underneath the microwave, which allowed the bottom piece to hang down so I could see the turntable motor. I took the two screws out holding the motor in place and pulled the electric connectors off the motor terminals. Then I got the new part from PartSelect.com, replaced the electrical commectors, fit the motor back into the slot it came from (cause the pin has to be seated up in the hole) and replaced the 2 screws holding in the motor. Then I put the bottom metal piece back up and put the 6 screws back in. It was really easy - and I'm a chick! ;)
At first I tried to use pliers to unscrew the base,very uncomfortable working position,upside down and backwards(the microwave is installed over the range top)very limited space for your body and arms to manuver and you really cant see the base,all of this took place after the breaker was turned off ofcourse,finally figured out that you can drop the entire bottom housing of the microwave by unscrewing 6 screws and the light sockets are easily accessable once you lower it,take out 1 retaining screw ,remove the entire socket and unscrewed the broken base and replaced the bulbs,I said bulbs,there is no sense in having to replace another bulb in who knows how long since only one had burned out but they were both the same age
Had to take unit off wall and disassemble the main casing.then disconnected the wires from the magnetron.took the mounting nuts off but wasn't able to remove the magnetron until I loosened the transformer out of the way .Then it came out easy.Installed the magnetron ,tightened the nuts,installed the transformer back in, connected the the wires back on and installed the casing on ,screwed the screws and got help to install the unit to the wall again.....Tested the unit before putting back on the wall to make sure it heated....The parts were exac same type and wasn't too hard to do...