This bake element has push-on terminal ends.
NOTE: This element has been updated by the manufacturer. New installation screws are required. Screws are sold separately.
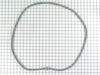
The filter is made of metal and is intended for use with ranges and cooktops. As per the manufacturer, this filter may be 1/2" slimmer than the original, but will still function the same.
The oven sensor detects the temperature within the oven cavity and sends the information to the control board. If your oven is not heating evenly, has little or no heat when baking, or is too hot, you...
This part is a replacement halogen lamp for your oven. The bulb is 25 watts and 120 volts. If your light bulb is burned out, this is the part that replaces it. Be sure to turn off power to your range ...
This is a multi-use and multi-appliance screw. It can be used on a microwave, refrigerator, range/oven, air conditioner, dehumidifier, washer, or dryer. The measurements of this screw are 8 x 1/2 inch...
Keep your oven safe and functional with this replacement interior door glass, the heat-resistant panel that lines the inside of your oven door. With dimensions of approximately 20 5/8" x 13 1/8", it f...
This surface burner head is for ranges.
Surface burner head distributes the gas through holes or slots to create an even flame across the cooking area.
Shut off the gas supply and unplug the ran...
$177.02
In Stock
Questions And Answers for JDS9860AAB
Ask our experts a question about this model and we'll get back to you as soon as possible!
7 questions answered by our experts.
< Prev
1
2
Next >
Sort by:
Search filter:
Clear Filter
Your search term must have 3 or more characters.
Keep searches simple. Use keywords, e.g. "leaking", "pump", "broken" or "fit".
Sorry, we couldn't find any existing answers that matched.Try using some different or simpler keywords, or submit your new question by using the "Ask a Question" button above!
Jeff
March 11, 2020
Oven would not shut off flashing f1-1 almost like it went into cleaning mode?
For model number JDS9860AAB
Hello Jeff, Thank you for the question. The f1-1 error code indicates the oven temperature is over 650 degrees in the bake mode. This could be caused by a faulty Long Oven Sensor, PartSelect Number PS1570174. Testing the temperature sensor probe on your oven is easy. With the sensor at room temperature, measure the resistance between the two prongs at the end of the sensor connector. The resistance of the sensor should read approximately 1080 – 1090 ohms at room temperature. We hope this helps.
We had a power outage and when it came back on the broiler & oven bake coil will not heat at all , is it the long oven sensor or something else.....Thanks Dan
For model number JDS9860AAB
Hello Dan, thank you for reaching out. If your oven is not heating, we suggest that you check the terminal block, oven sensor, and control board, as these could get defective after a power outage. Please reach out to customer service if you need help placing an order, anyone will be happy to assist you. We hope that helps.
Hello Michael, thank you for the query. Based on the description you have provided, we would recommend replacing the control panel with touchpad, part number PS11744106, to fix the issue. We hope this helps!
Took center cover with electronics and knobs to test continuity of ignition switches.one set of burners are not lighting but if you slide out the burners and install on other side, they fire right up. Switches seemed ok. The center of switches turn all the way around when testing. Long story short ! Put it back together. Turned gas on came up and smelled gas like one of the burner valves stuck partway open. Had a heck of a time putting all the wires back and front cover back on. Is there possibly wires in the way and pushed against a valve or the inside of switch turned the wrong way? Can only go on valve one way. Any suggestions? STUMPED!
For model number JDS9860AAB
Hi Mike, thank you for reaching out. Based on the description, we have concluded that the issue is with the ignitor assembly, part number PS11744120. You may need to replace the ignitor assembly to fix the issue. We hope this sorts out your problem!
Replaced lower heating element still does not work
For model number JDS9860AAB
Hi Ken,
Thank you for your question. If you have replaced the bake element and the oven is not heating correctly, the issue may be with the oven temperature sensor. The oven temperature sensor monitors the oven temperature and signals the electronic control board to turn the elements on and off. Before removing this part from the oven and testing it for continuity with a multimeter on the Rx1 setting, unplug the oven from the electrical outlet. This test needs to be done with the sensor at room temperature to produce accurate results. The reading should be between 1080 and 1100 ohms. If you get any other reading, you need a replacement temperature sensor. If the sensor is fine, you will need to check the electronic control board and the wiring between the parts to see which part is causing the issue. We hope this helps with the repair!
First, I unplugged the oven. Then, I removed the two screws that hold the element in place. After that, I gently pulled the element toward the front of the oven until the wires were exposed. I disconnected the wires from the old element, removed the old element and then attached the wires to the new baking element. I gently pushed the new element back into the screw holes and screwed the new element in place. When I plugged the oven back into the wall I heard a pop and thought I'd blown up the oven! Turns out the breaker popped...after fixing the breaker, I turned the oven on and the element worked just fine. I highly recommend PartSelect.com for their fast shipping and great products. I will be ordering from them again for future appliance parts.
Removed the oven door by opening slightly, then pic door up to remove. Remove 2 screws holding oven sensor in place, gently pull on sensor to remove, had to remove about 8 inches to get at plastic connector. Unplug connector, had to use an adapter cable supplied with the PartSelect kit to install new sensor, push cable back into opening, reinstall 2 screws. The oven works fine! Note that due to thermal lag the temperature overshoots to 370 degrees and undershoots to 340 degrees, this appears to be normal oven operation. Putting door back in place was easy.


 Diagram and Parts List for Jenn-Air Range")


 – Part Number: W11665456")