This part is essential in your dishes getting clean during the wash cycle. If there is any debris or a tear in the filter, it can cause extra buildup and, therefore, causing dirty dishes.
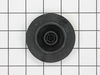
If your dishwasher isn’t cleaning as well as it used to, the wash impeller might be to blame. This spinning plastic part helps move water and detergent through the spray arms, making sure every dish g...
This is a fold away tine pivot for your dishwasher. It allows the dish rack tines on certain models to pivot and fold down. This part is gray in color and is approximately 3-¾ inches wide by ½ an inch...
The fold away tine latch or fold away tine clip in your dishwasher holds the tine row in the vertical position. If your dishwasher has a fold away tine latch, it can be disconnected so that the tine r...
The docking station is located on the water supply tube at the far back. It provides water to the upper and middle spray arm and also includes the flappers.
This hose clamp extends from half an inch to an inch in diameter. It is made entirely of metal and is intended for use with Maytag brand washing machines.
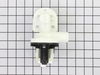
This is the replacement water valve for your dishwasher. The water inlet valve connects to the water source and solenoid wires, and ensures the tub has the right amount of water entering it. If your d...
This part provides a waterproof seal between the tub and the door. Also known as Gasket.
$179.80
In Stock
Questions And Answers for JDB2100AWS
Ask our experts a question about this model and we'll get back to you as soon as possible!
1 question answered by our experts.
< Prev
1
Next >
Sort by:
Search filter:
Clear Filter
Your search term must have 3 or more characters.
Keep searches simple. Use keywords, e.g. "leaking", "pump", "broken" or "fit".
Sorry, we couldn't find any existing answers that matched.Try using some different or simpler keywords, or submit your new question by using the "Ask a Question" button above!
Tim
November 26, 2025
Makes a screeching noise when running.
For model number JDB2100AWS
Hi Tim, thank you for reaching out. We would suggest checking the impeller, part number PS11747701. It attaches to the motor shaft and rotates to move water through the spray arms during the wash cycle. It can cause a screeching or unusual noise in a dishwasher if it is worn, damaged, or has debris caught in it. You may need to replace it to fix the issue. We hope this solves your problem!
the only thing that I wish was that the website had been more descriptive of the item. I ordered the two listed because it didn't say whether it was one side or both sides of a split basket. Now I have two complete baskets in different shades of grey! Only needed to order one maybe this will help someone else with the same problem. Great service and fast delivery though! Will order from this site again if I ever need anything else!
Most of the time was spent pulling out the dishwasher from under the counter, as a new tile floor had been installed after the DW was installed.
Great pictures of components on this website confirmed what part to order.
Shut off water feed to DW and disconnect power to DW.
Unplug wire connector to old valve (solenoid) and disconnect water inlet hose. Observe that valve is attached to sheet metal bracket.
Remove bracket, with valve attached. Don't remove valve from bracket. New valve comes with sheet metal bracket.
Remove female threaded adaptor (brass) from back of old valve and screw on to new valve using Teflon tape. That is the only piece you need to reuse.
Attached the new bracket (with valve attached) to DW. Attach water inlet hose. Attach plug to new valve.
Turn on water to DW. Check for leaks. Retighten hose connection if required. Run dishwasher. Keep lower panel off for a couple of days to be certain no leaks develop.
I had to remove the 4 screws holding the toe panel. Then I had to take out the one screw holding the floater switch housing in place. It snapped open to release the floater and that just lifted out. I put the new float in and snapped the new housing on. I put the screw back in to hold the housing in place attached the two wires to the switch and put the toe panel back on. It was all very easy to do and my first home repair went very well. thank you.


 Diagram and Parts List for Jenn-Air Dishwasher")
 Diagram and Parts List for Jenn-Air Dishwasher")
.gif "SUPPLEMENTAL INFORMATION Diagram and Parts List for Jenn-Air Dishwasher")