This evaporator fan motor is located in the back of the freezer and circulates air over the refrigerator coils. These coils will convert the heat into cool air, which is then circulated.
This 40-Watt light bulb is sold individually.
It is specially designed to withstand extreme temperatures, so this bulb is compatible with a variety of appliance types including refrigerators, ranges,...
This glass shelf is a genuine OEM replacement part is specially designed for refrigerators. It has a length of approximately 23 inches and a width of 13.5 inches. The glass shelf provides a wide surfa...
This ice maker assembly is used to make ice in your refrigerator. The ice maker receives water from the water inlet valve and will freeze until ice cubes are formed. Once the water has been frozen the...
The condenser fan blade assembly helps to regulate the temperature in your refrigerator or freezer. This fan assembly has 4 blades, but other fans may have 3 blades, so be sure to check the number of ...
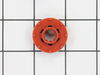
This is the light switch that goes in your refrigerator. If the light is not working or stays on, you may need to replace the switch. It is made of mainly white plastic, and is an OEM part, directly f...
This is the replacement vegetable drawer side rail for the right side of your refrigerator. It is made of white plastic and is approximately 14 inches long, and 2 inches wide. The slide rail supports ...
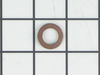
The lid bumper or evaporator fan motor bumper in your refrigerator prevents the fan motor from scraping against the side bracket. If your refrigerator/freezer is noisy, the bumper could be worn down o...
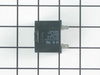
This part helps the compressor kick on and off while maintaining a constant temperature to keep things frozen in your freezer. This part has been updated by the manufacturer and may appear different t...
Need a solution for your snack pan support in your fridge? We've got the perfect answer with our GE Left Hand Snack Pan Rail. This high-quality rail is crafted specifically to fit snugly in your GE fr...
$23.03
Special Order
Questions And Answers for GTE18GTHHRWW
We're sorry, but our Q&A experts are temporarily unavailable.
Please check back later if you still haven't found the answer you need.
4 questions answered by our experts.
< Prev
1
Next >
Sort by:
Search filter:
Clear Filter
Your search term must have 3 or more characters.
Keep searches simple. Use keywords, e.g. "leaking", "pump", "broken" or "fit".
Sorry, we couldn't find any existing answers that matched.Try using some different or simpler keywords, or submit your new question by using the "Ask a Question" button above!
Cindy
September 8, 2021
Fridge is freezing everything below the freezer, vegetables, milk etc. How do i fix?
For model number GTE18GTHHRWW
Hello Cindy, thank you for your question. When you are having temperature problems in your fridge, there are a few parts that could cause the issue. Make sure you cut power to your appliance before doing any repairs or tests. First you should check your settings. Is the temperature set to the middle number? You should also check your door gasket to make sure it is sealing properly. Part number PS12069094. Then you should test your defrost thermostat with a multimeter, part number: PS1155320. Place the thermostat in ice cold water for 2-3 minutes after removing it from your appliance. It should be reading 0 ohms to be working correctly. If the thermostat, settings, and door gasket are good. We would suggest replacing the defrost control board. Part number PS10065388. We hope that helps. Good luck with your repair.
I’m sorry for bothering. I would like to know where is the defrost timer located in my refrigerator. I’m trying to fix it by my self i already change the door gasket . But the freezer is still freezing up and not cooling the bottom part of my refrigerator. Thank you so much
For model number GTE18GTHHRWW
Hi Luis, thank you for reaching out. The defrost control module is located in upper side of refrigerator in control housing. As your refrigerator is not cooling but freezer still works fine the issue seems to be the faulty evaporator fan motor part number PS12741350. Glad to be of help!
1 person found this helpful.
Was this helpful?
Thank you for voting!
Luis
September 8, 2023
I have my refrigerator is freezing up. But not the bottom part. I already change both gaskets.the freezer fan is working very good . But refrigerator just work good for 4 days. After that I have to remove the plastic that cover the evaporator and I remove the ice from the Evaporator. I hope you understand me . Can you give an advise of what to do to fix my refrigerator.l thanks
For model number PS11767911
Hi Luis, thank you for contacting us. Based on the description you have provided, it seems that there is an issue with the cold control kit, part number PS11767911. It regulates the temperature in the refrigerator. You may need to replace it to fix the issue. Glad to be of help!
1 person found this helpful.
Was this helpful?
Thank you for voting!
Luis
September 28, 2023
I have my refrigerator is freezing up. But not the bottom part. I already change both gaskets.the freezer fan is working very good . But refrigerator just work good for 4 days. After that I have to remove the plastic that cover the evaporator and I remove the ice from the Evaporator. I hope you understand me . Can you give an advise of what to do to fix my refrigerator.l thanks and I also change the cold control kit and the problem is still there
For model number GTE18GTHHRWW
Hello Luis, thank you for reaching out. Based on our understanding of the issue, we would suggest replacing the refrigerator defrost heater assembly, part number PS11701229. If the defrost heater assembly is defective, the defrost system will not work, and frost will continue to accumulate on the evaporator coils. This will result in cooling problems. We hope this solves your problem!
I removed two srews from the back panel inside fthe reezer compartment and the two that hold the air manifold/baffle? and pulled the baffle out. Then, I removed the two srews that hold the front part of the fan bracket behind the baffle and the back panel came out easily. Two more screws and one quick connect plug attached to the fan and I was done with removal. Insallation was even quicker, I slid the original fan right off the old motor and slid it on the new motor's shaft. Piece of cake! Thanks Partselect.
the repair was really easy!!! took longer to put the little clip on the fan part than it was to install the whole moter and put everthing back together
I first shut off water flow to the fridge. Examination of the package (which was not exact in appearance to the original) demonstrated that the electrical connectors were well-insulated so I arrogantly and successfully proceded without disconnecting the power. My fridge is old enough that the model doesn't appear exactly on anyone's list so I wasn't alarmed that it took an extra 10 minutes or so to noodle out how to adapt the slightly different inlet cowling and electrical cord with extension, but the device is pretty simple. Soon I loosened the two mounting screws with a nut driver, used a screwdriver to pry away the plastic snap-in housing over the electrical socket on the fridge inner wall and pulled away the electrical plug. The original water fill tube remained in its cavity, ready for re-use. The new unit's mounting points matched the original screw locations perfectly, as did the fill cowling - which on the replacement icemaker has two possible attachment points. The new unit's electrical connector required an extension pigtail to adapt to my socket, but it was included in the package. The extra cable posed a minor cosmetic issue because it hangs in the collection basket a bit, but that will soon be remedied with a tie wrap. After the water was restored and an anxious wait of a few hours, we had well-formed ice cubes that weren't all stuck together and the stalactites haven't reappeared.