This handle screw, also known as a mounting bolt, is a mounting screw to help secure the door handle to your refrigerator door. If your handle is loose, you may just need to tighten the screw. If your...
$18.96
In Stock
Order within the next 9 hrs and your part ships today!
This refrigerator door shelf bin is a clear, gallon-sized storage accessory designed for installation on the right-side door of select refrigerator models. Crafted from durable, food-safe resin, it fe...
$79.89
In Stock
Order within the next 9 hrs and your part ships today!
Having trouble with your LG fridge's ice or water dispenser? We have a solution: the Refrigerator Ice Water Line Tube Assembly is ready to get your fridge back in top shape. Why is this part crucial...
$53.89
In Stock
Order within the next 9 hrs and your part ships today!
Are you tired of wrestling with a sagging freezer basket? Say goodbye to these days thanks to the Left Side Connector Rail, a genuine replacement part from LG. This freezer basket support rail speeds ...
$27.69
In Stock
Order within the next 9 hrs and your part ships today!
This is a manufacturer-approved refrigerator door closure for your refrigerator. It is made of white plastic and measures approximately 3 inches by 2 inches. If your old closure is damaged, your refri...
$28.96
In Stock
Order within the next 9 hrs and your part ships today!
This rail connector is a replacement structural component designed to join and stabilize sliding or support rails. It ensures smooth movement and alignment and is commonly replaced when worn or broken.
$28.96
In Stock
Order within the next 9 hrs and your part ships today!
Questions And Answers for GR-J338HSTP
Be the first to ask our experts a question about this model!
✖
Ask a Question
Ask our experts a question on this model and we'll respond as soon as we can.
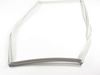
Watch YouTube videos on this topic if you are uncertain before tackling the job. The right door was easy to replace. Just pull the gasket with your fingers and it will come off easily. Place new gasket over door and use fingers to press it inside the groove few inches at a time. Pay attention to gasket orientation.
The left door is a bit harder because you need to remove the mullion at the door edge using a screw driver. Remove two screws on the center hinge and then slide the mullion up to disengage. Then unplug the wires to remove the mullion. Replace the gasket as described above and replace the mullion reversing the directions shown above.
I installed the new 3 wire ice maker very easily, but it was defective. I was told that instructions for the return of the defective part would be sent later due to the virus. I have never received the return instruction. I did receive a credit for the defective part. VERY Satisfied with y’all’s service. Waiting for return instructions if y’all still want it back. Thanks, Thomas Pennebaker
Fortunately, others had left comments about this installation, so proved very helpful. First thing was laying out the gasket flag on the counter to allow it to unbend, get out the kinks from shipping. While the new gasket was laying out on the counter, started removing the old gasket. As it had been there for 11 years, needed pliers to get a corner started. I was slow and careful removing the old gasket in case I needed to put it back in. A very helpful suggestion from others was to lightly rub dishwashing soap on the gasket edge that fits in the groove in the door. Again, slow and careful, got it installed, wiped off any excess dishwashing liquid, and the door closed with a better seal in a long time. Pleasantly surprised how easy this was to do!