Models > GIE17GSNDRSS

GIE17GSNDRSS General Electric Refrigerator - Overview

Sections of the GIE17GSNDRSS

[Viewing 7 of 7]
Keep searches simple, eg. "belt" or "pump".
Evaporator Fan Grommet - Red – Part Number: WR02X12008
Evaporator Fan Grommet - Red
★★★★★
★★★★★
(4)
PartSelect #: PS963756
Manufacturer #: WR02X12008
This evaporator fan grommet is red in color, and is about 1 inch in diameter.
$16.84
  Special Order
Evaporator Fan Motor – Part Number: WR60X31522
Evaporator Fan Motor
★★★★★
★★★★★
(16)
PartSelect #: PS12741350
Manufacturer #: WR60X31522
This evaporator fan motor is located in the back of the freezer and circulates air over the refrigerator coils. These coils will convert the heat into cool air, which is then circulated.
  No Longer Available
Glass Shelf – Part Number: WR32X21260
Glass Shelf
★★★★★
★★★★★
(8)
PartSelect #: PS11699574
Manufacturer #: WR32X21260
$58.97
  Special Order
Evaporator Fan Blade – Part Number: WR60X10204
Evaporator Fan Blade
★★★★★
★★★★★
(2)
PartSelect #: PS1018129
Manufacturer #: WR60X10204
This blade attaches to the evaporator motor.
$21.77
  Special Order
Condenser Fans Blade Assembly – Part Number: WR60X10207
Condenser Fans Blade Assembly
★★★★★
★★★★★
(1)
PartSelect #: PS1022410
Manufacturer #: WR60X10207
The condenser fan blade assembly helps to regulate the temperature in your refrigerator or freezer. This fan assembly has 4 blades, but other fans may have 3 blades, so be sure to check the number of ...
$22.81
  Special Order
Lid Bumper – Part Number: WR02X10540
Lid Bumper
PartSelect #: PS284979
Manufacturer #: WR02X10540
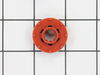
The lid bumper or evaporator fan motor bumper in your refrigerator prevents the fan motor from scraping against the side bracket. If your refrigerator/freezer is noisy, the bumper could be worn down o...
$12.42
  Special Order
REFRIGERATOR DOOR LIGHT SWITCH – Part Number: WR23X31507
REFRIGERATOR DOOR LIGHT SWITCH
PartSelect #: PS12727313
Manufacturer #: WR23X31507
This is the light switch that goes in your refrigerator. If the light is not working or stays on, you may need to replace the switch. It is made of mainly white plastic, and is an OEM part, directly f...
$21.80
  Special Order
PIN HINGE BOTTOM – Part Number: WR02X27092
PIN HINGE BOTTOM
PartSelect #: PS12295811
Manufacturer #: WR02X27092
Washers NOT included.
  No Longer Available
Door Hinge Nylon Washer – Part Number: WR01X27364
Door Hinge Nylon Washer
PartSelect #: PS12344581
Manufacturer #: WR01X27364
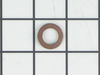
This is the replacement hinge washer for your refrigerator. The hinge washer is mounted on the top of the door hinge pin, and supports the refrigerator door, allowing it to open and close easily. The ...
  No Longer Available
SET SCREW – Part Number: WR01X20424
SET SCREW
PartSelect #: PS8767906
Manufacturer #: WR01X20424
$8.25
  Special Order
Icemaker Fill Cup – Part Number: WR29X10092
Icemaker Fill Cup
PartSelect #: PS2577890
Manufacturer #: WR29X10092
$15.56
  Special Order
FRESH FOOD SHELF – Part Number: WR17X30024
FRESH FOOD SHELF
PartSelect #: PS16220233
Manufacturer #: WR17X30024
The door shelf rail snaps into place on the door to hold items on the door shelf.
  No Longer Available

Questions And Answers for GIE17GSNDRSS

Be the first to ask our experts a question about this model!

Common Symptoms of the GIE17GSNDRSS

[Viewing 11 of 11]
Noisy
Fixed by
these parts
Fixing Fixing Fixing
Show All
Fridge too warm
Fixed by
these parts
Fixing Fixing Fixing
Show All
Freezer section too warm
Fixed by
these parts
Fixing Fixing Fixing
Show All
Door won’t open or close
Fixed by
these parts
Fixing Fixing
Show All
Clicking sound
Fixed by
these parts
Fixing Fixing Fixing
Show All
Will Not Start
Fixed by
these parts
Fixing
Show All
Fridge and Freezer are too warm
Fixed by
these parts
Fixing
Show All
Light not working
Fixed by
these parts
Fixing
Show All
Too warm
Fixed by
these parts
Fixing
Show All
Fridge runs too long
Fixed by
these parts
Fixing
Show All
Leaking
Fixed by
these parts
Fixing
Show All
Keep searches simple. Use keywords, e.g. "leaking", "pump", "broken" or "fit".
Freezer Fan
I removed two srews from the back panel inside fthe reezer compartment and the two that hold the air manifold/baffle? and pulled the baffle out. Then, I removed the two srews that hold the front part of the fan bracket behind the baffle and the back panel came out easily. Two more screws and one quick connect plug attached to the fan and I was done with removal. Insallation was even quicker, I slid the original fan right off the old motor and slid it on the new motor's shaft. Piece of cake! Thanks Partselect.
Parts Used:
Evaporator Fan Motor
  • Luis from College Station, TX
  • Difficulty Level:
    Really Easy
  • Total Repair Time:
    15 - 30 mins
  • Tools:
    Screw drivers, Socket set
253 of 276 people found this instruction helpful.
Was this instruction helpful to you?
Thank you for voting!
evaporator fan making lots of noise
the repair was really easy!!! took longer to put the little clip on the fan part than it was to install the whole moter and put everthing back together

save money do it yourself.....
Parts Used:
Evaporator Fan Blade Evaporator Fan Motor Evaporator Fan Grommet - Red
  • alex from rohnert park, CA
  • Difficulty Level:
    Really Easy
  • Total Repair Time:
    30 - 60 mins
  • Tools:
    Pliers, Screw drivers, Socket set, Wrench (Adjustable)
120 of 143 people found this instruction helpful.
Was this instruction helpful to you?
Thank you for voting!
Loud Fan Motor
Unplug refrigerator.Remove the floor of the freezer box by removing the 4 philips head screws. Remove the cover over the fan by pulling it straight up and out. Remove the styrafoam duct by pulling it straight up and out. Remove the back wall of the freezer by removing the 4 philips head screws. Unplug fan. Remove the fan, bracket and all, by removing the two philips head screws on the back wall. Take the two halves of the bracket appart by removing the two hex head scews on the back of the bracket. Remove the "O" ring from the fan blade and remove the blade. There is a rubber grommet on both the front and back halves of the bracket. Make sure they are set properly in the brackets to secure and position the motor properly so the fan blade doesn't hit anything when it spins. Install the new motor onto the bracket the same way you took the old one off. Check the positions of the brackets, rubber grommets and motor to make sure they're properly installed and secure. Replace the "O" ring onto the fan blade and install it onto the new motor with a firm push on the center of the blade. Install the brackets and fan onto the back wall and plug in the new motor. Reinstall the back wall of the freezer box and make sure the motor is secure. Plug the refrigerator back in and check to make sure the fan blade doesn't hit anything while it's turning. Finish reassembling the freezer box.
Parts Used:
Evaporator Fan Motor
  • Arthur from East Meadow, NY
  • Difficulty Level:
    Easy
  • Total Repair Time:
    30 - 60 mins
  • Tools:
    Nutdriver, Screw drivers
47 of 50 people found this instruction helpful.
Was this instruction helpful to you?
Thank you for voting!