This Drive Belt is 89.5" long and comes in black, featuring four ribs on the inside for a better grip. This is a long belt that wraps all the way around the dryer drum, around a tension pulley, and th...
This Genuine OEM door latch is designed for use with a wide range of GE clothes dryers. Constructed from a combination of durable metal and plastic, the latch is mounted onto the dryer frame to secure...
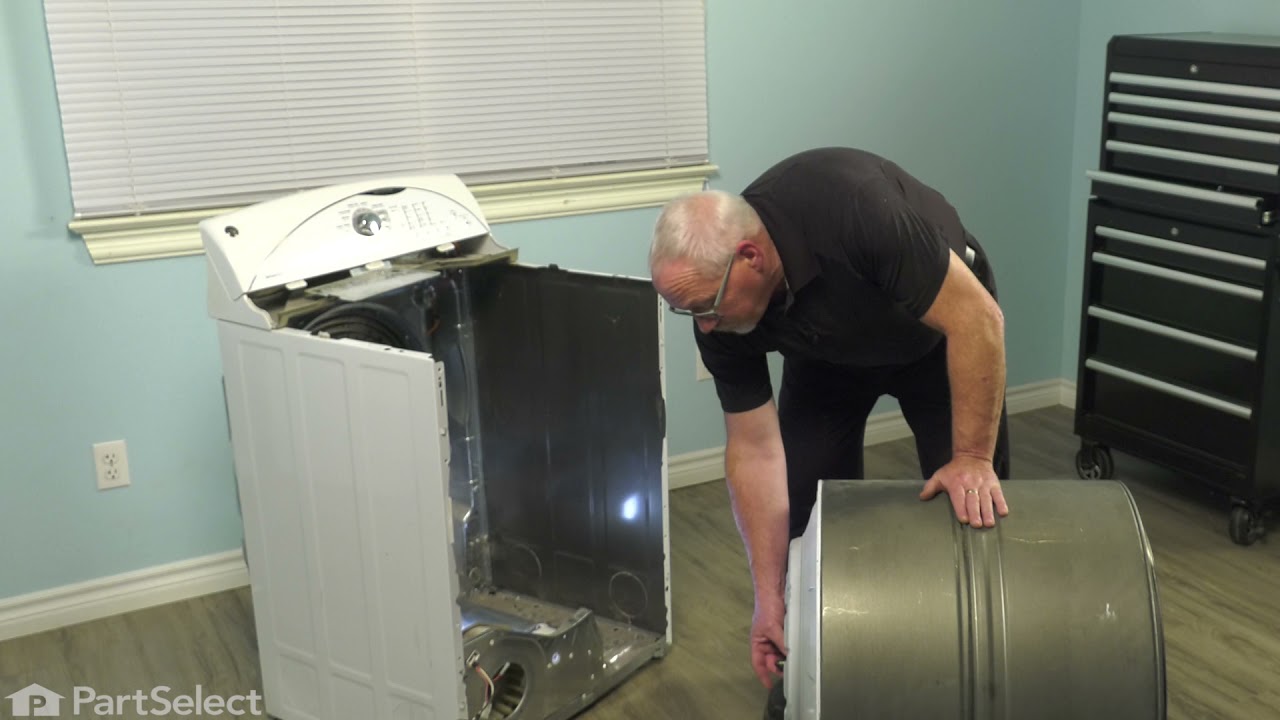
This drum glide bearing is an authentic OEM replacement part that is compatible with dryers. It is white in color and made of highly durable plastic. The bearing allows the drum to rotate smoothly and...
This is a replacement O-ring for the drum bearing retainer on your dryer. The drum bearing is found at the back of the dryer drum. The O-ring is designed to create a seal on the drum bearing. The O-r...
This OEM replacement dryer slide bearing is white in color, and approximately 3 inches long. The slide bearings are supportive linings for your dryer. If they have eroded, or are damaged, the drums wi...
The adjustable leveling screws on the bottom of your dryer can be screwed in or out to lower or raise the leg level. If one of the leveling screws is stripped, damaged, or missing, you may not be able...
This is a duct felt seal for a dryer. The duct felt seal allows the front-load dryer drum to glide smoothly on the front panel. Your dryer will not function properly if the drum felt seal is compromis...
Having trouble with your dryer taking too long or using too much energy to dry your clothes? You might need a new moisture sensor. This sensor, created by GE, plays a key role in making sure your drye...
Is your dryer not working as efficiently as it used to? The problem may lie in its drum support! This GE drum support shaft and bracket assembly offers robust support at the back end of your dryer dru...
$58.30
Special Order
Questions And Answers for GFD45ESSM0WW
Ask our experts a question about this model and we'll get back to you as soon as possible!
7 questions answered by our experts.
< Prev
1
2
Next >
Sort by:
Search filter:
Clear Filter
Your search term must have 3 or more characters.
Keep searches simple. Use keywords, e.g. "leaking", "pump", "broken" or "fit".
Sorry, we couldn't find any existing answers that matched.Try using some different or simpler keywords, or submit your new question by using the "Ask a Question" button above!
Douglas
November 28, 2022
Front of tub will move up about an inch seems of balance also makes a thumping noise
For model number GFD45ESSM0WW
Hello Douglas, thank you for asking. We have researched your model and found that this issue could be caused by an uneven distribution of load or an off-balanced dryer. If that is not the case, you may need to replace the drum bearing, part number PS267865. If you need help placing an order for it, please feel free to give us a call. We look forward to hearing from you!
Dryer door won’t latch. Do I need to replace the part attached to the dryer or the part attached to the door? I found the replacement part for the part attached to the dryer, but can’t find the part attached to the door. Please help!
For model number GFD45ESSM0WW
Hello Linda, thank you for your question. The two parts you need are the Strike PS8756628 and Door Latch PS3502777. We hope this helps.
Dryer runs, but is not heating up. Trying to find a video to replace the heating element.
For model number GFD45ESSM0WW
Hello Christy, Thank you for your inquiry. Although we do not have a video for the exact compatible heating element, part# PS11736636, we do have a video for a similar heating element to give you a general idea of the repair. We hope this helps.
Was this helpful?
Thank you for voting!
Derek
May 12, 2024
My dryer is constantly making a high pitch squeak. I replaced the drive belt but the noise didn’t go away. What should I do to troubleshoot and replace the right part this time?
For model number GFD45ESSM0WW
Hi Derek, thank you for reaching out. As you have already replaced the drive belt, we would suggest checking the rear drum bearing, part number PS266777. It supports the back of the dryer drum and reduces friction as the drum rotates. You may need to replace it to fix the issue. We hope this solves your problem!
Dryer is getting warm, but not hot and it's taking a long time to dry clothes, especially towels. They seem to sour because it's taking so long.
For model number GFD45ESSM0WW
Hi Mark, thank you for contacting us. Based on our understanding, the issue is with the inlet temperature thermostat, part number PS1766014. It monitors heating element temperature to help regulate the temperature inside the dryer. We would recommend checking the thermostat to fix the issue. We hope this solves your problem!
Removed the front Dryer panel. Left drum in place and lifted it up slightly to get access to motor drive. Slipped belt in place and put panel back on. This was a first attempt ever at fixing an appliance and it was no big deal.
The end repair was very simple and took minimal effort. The time and difficulty was all in the testing. I disassembled the dryer and removed the drum and then hard wired each thermo-fuse to determine where the fault was. After test all of those I was stumped. When I opened the door the light would not come on so I assumed it was a power fault closer to the source. However after all of my testing I couldn't find anything wrong. I then removed the light bulb and realized it was burned out which led me to the door switch being the fault. I removed the switch and soldered the three wire together and the dryer started right up! All I had to do was order a new $15 part, unsolder the wires and plug them in. Would have been so much simpler if that light bulb hadn't of been burned out causing me to over think my diagnosis. This was my first major appliance repair and I did it with only the help of the parts diagram provided on the website.
I had to take most of the dryer apart because there is no rear access to the motor. It turned out to be easy to dissasembel the dryer. The only problem that I had was that I could not figure out how to route the belt around the motor and the idol pullies. I could not find anywhere that gave instructions on how to properly tension the belt. I finally figured out that the idoler pulley needs to be locked in place on the right side of the engie mount. Then the belt needs to be routed over idoler pulley and under the motor pulley. Finally release the idoler pully from the locked postion to put tension on the belt. It really turned out to be pretty easy.


 – Part Number: WE03X37319")


 – Part Number: WE03X37320")