This is a replacement lint filter slide for your dryer. It is approximately 14 inches long and 5 inches wide. It is made of white plastic and is sold individually. The slide mounts to your dryer and a...
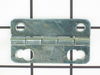
TThe door strike for your dryer is mounted on the dryer frame that the door shuts onto. It fits into the door catch on the door and keeps the door closed. If the door strike is damaged or missing, the...
This Genuine OEM door latch is designed for use with a wide range of GE clothes dryers. Constructed from a combination of durable metal and plastic, the latch is mounted onto the dryer frame to secure...
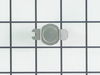
This drum glide bearing is an authentic OEM replacement part that is compatible with dryers. It is white in color and made of highly durable plastic. The bearing allows the drum to rotate smoothly and...
This rear drum bearing kit comes with a shaft, bearing and installation instructions. The bearing plate comes with a slot in it for the ground strap. Helps keep your dryer running as smoothly as poss...
This part is the replacement high-limit thermostat or safety thermostat for your dryer. The high-limit thermostat is found on the upper right-hand side of the heater housing, and it cuts off power to ...
Need a solution for your dryer that's lost its spin? Our GE Drum Drive Belt is what you've been looking for. This fundamental component connects to your dryer's motor pulley, letting your dryer drum r...
Need a hand getting your dryer back up and running smoothly? Look no further! The GE Idler Pulley Wheel is exactly what you need. The small but mighty idler pulley wheel is made from highly durable ...
No Longer Available
Questions And Answers for GDM1380V*419
Be the first to ask our experts a question about this model!
✖
Ask a Question
Ask our experts a question on this model and we'll respond as soon as we can.
First of all, unplug the dryer. I removed the two screws on the front of the cabinet to remove the top. I then took out the screws to remove the dial panel. Release the belt for the drum through the access hole in the rear of the dryer. Remove the front cover and pull the drum assembly out.
Remove the element disc from the rear of the housing, take note of the the wireing placement. Replace disc and reverse order of disassembly.
This job was easy for me as I am a tinkerer by nature. The hardest part of the whole job was waiting on the part, which by the way was ordered on a Sunday evening and I had the replacement in my hands and back in the dryer running by 1:00 PM on the following Tuesday!
I book marked this website and WILL refer it to others who simply need a repair, not a costly new appliance!
1. removed two screws to take off top. 2. removed two screws to take off front. 3. Took belt off pulley and removed drum. 4. inspected old heating element at back of dryer - saw broken wire 5. replaced heating element (round w/ heating coil) 6. Re-assembled dryer
Helpful hints: 1. mark down or take pictures of all wires before removal - easy to mix them up 2. when you re-attach drum-belt, it should be taught. Comes straight down wall around metal pulley and then forms an "S" as it wraps around plastic pulley on way up. To re-attach, stick both arms into dryer - one to pull plastic-pulley and other to attach belt.


 – Part Number: WE03X37319")