Models > FPCE21TFA0

FPCE21TFA0 Frigidaire Refrigerator - Overview

Sections of the FPCE21TFA0

[Viewing 4 of 4]
Keep searches simple, eg. "belt" or "pump".
Defrost Timer - 60Hz 120V – Part Number: 215846602
Defrost Timer - 60Hz 120V
★★★★★
★★★★★
(18)
PartSelect #: PS423801
Manufacturer #: 215846602
This defrost timer will cycle for thirty minutes after every eight hours of run time.
$45.60
  In Stock
Light Bulb – Part Number: 316538904
Light Bulb
★★★★★
★★★★★
(7)
PartSelect #: PS12751166
Manufacturer #: 316538904
Clear, 120 Volt, 40 Watt.
$25.16
  In Stock
Evaporator Fan Motor Kit – Part Number: 5300158289
Evaporator Fan Motor Kit
★★★★★
★★★★★
(4)
PartSelect #: PS450319
Manufacturer #: 5300158289
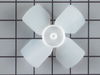
This motor runs the evaporator fan in your refrigerator. It is mounted on the center hub and has three lead wires terminals. This motor rotates in a clockwise fashion. Its shaft has a diameter of 1/8" and is 1-1/4" long.
$129.87
  In Stock
Light Socket – Part Number: 218906802
Light Socket
★★★★★
★★★★★
(4)
PartSelect #: PS3655096
Manufacturer #: 218906802
$28.03
  In Stock
Evaporator Fan Blade – Part Number: 5308000010
Evaporator Fan Blade
★★★★★
★★★★★
(1)
PartSelect #: PS473177
Manufacturer #: 5308000010
$65.93
  In Stock
Door/Light Switch – Part Number: 5309918806
Door/Light Switch
★★★★★
★★★★★
(4)
PartSelect #: PS474672
Manufacturer #: 5309918806
This part turns the light on/off as the door opens and closes.
$26.31
  In Stock
Door Rack - Cut-to-Fit – Part Number: 215516220
Door Rack - Cut-to-Fit
PartSelect #: PS423077
Manufacturer #: 215516220
This rack may be longer than what is needed. You will need to cut this rack to make it fit your appliance.
$62.83
  On Order
Hexagonal Screw – Part Number: 241710601
Hexagonal Screw
PartSelect #: PS1526503
Manufacturer #: 241710601
Sold individually.
$16.47
  In Stock
Door Shelf End Cap - Right Side – Part Number: 5303325990
Door Shelf End Cap - Right Side
PartSelect #: PS467978
Manufacturer #: 5303325990
Note: As per manufacture this end cap is the right side.
$20.63
  In Stock
Door Shelf End Cap - Left Side – Part Number: 5303325991
Door Shelf End Cap - Left Side
PartSelect #: PS467979
Manufacturer #: 5303325991
This white door shelf end cap is used for left side of some refrigerator door shelves. Note: As per the manufacture this end cap is for the left side.
$20.63
  On Order
Levelling Leg – Part Number: 131527400
Levelling Leg
PartSelect #: PS418072
Manufacturer #: 131527400
Sold individually.
  No Longer Available
Door Shelf End Cap - Left Side – Part Number: 5303323481
Door Shelf End Cap - Left Side
PartSelect #: PS467699
Manufacturer #: 5303323481
This white door shelf end cap is used for left side of some refrigerator door shelves.
$33.08
  In Stock

Questions And Answers for FPCE21TFA0

Be the first to ask our experts a question about this model!

Common Symptoms of the FPCE21TFA0

[Viewing 15 of 15]
Fridge too warm
Fixed by
these parts
Fixing Fixing Fixing
Show All
Noisy
Fixed by
these parts
Fixing Fixing Fixing
Show All
Light not working
Fixed by
these parts
Fixing Fixing
Show All
Freezer not defrosting
Fixed by
these parts
Fixing
Show All
Freezer section too warm
Fixed by
these parts
Fixing Fixing
Show All
Leaking
Fixed by
these parts
Fixing Fixing Fixing
Show All
Will Not Start
Fixed by
these parts
Fixing
Show All
Fridge runs too long
Fixed by
these parts
Fixing Fixing
Show All
Fridge and Freezer are too warm
Fixed by
these parts
Fixing
Show All
Fridge too cold
Fixed by
these parts
Fixing Fixing
Show All
Freezer too cold
Fixed by
these parts
Fixing
Show All
Door Sweating
Fixed by
these parts
Fixing
Show All
Frost buildup
Fixed by
these parts
Fixing
Show All
Too warm
Fixed by
these parts
Fixing
Show All
Door won’t open or close
Fixed by
these parts
Fixing
Show All
Keep searches simple. Use keywords, e.g. "leaking", "pump", "broken" or "fit".
Noisy fan
1. Removed the 7 nuts using the nut driver from the freezer back panel inside the freezer.
2. Remove the back panel. The evaporator motor and fan are located above the coils.
3. Unplug the wiring harness.
4. Remove the two gold mounting screws holding the motor and fan in place.
5. Remove the motor and fan including the brackets.
6. Install the new motor and fan onto the mounting bracket.
6a. Attach the green ground to the mounting bracket.
7. Screw the two gold screws back into the freezer.
8. Attach the new wiring harness. Note, the old harness had a mounting hole/space for it to connect to the wiring harness of the freezer. The new motor's harness was not long enough for this, so it is connected freely to the freezer harness.
9. Use the hair dryer to melt any ice that may have formed on the coils and hole where the fan goes.
10. Turn the freezer on to see if the fan turns on.
11. Reinstall the back panel.
All done!
Parts Used:
Evaporator Fan Blade Evaporator Fan Motor Kit
  • Jordan from Maumee, OH
  • Difficulty Level:
    Easy
  • Total Repair Time:
    1- 2 hours
  • Tools:
    Nutdriver
152 of 178 people found this instruction helpful.
Was this instruction helpful to you?
Thank you for voting!
Light socket melted around bulb
After unsuccessfully trying to change the blown light bulb I discovered that the plastic light socket had gotten so hot that it melted and permanently fused with the blown bulb. After my new socket arrived in the mail I just popped the temp control assembly out with a screw driver and removed the old socket and placed the new one in. Whole operation to 5 minutes.
Parts Used:
Light Socket
  • William from Alexandria, VA
  • Difficulty Level:
    Really Easy
  • Total Repair Time:
    Less than 15 mins
  • Tools:
    Screw drivers
65 of 107 people found this instruction helpful.
Was this instruction helpful to you?
Thank you for voting!
Side-by-side .. freezer working, fridge not cooling
My freezer was frozen but my refrigerated side was not cooling, the temp was actually around 60-degrees. After inspecting i noticed no air was flowing through the vent from freezer side to fridge side. I removed everything from freezer and took the back wall panel off inside freezer section and immedietely noticed alot of ice on coils etc. After researching i found the defrost timer was not working and thus allowing frost and ice to build up on coils and block air flow. My defrost timer was located on the front bottom left behind kick panel, using a phillips screwdriver i removed 2 screws and then disconnected wire harness to the defrost timer. Then i inserted new defrost timer and connected wire harness and then put the 2 screws back in. My fridge is now working great and the ice build-up is gone and i am getting good air flow .. temps on fridge side are now between 32-34degrees. This was an easy project and saved me alot of money doing myself
Parts Used:
Defrost Timer - 60Hz 120V
  • Tad from Lancaster, OH
  • Difficulty Level:
    Easy
  • Total Repair Time:
    15 - 30 mins
  • Tools:
    Screw drivers
46 of 50 people found this instruction helpful.
Was this instruction helpful to you?
Thank you for voting!