This hot water inlet valve is designed to regulate water flow into the washing machine during operation. Featuring a standard hose fitting inlet and a single water outlet, it opens as needed to allow ...
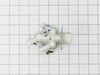
This valve is used for cold water, bleach dispenser and prewash cycles. It has a standard hose fitting inlet with 2 outlets facing 45 degrees to the right and one outlet facing 45 degrees to the left.
This washer hose with bellows, also known as a dispenser hose, is a genuine OEM replacement part for your washer. Replacing this part can be helpful if your washer is leaking. The dispenser hose conne...
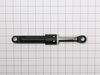
This friction damper assembly is designed to stabilize the washer tub during operation, particularly during high-speed spin cycles. By absorbing movement and reducing vibrations, it helps ensure quiet...
This door boot seal is for front loading washing machines. This part forms a seal between the wash tub and the door, preventing leaks. We recommend unplugging the washer before installing this part an...
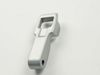
The blue plastic detergent dispenser holds the detergent and then dispenses it into the washer during the wash cycle. If the detergent dispenser is broken, lost, or if the detergent is not dispensed d...
This part is the replacement rear tub gasket for your washer. It is made of black plastic and is approximately 3-1/4 inches in diameter. The rear tub gasket forms a watertight seal between the rear tu...
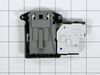
This door lock switch is a key component in compatible washing machines, designed to signal the control board when the door is securely closed. Once engaged, it enables the locking mechanism and allow...
$205.79
In Stock
Questions And Answers for F14F1CDYP7
Be the first to ask our experts a question about this model!
✖
Ask a Question
Ask our experts a question on this model and we'll respond as soon as we can.
Pull washer away from wall. Unplug cord and remove drain hose from receptacle. Remove 4 screws holding panel to rear of washer. Squeeze and slide back hose clamps on each end of drain hose and loosen center clamp with screwdriver. Remove old hose. Reinstall new hose in reverse order using existing clamps. Re-install back panel.
Followed the videos on line. However instead of buying the $75 spring expansion tool I used two zip ties. One at each end of the spring to create loops for my index fingers to pull the spring apart. Needed a second person to help hold the ring in place at 3&9 position.


 Diagram and Parts List for ASSEECI LG Washer")