This an authentic OEM 40-Watt replacement light bulb, used in a number of household appliances. It is specially designed to withstand extreme temperatures, which is why these replacement bulbs are mos...
$22.58
In Stock
Order within the next 9 mins and your part ships today!
This 18 ml bottle of white appliance touch-up paint is used to cover scratches or marks on your appliance. The white touch-up paint can be used on refrigerators, microwaves, ranges, clothes dryers, an...
$15.95
In Stock
Order within the next 9 mins and your part ships today!
This eight-hour defrost timer will replace most other defrost timers. This device acts like a clock. It continually advances and alternates between activating the cooling cycle and the defrost heater....
$45.48
In Stock
Order within the next 9 mins and your part ships today!
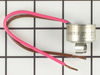
This clip-on thermostat will sense the temperature increase in the evaporator during the defrost cycle and will cycle the defrost heater off after the ice or frost is melted.
$53.86
In Stock
Order within the next 9 mins and your part ships today!
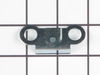
This hinge bracket, also known as a door stop, is attached to the bottom of the door and is used to limit how far the door swings out to protect the refrigerator itself, and any surrounding cabinets f...
$16.43
In Stock
Order within the next 9 mins and your part ships today!
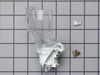
This is a replacement crisper drawer for your refrigerator. The drawer is approximately 24 inches long, 11 inches wide, and 12 inches tall. It is made of clear plastic and is sold individually. The cr...
$164.03
In Stock
Order within the next 9 mins and your part ships today!
The door shelf retainer bar end cap connects to the retainer bar on your refrigerator’s door shelf, and attaches it to the refrigerator door. If your shelf retainer bar has become disconnected, a dama...
$16.69
In Stock
Order within the next 9 mins and your part ships today!
I troubleshot the problem by reading the electrical schematic and concluding the heating elements (defrost cables) were either defective or the bi-metal temp sensor was open. When closed the temp sensor completes the circuit for the current to flow through the heaters to defrost the cooling coils every 8 hours and then when the bimetal opens at 55 degrees the circuit is open and the coils are cooled because the refridgeration motor is in run mode. A timer between the motor and heater elements also was defective. The timer controls the cooling period and the defrost period. I ohmed out each part according to the spec sheet of normal resistance of parts and thus the bimetal and timer were defective. I gather a surge of some duration and amplitude affected these parts because a storm 24 hours prior to refridgerator problem had passsed through the area and the AC electrical power had oscillated several times during that event. I used hand tools to do the repair. If you are not mechanically inclined a step by step proceedure would be moot. It is a matter of disassembly and assembly paying close attention to fragile parts.
Open the door. Removed two screws holding the cover of the thermostat. There is a clip which holds the thermostat in place. Remove the clip. Take out the thermostat. Remove the thermocouple (the long grey metal with the coil at the end) which is also held in place by a clip. Replace with the new thermostat and thermocouple and clip into place. Replace the screws to the cover. Close the door.
I used a flat-head screwdriver to pop out the old light rocker switch. Then, I unplugged the wires, plugged them into the new light rocker switch, and then popped the new switch into the hole. That's it! Lights began working again.