This foot pad is just over an inch in diameter. It is made entirely of rubber and is gray in color. This pad is intended for use with washers and some dryers.
If your dryer isn’t heating properly, this adjustable thermostat kit could be the solution. It helps keep the dryer at the right temperature by turning the heat on and off as needed. You can set it an...
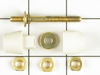
Cycling thermostats continually cycle the heating element off and on to maintain a constant inner temperature. This particular cycling thermostat has a limit of 140 degrees Fahrenheit and a differenti...
The lower rack provides easy loading with flexibility for small and large items, and helps hold the dishes in place during the wash and dry cycle. The rack measures approximately 22-inch x 21-inch. Th...
Ask our experts a question about this model and we'll get back to you as soon as possible!
2 questions answered by our experts.
< Prev
1
Next >
Sort by:
Search filter:
Clear Filter
Your search term must have 3 or more characters.
Keep searches simple. Use keywords, e.g. "leaking", "pump", "broken" or "fit".
Sorry, we couldn't find any existing answers that matched.Try using some different or simpler keywords, or submit your new question by using the "Ask a Question" button above!
Mike
December 2, 2019
Had to replace the heating element about 1 year ago, and dryer dries clothes again, but automatic shut-off has not worked since then. Is there a simple fix you could guide me through?
For model number DE606
Hello Mike and thanks for writing.
If your gas or electric dryer isn't ending the Auto Dry cycle when the clothes are dry, it may be the fault of a defective cycling thermostat PS11743793. This part governs the temperature of the dryer as well as the timer motor on Auto Dry models.
Hello and thank you for writing.
The drive belt on your dryer attaches to the motor pulley and then wraps around the drum and a tensioner pulley, and spins the drum as the motor rotates. Your dryer drum cannot spin without this belt. Belts can stretch or become brittle over time which may cause it to malfunction.
There are 2 different belts for these dryers you would have to measure your old belt to make sure you order the correct one.
Belt # PS11757533 46.5 Inch
Belt # PS11757534 56 Inch
We hope this helps. Please contact us anytime if you require further assistance.
Since the heating coil is right behind the front door I had to remove all panels starting with the back one to get to it. The back has a lot of tech screws that I removed with the nut driver. The side panels were removed with a phillips screwdriver. The top is held in place with the other panels. The base was shifted away from the front and I released the heating coil case with 4 screws in the front and was able to pull it out of the top to replace it. I cut the old one out with wire cutters and snaked the new one through the ceramic insulators. I was careful not to touch the new one without gloves because the oil from your hands can burn them out more quickly. I screwed the new ones to the contact points while trying not to stretch it too much. I vacuumed the whole dryer out before putting it back together.
Put blocks under the washer where the leveling leg was needed and screwed the part into the washer. Then it was just a matter of moving the washer into place and leveling. Pretty easy.
Took off back cover, thermostat was easily identified because of photos I've seen on website. Took 2 connectors off, removed 2 screws and removed old thermostat. That was pretty much it!
NOTE: Replacement thermostat 694674 has an adjustable temperature range setting that MUST be manually set prior to installing! You need to use the enclosed chart to find your original part# and make sure the setting is matched. My original part# 341146 had a "D" setting so I had to change but very easy to do.


.gif "50 CYCLE CONVERSION LIST Diagram and Parts List for Maytag Dryer")

 Diagram and Parts List for Maytag Dryer")