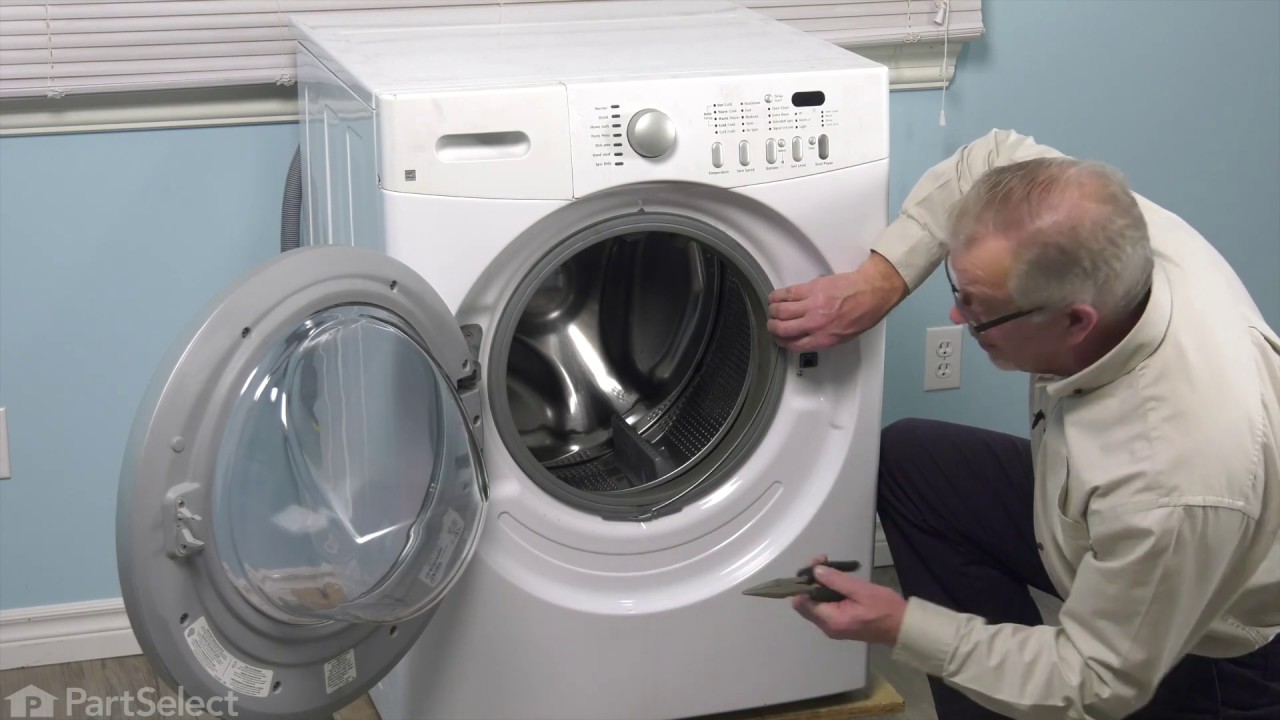
This door lock and switch assembly is manufactured to lock the door on your front load washer to prevent it from opening while it is running. You may need to replace the door lock and switch if the do...
$183.11
In Stock
Order within the next 26 mins and your part ships today!
Refresh the look and function of your washer with this white outer door panel. Designed for select front-loading models, it helps your door close securely and keeps water where it belongs—inside the m...
$219.43
In Stock
Order within the next 26 mins and your part ships today!
Also known as a Door Boot Seal and is used in front load washers. This part is used to keep the clothes inside the tub during the wash cycle. The folds in the bellow allow the tub to move separately f...
$411.69
In Stock
Order within the next 26 mins and your part ships today!
If your washer’s detergent drawer is hard to open or the handle frame is damaged, this replacement part offers a quick fix. It snaps easily into place and helps restore smooth access to the dispenser....
$104.06
In Stock
Order within the next 26 mins and your part ships today!
This is a replacement screw for your washer or dryer. The screw is approximately half an inch in length and is a Phillips-head screw. It screws in from the outside of the drum, into the vane/baffle. T...
$27.85
In Stock
Order within the next 26 mins and your part ships today!
This washer shock absorber mounting pin is a small but essential fastener that secures the shock absorber to the outer tub of a front-load washing machine. By holding the shock absorber firmly in plac...
$29.73
In Stock
Order within the next 26 mins and your part ships today!
This water inlet valve controls the flow of water into your appliance, ensuring proper filling during wash cycles. Ideal for replacing a faulty valve that causes leaks or filling issues, it restores e...
$173.55
In Stock
Order within the next 26 mins and your part ships today!
Your washer's door glass panel is the window to efficiency and cleanliness. If it's compromised, it may affect your appliance's performance. That's where our genuine Frigidaire Door Glass Panel comes ...
$316.35
In Stock
Order within the next 26 mins and your part ships today!
This washer tub-to-pump hose, often called a coin trap or bellows hose, carries water from the outer tub to the drain pump during drain and spin cycles. Designed with an integrated trap, it captures c...
$120.61
In Stock
Order within the next 26 mins and your part ships today!
Questions And Answers for CFW4700LW0
We're sorry, but our Q&A experts are temporarily unavailable.
Please check back later if you still haven't found the answer you need.
5 questions answered by our experts.
< Prev
1
Next >
Sort by:
Search filter:
Clear Filter
Your search term must have 3 or more characters.
Keep searches simple. Use keywords, e.g. "leaking", "pump", "broken" or "fit".
Sorry, we couldn't find any existing answers that matched.Try using some different or simpler keywords, or submit your new question by using the "Ask a Question" button above!
Nancy
January 6, 2024
How to take front cover off to get to the locking mechanism?
For model number CFW4700LW0
Hi Nancy,
Thank you for your question. Here is a link to one of our YouTube videos that you may reference for information on how to install the door lock. The washer in the video may not be the same as yours, but it will give you a general idea on how to install the part. We hope this helps!
I replaced the bellow(boot) and now the door wont shut. On the instructions theres a parts number 134515300 and i have some they say check universal part number 134639100.
DID I GET THE WRONG PART?
For model number CFW4700LW0
Hello Liz, thank you for your inquiry. The door boot seal you mentioned is compatible with your model. We would recommend making sure that you have installed it correctly. The issue may not be due to the leveling leg that you have mentioned. We hope this information helps!
Was this helpful?
Thank you for voting!
Kenneth
July 29, 2021
When I start the washer no water, temp lights and spin speeds come on.
For model number CFW4700LW0
Hello Kenneth, Thank you for the question. If the Water is not filling it will not allow the appliance to start the cycle. We suggest testing the Water Valve to see if it is defective and may need to be replaced. Set your multitester to the R X 1 ohms setting to test for continuity. Place each of the multitester's leads on a terminal. Your multitester should display a reading between 200 and 500 ohms. Closely examine your water inlet valve. The exact ohm resistance rating you should test for may be marked on the valve. We hope this helps!
Hi Bryan, thank you for contacting us. According to our research, the issue is most probably with the control board, part number PS16555373. The control board controls the settings of the cycles of the washer. We hope this sorts out your problem!
No water is coming in and I replace the valves and still no water is coming and does that ohm be different for different ones?
For model number CFW4700LW0
Hello Andre, thank you for contacting us. Based on our research, you may need to replace the water level pressure switch, part number PS2349296. Before replacing the part, we would recommend checking whether the inlet hose is collaged or not. We hope this solves your problem!
This was one of the simpliest repairs I have ever done taking less than 5 minutes to complete. On the inner door I removed the two screws that hold the plastic catch in place. I then removed the broken catch and put the new catch in place. Finally I replaced the two screws that hold the catch in place and it was done.
1. Unplug unit. 2. Unscrew 2 nuts holding top in place in rear of unit using phillips head screwdriver. 3.Slide top back and remove. 4. Open door of washer and unscrew 2 screws holding in door lock unit. 5.Pull out unit from the top and install new unit reconnecting the 3 wire connections.
remove top of machine by removing 3 screws along the top edge in the back of your machine and then sliding the top back and up. Then loosen the screws holding on the control panel enough to get to the 2 screws at the top of the door panel. Next remove bottom panel by removing 2 screws along bottom edge then pulling it free from snaps. Then along the outside lip of the bellow, just inside the door, is a wire clip that is easily removed by prying it past rubber lip with a screw driver and lifting it away. Remove the door panel by removing the 2 screws you exposed by loosening the control panel and 2 more along the bottom that were exposed when removing bottom panel. After the door panel is removed and the bellow is completely exposed, you will find that it is held in place by a circular spring which wraps the whole way around the drum opening. Again it can be removed by prying it out away from the groove in which it sits with a screw driver. Now your machine is broken down as far as it needs to be. From here you can follow the directions included in your new bellow kit and put it back together by following these instructions in reverse.