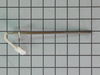
The temperature sensor, also known as an oven probe, detects the temperature within the oven cavity. This temperature sensor is 9 inches in length and is a genuine OEM part. If your oven is too hot, n...
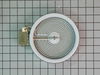
The 6” radiant cooking element with limiter fits under the glass cooktop and supplies heat to the cooking area. If your element is not heating, you can test the element for continuity with a multimete...
This oven temperature sensor is a precision component designed to measure and relay internal oven temperatures to the control board, ensuring accurate and consistent cooking performance. Commonly refe...
Restore your oven’s baking performance with this 3000-watt bake element, located at the bottom of the oven. It fits a variety of Frigidaire, Electrolux, and Tappan models and features a unique coil de...
This oven door gasket creates a secure seal around the door to keep heat inside the oven for consistent cooking and energy efficiency. Made from high-quality, heat-resistant fiberglass with a tempered...
$160.07
In Stock
Questions And Answers for CEW30EF6GSF
Ask our experts a question about this model and we'll get back to you as soon as possible!
1 question answered by our experts.
< Prev
1
Next >
Sort by:
Search filter:
Clear Filter
Your search term must have 3 or more characters.
Keep searches simple. Use keywords, e.g. "leaking", "pump", "broken" or "fit".
Sorry, we couldn't find any existing answers that matched.Try using some different or simpler keywords, or submit your new question by using the "Ask a Question" button above!
Raj
December 16, 2019
My glass on top of the heating elements broke, can i change. What is the cos
For model number CEW30EF6GSF
Good Day Raj. Thank you for your question in regards to your unit (Model Number CEW30EF6GSF). Based on our research the part number for the PartSelect number that is compatible with your unit is PS2339270. If you search this part number on our website www.PartSelect.ca, it will show these part's current price and shipping costs. Hope this helps. Best Regards.
1 personfound this helpful.
Was this helpful?
Thank you for voting!
< Prev
1
Next >
✖
Ask a Question
Ask our experts a question on this model and we'll respond as soon as we can.
PF alarm appeared on display. Noticed clicking when cord was moved. Had arced for some time and melted original block. New part slightly different. Only has 3 lugs, old one had six. Stack using washers provided. Take note of colors before disassembly. Use caution while working through access opening. The edges are sharp. Only tools needed are phillips screwdriver, deep socket for lug nuts. Nut driver optional. Hope this is helpful.
Cut off power at fuse panel. pulled stove out from wall went behind stove removed back panels in area of sensor that I could see from the front side, inside oven. Located sensor from rear & unpluged senser from wiring bundle reached inside oven & removed screws from sensor. Pulled sensor out & threaded wire through hole. Took old & new sensors to bench in shop. Plug on new not the same as old. Had to change plug Cut and stripped wires. Wire is very small, need to use a good stripper. Twisted wire together & soldered connection, used shrink wrap to insulate wire. Took part inside and reinstalled in reverse order. Used 1/4 inch nutdriver on total job start to finish.
I called a repair place. They charged $54 to diagnose, (said it needed a new latch motor) then wanted $220 to complete the repair. I checked online prices and did it myself for about 15 minutes work and the latch motor itself ($44?).
Was necessary to uplug the range, pull it away from the wall and remove the back panel sheet metal, then 3 screws that mount the motor. Replace motor, reattach sheet metal. Plug in. Done. Ready to bake cookies.