


CDT865SMJ2DS General Electric Dishwasher - Overview
Sections of the CDT865SMJ2DS
[Viewing 7 of 7]


Keep searches simple, eg. "belt" or "pump".

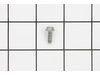
Screw 8-16 hxw 1/2 Stainless Steel
PartSelect #: PS258461
Manufacturer #: WD02X10067
This OEM-compatible screw is designed for use with many GE dishwashers. Measuring 8-16 HXW and 1/2" in length, this stainless steel screw secures the middle spray arm hub to the upper rack assembly, e...
$13.95
Special Order

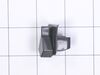
Door Latch
PartSelect #: PS6447681
Manufacturer #: WD21X10490
This is replacement door latch for your dishwasher. The door latch is attached to the tub frame, and connects to the door strike to keep your dishwasher door closed during operation. If you have a bro...
$71.60
Special Order

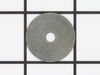
SCR B-16 HXW 1/2 Stainless Steel
PartSelect #: PS2370492
Manufacturer #: WD02X10169
This part is a replacement middle spray arm bearing for your dishwasher. The spray arm bearing reduces friction and allows the spray arm to rotate during the operating cycle. If the spray arm is not r...
$17.70
Special Order

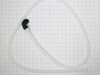
GASKET TUB Stainless Steel
PartSelect #: PS11721490
Manufacturer #: WD08X22095
This dishwasher tub gasket creates a watertight seal between the tub and door to prevent leaks and maintain efficient performance. Made from durable rubber, it fits into the tub’s channel and is easy ...
$46.63
Special Order

Dishwasher Clip Lower Rack
PartSelect #: PS8756263
Manufacturer #: WD12X20171
Are you grappling with a faulty GE dishwasher? Maybe the lower rack just won't stay put? Let's help you put an end to that stress. Our GE Lower Rack Clip might just be what you've been searching for. ...
$13.95
Special Order

Dishwasher Fdt Coated Lower Rack
PartSelect #: PS8767471
Manufacturer #: WD28X20164
Meet the GE FDT Coated Lower Dishrack - your dishwasher's new best friend. Its job is simple but vital. It separates and supports your dishes within the rack, making sure each dish gets a thorough cle...
$24.95
Special Order

INNER RAIL UPR RACK Assembly
PartSelect #: PS8767476
Manufacturer #: WD30X20110
$98.46
Special Order

Dishwasher Cover Vent
PartSelect #: PS8769905
Manufacturer #: WD24X20586
This vent cover helps direct airflow and protect internal vent components. Designed for durability, it supports proper ventilation and efficient appliance performance.
$19.38
Special Order

Dishwasher Lower Rack Roller
PartSelect #: PS16217024
Manufacturer #: WD12X26146
The lower rack roller supports the smooth sliding of your dishwasher’s bottom rack. Measuring 1.5 inches in diameter and charcoal-colored, this OEM replacement part is sold individually. Replace all f...
No Longer Available


Latch Striker
PartSelect #: PS8690622
Manufacturer #: WD13X10071
This dishwasher latch strike is a manufacturer-approved replacement part for your appliance. The latch strike is an important component in your dishwasher door assembly, and adds an extra layer of sec...
$17.70
Special Order

Questions And Answers for CDT865SMJ2DS
We're sorry, but our Q&A experts are temporarily unavailable.
Please check back later if you still haven't found the answer you need.
Common Symptoms of the CDT865SMJ2DS
[Viewing 10 of 10]Leaking
Fixed by
these parts
these parts


Show All
Will Not Start
Fixed by
these parts
these parts

Show All
Door latch failure
Fixed by
these parts
these parts
Show All
Not cleaning dishes properly
Fixed by
these parts
these parts

Show All
Not draining
Fixed by
these parts
these parts


Show All
Door won’t close
Fixed by
these parts
these parts

Show All
Will not fill with water
Fixed by
these parts
these parts


Show All
Noisy
Fixed by
these parts
these parts
Show All
Not drying dishes properly
Fixed by
these parts
these parts

Show All
Will not dispense detergent
Fixed by
these parts
these parts

Show All


Keep searches simple. Use keywords, e.g. "leaking", "pump", "broken" or "fit".
Door latch not functioning
1. Turn off breaker supplying power to dishwasher in electrical panel
2. Open dishwasher door
3. Unscrew the screws that secure the dishwasher to the counter.
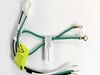
4. Tip dishwasher forward. Identify the non-functioning door latch. It looks exactly like the replacement. Unclip the wire harness from the door latch.
5. On the inside of the dishwasher, there are 2 screws directly under the door latch. Unscrew them and carefully set aside.
6. Remove old door latch.
7. Set new door latch in place. Holding securely, replace screws removed in step 5. Toward the end they get a little tougher to screw in.
8. Plug wire harness into new door latch.
9. Re-align dishwasher and re-secure to counter in previous position.
10. Test latch to make sure it closes properly.
11. Turn on breaker in electrical panel.
The dishwasher should now function properly.
2. Open dishwasher door
3. Unscrew the screws that secure the dishwasher to the counter.
4. Tip dishwasher forward. Identify the non-functioning door latch. It looks exactly like the replacement. Unclip the wire harness from the door latch.
5. On the inside of the dishwasher, there are 2 screws directly under the door latch. Unscrew them and carefully set aside.
6. Remove old door latch.
7. Set new door latch in place. Holding securely, replace screws removed in step 5. Toward the end they get a little tougher to screw in.
8. Plug wire harness into new door latch.
9. Re-align dishwasher and re-secure to counter in previous position.
10. Test latch to make sure it closes properly.
11. Turn on breaker in electrical panel.
The dishwasher should now function properly.
Parts Used:
-
James from ALBRIGHTSVLLE, PA
-
Difficulty Level:Really Easy
-
Total Repair Time:Less than 15 mins
-
Tools:Screw drivers
32 of 53 people
found this instruction helpful.
Was this instruction helpful to you?
Thank you for voting!
Dishwasher leaked because vent cover would not stay on
Replaced transition piece, gasket, and vent cover. The root cause problem is that the factory installed gasket was too thick and would not allow sufficient thread engagement. The replacement gasket was about 25% thinner and worked perfectly.
Parts Used:

-
Edward from LOUISVILLE, KY
-
Difficulty Level:A Bit Difficult
-
Total Repair Time:30 - 60 mins
-
Tools:Nutdriver, Pliers, Screw drivers, Socket set, Wrench (Adjustable)
10 of 11 people
found this instruction helpful.
Was this instruction helpful to you?
Thank you for voting!
Wouldn't start, no lighted functions.
Shut off power at breaker, remove two screws anchoring DW to counter top . Slide DW out far enough to access door latch, disconnect electrical wiring plug, remove two Phillips head screws, install new door latch, repeat installation in reverse order.
Parts Used:
-
Edward from BEAUFORT, SC
-
Difficulty Level:Really Easy
-
Total Repair Time:Less than 15 mins
-
Tools:Screw drivers
14 of 24 people
found this instruction helpful.
Was this instruction helpful to you?
Thank you for voting!