This is an end cap for a dishwasher rack. This part is about 2.5 inches long, is black, and is made of plastic. You may need to replaced this part if it is broken, or if your dishwasher rack continuou...
This OEM-compatible screw is designed for use with many GE dishwashers. Measuring 8-16 HXW and 1/2" in length, this stainless steel screw secures the middle spray arm hub to the upper rack assembly, e...
This is a door handle fastener to secure the handle to your refrigerator drawer. It is also known and a mounting bolt or screw. It is approximately 1 inch in total length, and is made of metal.
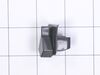
This is replacement door latch for your dishwasher. The door latch is attached to the tub frame, and connects to the door strike to keep your dishwasher door closed during operation. If you have a bro...
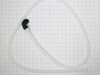
This dishwasher tub gasket creates a watertight seal between the tub and door to prevent leaks and maintain efficient performance. Made from durable rubber, it fits into the tub’s channel and is easy ...
Are you grappling with a faulty GE dishwasher? Maybe the lower rack just won't stay put? Let's help you put an end to that stress. Our GE Lower Rack Clip might just be what you've been searching for. ...
Meet the GE FDT Coated Lower Dishrack - your dishwasher's new best friend. Its job is simple but vital. It separates and supports your dishes within the rack, making sure each dish gets a thorough cle...
This vent cover helps direct airflow and protect internal vent components. Designed for durability, it supports proper ventilation and efficient appliance performance.
The lower rack roller supports the smooth sliding of your dishwasher’s bottom rack. Measuring 1.5 inches in diameter and charcoal-colored, this OEM replacement part is sold individually. Replace all f...
This dishwasher latch strike is a manufacturer-approved replacement part for your appliance. The latch strike is an important component in your dishwasher door assembly, and adds an extra layer of sec...
$17.70
Special Order
Questions And Answers for CDT800P2N3S1
Be the first to ask our experts a question about this model!
✖
Ask a Question
Ask our experts a question on this model and we'll respond as soon as we can.
Decided it could be 1 of 3 things. Fuse on main circuit board that controls hot water. Main control board or drain pump failure. Was not able to find out how to do diagnostics on this unit as there is no "cycle control" feature and this is a top of the line unit. Replaced the fuse and dishwasher failed. Replaced the circuit board and dishwasher failed the first time. Second time it went to completion and has worked properly since. You can go on line and find videos on removing the circuit board for GE dishwashers. This can be done without pulling the dishwasher out. Remove the lower black dust panel and insulation. Remove cover to electrical box - 1 screw and remove. Remove 2 to 4 screw on a sheet metal bracket that holds the circuit board. Notice where 2 metal hangers are located if you remove 4 screws on the left and right side of machine as they drop out. Remove black corded door sensor under circuit board. Work the sheet metal back and forth to remove from dish washer so that circuit board is exposed. Remove circuit board connectors and pull out unit to install new circuit board. Some have one screw and some have only plastic retainers. Re-install. I did not need the drain pump and the circuit board comes with a control board fuse. Washer was only 14 months old and 2 months out of warranty.
1. Turn off breaker supplying power to dishwasher in electrical panel 2. Open dishwasher door 3. Unscrew the screws that secure the dishwasher to the counter. 4. Tip dishwasher forward. Identify the non-functioning door latch. It looks exactly like the replacement. Unclip the wire harness from the door latch. 5. On the inside of the dishwasher, there are 2 screws directly under the door latch. Unscrew them and carefully set aside. 6. Remove old door latch. 7. Set new door latch in place. Holding securely, replace screws removed in step 5. Toward the end they get a little tougher to screw in. 8. Plug wire harness into new door latch. 9. Re-align dishwasher and re-secure to counter in previous position. 10. Test latch to make sure it closes properly. 11. Turn on breaker in electrical panel. The dishwasher should now function properly.
I found it online! There were step by step instructions that were easy to understand. I have never had to do anything like this in my life, only recently had to start doing everything around the house myself due to husband's illness. The repairman came out, charged me $100 to determine what the dishwasher needed & left me with the part number. He was going to charge me $389 to install the part and they were over charging for the part. The repairman suggested I just get a new dishwasher. I ordered the part from the website at 1/2 the price that the other place charges and found it on line. With the step by step instructions and the online page, I successfully installed it MYSELF. Saved me a ton of $$. I LOVE the website Thank You!!!!