


AC2228HEKB Amana Refrigerator - Overview
Sections of the AC2228HEKB
[Viewing 17 of 17]


.gif "SUPPLEMENTAL INFORMATION Diagram and Parts List for Amana Refrigerator")

Keep searches simple, eg. "belt" or "pump".

Refrigerator Water Filter Bypass
PartSelect #: PS12731165
Manufacturer #: W11395888
This water filter bypass cap is a genuine OEM component designed for select Whirlpool, Maytag, KitchenAid, and affiliated refrigerator models. Installed in place of the water filter, it allows uninter...
$55.88
In Stock

Screw
PartSelect #: PS12349731
Manufacturer #: W11233072
This is a multi-use and multi-appliance screw. It can be used on a microwave, refrigerator, range/oven, air conditioner, dehumidifier, washer, or dryer. The measurements of this screw are 8 x 1/2 inch...
$28.95
In Stock

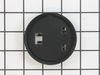
Door Closure Cam Kit
PartSelect #: PS2168612
Manufacturer #: R0181181
This part helps with the closing of the door and helps keep them in position.
$14.25
In Stock

Door Switch
PartSelect #: PS12731166
Manufacturer #: W11396033
This light switch may also be known as a refrigerator door switch or a light switch kit, and is compatible with your refrigerator. The function of the refrigerator door switch is to turn on the light ...
$38.96
In Stock


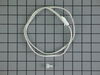
Thermistor
PartSelect #: PS2003772
Manufacturer #: 12002355
Long harness thermistor kit.
$57.66
In Stock

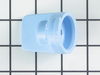
Refrigerator Water Fill Cup & Bearing
PartSelect #: PS11743318
Manufacturer #: WP628356
This icemaker water inlet cup is three inches long. It is all white in color and is made of plastic.
$51.12
Special Order

Evaporator Fan Blade
PartSelect #: PS11738973
Manufacturer #: WP2169142
If your refrigerator or freezer is too warm, or making noises, you may need to replace the fan blade. The fan blade attaches to the evaporator motor, which is in the freezer section, to help circulate...
$47.08
In Stock

Refrigerator Switch
PartSelect #: PS12584655
Manufacturer #: W11291138
This is a light switch for your refrigerator. It activates when the door of your appliance is opened, and it will turn the light inside on and off. You will need to replace this part is if your light ...
$38.09
In Stock

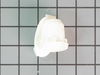
Refrigerator Water Filter Cover
PartSelect #: PS11738541
Manufacturer #: WP12568001
This part is the replacement water filter cover for your refrigerator. It is made of white plastic and is approximately 13 inches long and 4 inches wide at the widest point. The water filter cover pro...
$77.22
In Stock

Refrigerator Crisper Frame Support
PartSelect #: PS11738556
Manufacturer #: WP12603701
Support for the crisper or shelf frame.
$15.95
In Stock

Dryer Screw
PartSelect #: PS11746840
Manufacturer #: WP90767
This screw is sold individually.
$10.09
In Stock
Questions And Answers for AC2228HEKB
We're sorry, but our Q&A experts are temporarily unavailable.
Please check back later if you still haven't found the answer you need.
Common Symptoms of the AC2228HEKB
[Viewing 20 of 20]Light not working
Fixed by
these parts
these parts


Show All
Leaking
Fixed by
these parts
these parts


Show All
Ice maker won’t dispense ice
Fixed by
these parts
these parts


Show All
Ice maker not making ice
Fixed by
these parts
these parts

Show All
Fridge too warm
Fixed by
these parts
these parts


Show All
Not dispensing water
Fixed by
these parts
these parts


Show All
Door won’t open or close
Fixed by
these parts
these parts
Show All
Fridge too cold
Fixed by
these parts
these parts
Show All
Noisy
Fixed by
these parts
these parts
Show All
Clicking sound
Fixed by
these parts
these parts
Show All
Door Sweating
Fixed by
these parts
these parts

Show All
Freezer too cold
Fixed by
these parts
these parts
Show All
Freezer section too warm
Fixed by
these parts
these parts
Show All
Ice maker dispenses too much ice
Fixed by
these parts
these parts
Show All
Freezer not defrosting
Fixed by
these parts
these parts
Show All
Fridge and Freezer are too warm
Fixed by
these parts
these parts
Show All
Frost buildup
Fixed by
these parts
these parts
Show All
Too warm
Fixed by
these parts
these parts
Show All
Ice maker dispenses too little ice
Fixed by
these parts
these parts
Show All
Fridge runs too long
Fixed by
these parts
these parts
Show All


Keep searches simple. Use keywords, e.g. "leaking", "pump", "broken" or "fit".
The Bearing Cup Assembly was broken and ice would jamb against it during the ice making cycle.
I removed the ice maker from the refrigerator, by removing one screw on the underside bracket and loosening the two screws at the top side, then lifting the ice maker off the loosened screws. I then unplugged the electrical harness that supplies power from the refrigerator to the ice maker. I then disassembled the ice maker by removing the front cover which is snapped in place, then removing two recessed screws at the front. I removed the broken part, I then reassembled the ice maker with the new part. I replaced the two recessed screws at the front and snapped on the cover. Then I reinstalled the ice maker in the refrigator by plugging in the harness, slipping the ice maker over the loosened screws in the refrigerator and replacing the screw that was removed from the underside bracket. Tightening all the screws completed the project.
Parts Used:

-
David from Chester, CA
-
Difficulty Level:Really Easy
-
Total Repair Time:Less than 15 mins
-
Tools:Nutdriver, Screw drivers
108 of 138 people
found this instruction helpful.
Was this instruction helpful to you?
Thank you for voting!
Door would not close
After emptying the refrig. door, I unscrewed the plate on the top of the refrigerator that covered the door bolts. Then off with the three bolts. I removed the door by lifting it up a few inches. The two parts of the door cam were easily removed and replaced with the new part. BEFORE REPLACING the door spread vasoline on both cam parts.
(Not after as I did. The second time you do any of these repairs go SO much better :o)
After putting the door back on, adjust the tension of the screws holding the door in place if needed to align the door on the cams so that it shuts completely. Failure to do this will require taking the top off the door again. (see comment above on "... second time...")
If all is properly aligned, the door should swing completely shut.
Even with the mistakes that required removing the door to lubricate the cams, and removing it AGAIN to readjust the screws on the top to properly align the door on the cams, this was a twenty minute job. My wife and I were still speaking to one another at the end of it- a sure sign of an easy repair.
Parts Used:
-
Russ from Asheville, NC
-
Difficulty Level:Easy
-
Total Repair Time:15 - 30 mins
-
Tools:Nutdriver, Screw drivers
79 of 84 people
found this instruction helpful.
Was this instruction helpful to you?
Thank you for voting!
Ice maker would not turn allowing the ice to come out the dispenser. The ice bucket was also cracked from kids (ok and parents) getting frustrated and shaking the ice bucket!
Piece of cake!
Removed the old ice bucket which was cracked and ice would not dispense. The Helix Cap also looked worn which is why I ordered both parts. (Probably if not for the shaking of the ice bucket the Helix cap would have been the only part required. We ended up cracking the ice bucket) Removed the four hex screws from the auger system on the old ice bucket with a socket wrench. Removed the old Helix end cap from the auger system and replaced with the new. Literally just slips on the auger. Reinstalled auger system back onto the new ice bucket. Total time not even five minutes.
Working great! Probably saved $ 75.00 - $ 100.00 on a service call. Half of a wrench on skill level needed (One=Low skill level/ Five=High skill level)
Great response & delivery from Parts Select!
Definitely recommend highly.
Todd
Lancaster-PA
Parts Used:


-
Todd from Lancaster, PA
-
Difficulty Level:Really Easy
-
Total Repair Time:Less than 15 mins
-
Tools:Socket set
50 of 56 people
found this instruction helpful.
Was this instruction helpful to you?
Thank you for voting!