91141489995 Kenmore Microwave Oven Combo - Overview

Sections of the 91141489995

[Viewing 7 of 7]

Manuals & Care Guides for 91141489995

Click to download
Keep searches simple, eg. "belt" or "pump".
Microwave Fuse – Part Number: WB27X10928
Microwave Fuse
★★★★★
★★★★★
(1)
PartSelect #: PS1481237
Manufacturer #: WB27X10928
This ceramic microwave fuse is just over an inch in length. It is white in the center, and metal on both ends. This is a 20-amp fuse, and is used to power your microwave. If the touch pad on the micro...
$25.31
  Special Order
Oven Sensor – Part Number: WB23T10015
Oven Sensor
★★★★★
★★★★★
(13)
PartSelect #: PS236398
Manufacturer #: WB23T10015
This temperature sensor detects the temperature within the oven cavity.
$63.84
  Special Order
Oven Rack – Part Number: WB48T10095
Oven Rack
★★★★★
★★★★★
(6)
PartSelect #: PS6447646
Manufacturer #: WB48T10095
This single chrome oven rack provides a reliable flat cooking surface for your cookware inside of the oven cavity. The oven rack is made of metal and measures approximately 24” wide by 17 1/2” deep. T...
$90.54
  Special Order
Screw – Part Number: WB1K5157
Screw
PartSelect #: PS234226
Manufacturer #: WB1K5157
This screw is black in color and sold individually.
$13.95
  Special Order
Oven Bulb Lens Cover - Glass – Part Number: WB25T10002
Oven Bulb Lens Cover - Glass
★★★★★
★★★★★
(3)
PartSelect #: PS237483
Manufacturer #: WB25T10002
This part is the replacement oven bulb lens cover. It is made of glass and is approximately 3 inches in diameter. The lens cover is rigid and protects the oven light bulb from being damaged. The main ...
$35.79
  Special Order
Oven Light Housing – Part Number: WB08T10002
Oven Light Housing
★★★★★
★★★★★
(1)
PartSelect #: PS230438
Manufacturer #: WB08T10002
Must buy bulb locally as per manufacturer.
$75.57
  Special Order
Switch – Part Number: WB24T10147
Switch
★★★★★
★★★★★
(1)
PartSelect #: PS1765837
Manufacturer #: WB24T10147
This light switch is controlled by opening and closing the oven door
$39.71
  Special Order
Bake Element - 3400W – Part Number: WB44T10018
Bake Element - 3400W
PartSelect #: PS249293
Manufacturer #: WB44T10018
This bake element is found on the bottom of the oven.
$152.86
  Special Order
Broil Element – Part Number: WB44T10043
Broil Element
★★★★★
★★★★★
(1)
PartSelect #: PS754418
Manufacturer #: WB44T10043
This broil element is found on the roof of the oven.
$144.43
  Special Order
Range Screw – Part Number: WB01T10008
Range Screw
PartSelect #: PS222157
Manufacturer #: WB01T10008
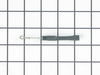
This part is a replacement screw for your oven. It is made of black metal and is sold individually. This screw is approximately 1/4 inch in diameter and about 1/2 inch in length. It is designed to con...
$13.95
  Special Order
Door Pad – Part Number: WB01T10026
Door Pad
PartSelect #: PS222173
Manufacturer #: WB01T10026
This is the door pad only. The trim is sold separately.
$13.95
  Special Order
Upper Cooling Fan Motor with Blade – Part Number: WB26K5061
Upper Cooling Fan Motor with Blade
PartSelect #: PS237580
Manufacturer #: WB26K5061
Are you looking for a replacement part for your oven or range that delivers effective and reliable performance? Well, this Upper Cooling Fan Motor with Blade is your solution! A genuine, direct compon...
$220.05
  Special Order

Questions And Answers for 91141489995

Be the first to ask our experts a question about this model!

Common Symptoms of the 91141489995

[Viewing 9 of 9]
No heat
Fixed by
these parts
Fixing Fixing
Show All
Won’t turn on
Fixed by
these parts
Fixing
Show All
Little to no heat when baking
Fixed by
these parts
Fixing Fixing
Show All
Element will not heat
Fixed by
these parts
Fixing Fixing Fixing
Show All
Touchpad does not respond
Fixed by
these parts
Fixing
Show All
Oven not heating evenly
Fixed by
these parts
Fixing Fixing
Show All
Little to no heat when broiling
Fixed by
these parts
Fixing
Show All
Oven is too hot
Fixed by
these parts
Fixing
Show All
Will Not Start
Fixed by
these parts
Fixing
Show All
Keep searches simple. Use keywords, e.g. "leaking", "pump", "broken" or "fit".
Microwave completely stopped working
Turned out the issue was easily solved by replacing a single, inexpensive fuse.

First off, UNPLUG THE MICROWAVE.

The fuse is located under the plastic grill at the top of the microwave. It's held on by two screws. Once you've removed the screws and taken off the plastic grill, you go to the right side of the microwave and remove another screw that holds a small metal grill in place. Removing the small metal grill is probably the toughest part of this repair. You kind of have to rock it back and forth a bit to get it to release. Once that's off, you can get to the fuse. I removed the burnt out one with a pair of needle nose pliers. I also put a small piece of cardboard under the fuse when I did this so I didn't accidentally drop it into the innards of the microwave. I did the same thing when I replaced the new fuse. I then plugged the appliance back in and made sure it worked. Once that was confirmed, I replaced both grills.
Parts Used:
Microwave Fuse
  • Kim from Cliffside Park, NJ
  • Difficulty Level:
    Really Easy
  • Total Repair Time:
    15 - 30 mins
  • Tools:
    Screw drivers
964 of 1257 people found this instruction helpful.
Was this instruction helpful to you?
Thank you for voting!
Broken element
First, disconnect the power from the electrical box, not just turn off that oven. specially if you have a double oven. Just turn one off is not enough.

I removed the two screws that hold the element in place. I then pulled the element out slowly about 2 inches to expose the connectors, and then disconnected the two wires by holding the wire (female) connector by one plier and pull the element (male) connector out with another plier. Then, insert the new element connectors, and push the wire back into wall then fasten the element with 2 screws.
Parts Used:
Bake Element - 3400W
  • Yungti from Tomball, TX
  • Difficulty Level:
    Easy
  • Total Repair Time:
    15 - 30 mins
  • Tools:
    Nutdriver, Pliers
51 of 55 people found this instruction helpful.
Was this instruction helpful to you?
Thank you for voting!
Oven was not coming up to temperature
I had to remove the oven from the wall because the sensor plug connction is behind the unit. Two screws hold the sensor inside the oven and then I disconnected the lead and pulled the sensor out from the front. I installed the new sensor, tightened the two screws holding it in and connected the lead. Then reinstalled the oven into the wall. Overall, a very easy repair once you get the oven out.
Parts Used:
Oven Sensor
  • Sean from Highlands Ranch, CO
  • Difficulty Level:
    Really Easy
  • Total Repair Time:
    15 - 30 mins
  • Tools:
    Nutdriver, Screw drivers
56 of 75 people found this instruction helpful.
Was this instruction helpful to you?
Thank you for voting!