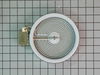
The 6” radiant cooking element with limiter fits under the glass cooktop and supplies heat to the cooking area. If your element is not heating, you can test the element for continuity with a multimete...
Having trouble with your stove or oven's light indicator? Don't fret - we have a solution for you. Our Frigidaire Range Light Lens Indicator, ideal for select Frigidaire, Electrolux, White Westinghous...
Introducing the Frigidaire Light Indicator, an authentic OEM part designed specifically for your cooking needs. This part plays a crucial safety role - it lights up to let you know when the oven or bu...
This radiant burner element delivers powerful, even heat for your cooktop, ensuring fast and efficient cooking. Measuring 9 inches and rated at 3200 watts, it is ideal for replacing a worn or malfunct...
PF alarm appeared on display. Noticed clicking when cord was moved. Had arced for some time and melted original block. New part slightly different. Only has 3 lugs, old one had six. Stack using washers provided. Take note of colors before disassembly. Use caution while working through access opening. The edges are sharp. Only tools needed are phillips screwdriver, deep socket for lug nuts. Nut driver optional. Hope this is helpful.
First we removed two screws under the rim of the range top to open the lid. Lifted the lid and removed the screws from the bracket that holds the elements, Be careful with the clips that hold the element in, if you break them or bend them there aren't any more! Also note which holes they were in, they are marked according to the different sizes of elements. Disconnected the wires, needed needlenose pliers to grip them...connected new element, popped it back in place, replaced bracket, closed top ...Easy peasy!!!
This was the first time replacing the fan. It is a lot easier to work in the oven compartment with the oven door removed, only two screws on the door and the hinges were released. I found that a couple of the screws were either rusted or stripped so I used a pair of pliers to remove the screws that were holding the diffuser in place. Once there was access to the fan I found that the fan was warped and that the blades were scraping against the back wall of the oven. The next challenge was to remove the retaining nut. I used a sheet metal screw to secure the warped fan to keep it from spinning. once I figured out that you have to turn the retaining nut to the right to loosen, it came off easily. 1/2" socket with extension. When I replace the fan I used two washers for spacers to make sure that the fan would not scrape the wall of the oven. Its been tested many times and the oven does not make that horrible sound anymore.