The coil burner element is eight inches in diameter. It has four turns, 220 volts and looped terminal ends. The coil burner element provides heat to the cooking surface on your range. You might need t...
Sold individually. This part is sold individually. This is a part for your stove top. The surface element is what your cookware sits on. The element supplies heat at varying temperatures. This may nee...
If your oven isn’t heating properly when broiling or baking, this top-mounted heating element might be the fix you need. It sits at the very top inside your oven and gives off strong, direct heat—perf...
Designed to maintain a tight seal around your oven door, this gasket helps prevent heat loss during baking and roasting. It plays a key role in keeping the oven’s internal temperature stable, which is...
This 18 ml bottle of white appliance touch up paint is a little over two inches tall. It can be used for refrigerators, microwaves, ranges, clothes dryers, and freezers.
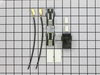
PF alarm appeared on display. Noticed clicking when cord was moved. Had arced for some time and melted original block. New part slightly different. Only has 3 lugs, old one had six. Stack using washers provided. Take note of colors before disassembly. Use caution while working through access opening. The edges are sharp. Only tools needed are phillips screwdriver, deep socket for lug nuts. Nut driver optional. Hope this is helpful.
Ever since we moved to this house I had used generic or standard drip pans found in any store. Needles to say they never fit properly so I always ended up with some burners tilting so my food would not cook evenly Until I decided to search for stove specific drip pans and this is how I bumped into your site. I am so happy now I can use all four burners at the same time if I wanted to, and my food cooks evenly since the burners are not tilting.
I disconnected power cord. Removed cooking racks. Removed element mounting screws. Removed back panel and removed wires on both ends. Pulled element out put new one in and bolted down. Reconnected wires. Put rear cover on. Plugged in and checked for correct opreation. OK!