79-678R1 Frigidaire Refrigerator - Overview

Sections of the 79-678R1

[Viewing 1 of 1]
Keep searches simple, eg. "belt" or "pump".
Evaporator Fan Blade – Part Number: 5308000010
Evaporator Fan Blade
★★★★★
★★★★★
(3)
PartSelect #: PS473177
Manufacturer #: 5308000010
$67.38
  In Stock
Ice Cube Tray – Part Number: 215667501
Ice Cube Tray
PartSelect #: PS423293
Manufacturer #: 215667501
Sold individually.
$15.17
  In Stock
Levelling Leg – Part Number: 131527400
Levelling Leg
PartSelect #: PS418072
Manufacturer #: 131527400
Sold individually.
  No Longer Available
Egg Tray – Part Number: 215817806
Egg Tray
PartSelect #: PS423761
Manufacturer #: 215817806
This is used to hold eggs in your refrigerator.
$26.58
  Special Order
2 Pack Light Bulb - 40W – Part Number: 5304490731
2 Pack Light Bulb - 40W
PartSelect #: PS8760365
Manufacturer #: 5304490731
$38.00
  On Order
GLIDE N
GLIDE N' GUARD
PartSelect #: PS479689
Manufacturer #: 93001
  No Longer Available
Single Outler Water Valve Kit – Part Number: 5303917098
Single Outler Water Valve Kit
PartSelect #: PS468507
Manufacturer #: 5303917098
This water vavle kit comes with a single outlet water valve, union, two screws, and some tubing pieces.
$78.04
  Special Order
REF Stainless Steel INST C6 WATE – Part Number: 5304490728
REF Stainless Steel INST C6 WATE
PartSelect #: PS8760363
Manufacturer #: 5304490728
$47.04
  In Stock
Petrogel Lubricant – Part Number: 5303321429
Petrogel Lubricant
PartSelect #: PS467325
Manufacturer #: 5303321429
  No Longer Available
20-Inch Copper Water Line Kit – Part Number: 5304490717
20-Inch Copper Water Line Kit
PartSelect #: PS9493924
Manufacturer #: 5304490717
$49.62
  Special Order
DISCONTINUED – Part Number: 5300186907
DISCONTINUED
PartSelect #: PS450560
Manufacturer #: 5300186907
  No Longer Available
Cleaning Brush – Part Number: L304433062
Cleaning Brush
PartSelect #: PS3412252
Manufacturer #: L304433062
This condenser coil brush is useful for cleaning refrigerator condenser coils and dryer venting systems.
$28.56
  Special Order

Questions And Answers for 79-678R1

Be the first to ask our experts a question about this model!

Common Symptoms of the 79-678R1

[Viewing 4 of 4]
Noisy
Fixed by
these parts
Fixing
Show All
Ice maker not making ice
Fixed by
these parts
Fixing
Show All
Fridge too warm
Fixed by
these parts
Fixing
Show All
Leaking
Fixed by
these parts
Fixing
Show All
Keep searches simple. Use keywords, e.g. "leaking", "pump", "broken" or "fit".
Icemaker Wasnt Making Ice
After unplugging electric cord and turning off water at wall, I then removed the two screws that secured the valve to the refrigerator. I then removed the water connections to the valve and removed a short portion of the hose going to the icemaker. I then installed the connection pieces provided package and reversed the procedures to install the new part. It was easier than I thought it would be.
Parts Used:
Single Outler Water Valve Kit
  • ERIC from SAN ANTONIO, TX
  • Difficulty Level:
    Really Easy
  • Total Repair Time:
    15 - 30 mins
  • Tools:
    Nutdriver, Pliers
12 of 16 people found this instruction helpful.
Was this instruction helpful to you?
Thank you for voting!
ice maker did not work.
I pulled the cover from back of fridge then removed two screws from the water valve disconected the wires and removed water lines. had to reroute water lines so the universal part would fit. don't forget to turn off the water befor doing the above. found new mounting hole and reconected water lines. worked like a champ.
Parts Used:
Single Outler Water Valve Kit
  • LARRY from HANOVER, MD
  • Difficulty Level:
    Easy
  • Total Repair Time:
    15 - 30 mins
  • Tools:
    Nutdriver
6 of 7 people found this instruction helpful.
Was this instruction helpful to you?
Thank you for voting!
I had a broken fan blade due to ice build up from a leaking ice maker.
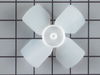
1. I took out one screw on the ice maker and loosened the other two screws and unplugged and removed the ice maker.
2. Next I took out 2 screws from the bottom of the auger drive box and unplugged the wiring harness and removed the box. The wiring harness was a little tricky. The lock on the plug pushes in to unlock even though it looks like it pulls out,.
3.next you must remove 2 screws from the left side bracket that holds the auger box and remove the bracket.
4.Now take out 8 screws that hold the back panel in place and remove the back panel.
5. now your looking at the evaporator fan blade and motor. The simple way to replace the fan blade is to unplug the motor and remove it from the freezer. It just sits in with nothing holding it. The fan requires a little pressure but should pull right off. Install new fan blade and put everything back in the same order it was removed.
Parts Used:
Evaporator Fan Blade
  • gary from ARANSAS PASS, TX
  • Difficulty Level:
    Easy
  • Total Repair Time:
    30 - 60 mins
  • Tools:
    Nutdriver
5 of 7 people found this instruction helpful.
Was this instruction helpful to you?
Thank you for voting!