Need a new spot for your silverware in the dishwasher? This updated flatware basket is just what you need. It holds forks, spoons, and other small items securely so they get cleaned properly. The look...
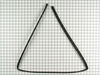
The rack track stop on your dishwasher is designed to stop the dish rack at the appropriate place when opening and closing the rack. If your dishwasher is not cleaning your dishes properly, the rack s...
If your dishwasher isn’t filling with water or is leaking, the water inlet valve might be the problem. This part controls how much water flows into the machine during each cycle, helping it clean prop...
Sold individually. This part secures the upper side of the dishwasher to the underside of the counter or cabinet to prevent the dishwasher from moving, shaking, or tilting forward.
This manufacturer-certified heating element is used to create heat during the dry cycle and increase water temperature during portions of the wash cycle when certain options are selected. If your dish...
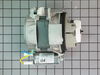
This drain pump is used in dishwashers to remove water from the dishwasher tub. If the impeller in the dishwasher is damaged or the motor has been shorted out and will not drain, it is possible the bo...
This rinse aid dispenser cap is a precision-molded component designed to seal the rinse aid compartment within compatible dishwashers. Constructed from durable, blue-colored plastic and equipped with ...
This part is used as a safety device to protect the dishwasher circuit from overload. If the temperature gets to high it will shut off the electrical current to the heating unit in the appliance. Als...
This is also called the 3rd-level spinner. This part works like a little spray arm at the top of your dishwasher.
$37.43
In Stock
Questions And Answers for 66513732K600
We're sorry, but our Q&A experts are temporarily unavailable.
Please check back later if you still haven't found the answer you need.
2 questions answered by our experts.
< Prev
1
Next >
Sort by:
Search filter:
Clear Filter
Your search term must have 3 or more characters.
Keep searches simple. Use keywords, e.g. "leaking", "pump", "broken" or "fit".
Sorry, we couldn't find any existing answers that matched.Try using some different or simpler keywords, or submit your new question by using the "Ask a Question" button above!
Michael
September 14, 2023
The dishwasher will begin a cycle and after the about 30 to 40 minutes the Clean light flashes. I correct this code and start over, however the wash cycle chosen will go over the average time by 60 minutes. The cycle sounds to be ending but on its own the machine will start the cycle all over again.
Your site suggested that the heating element could be at fault. I can check again but I got 10 ohms when I tested it.
For reference, incoming water is 130 degrees, always has been, and we never use the heated dry option.
Thoughts??
For model number 66513732K600
Hi Michael, thank you for reaching out. It seems the issue is with the turbidity sensor, part number PS11757214. You may need to replace the turbidity sensor to fix the issue. We hope this solves your problem!
Greetings. My washer starts making and loud sounds right after it fills and starts washing. It makes this sound for the majority of the rest of the time, occasionally pausing and then starting again. You can hear it here: https://photos.app.goo.gl/R5nPbaQvmffsDq2q9
Do you think this is the water inlet, washer pump, or something else?
Thank you
For model number Kenmore 66513732k600
Hello Matthew, thank you for the question. According to the description of the issue, you will need to replace the pump assembly, part number PS11757411, to fix the issue. The motor that moves water through the spray arms may be jammed or failing. Also, check for debris in the sump. We hope this is what you were looking for!
Caviat: The actual repair is less than 15 minutes, but I spent a lot of time playing with it before I figured out it was that easy and fast. You don't need to remove the dishwasher from the counter to do this. And it will probably help to look at the new part closely so you can understand where the retainer clip is to press it and release the old pump.
First remove the water from the dishwasher pan that would not drain with a wet/dry vac. Otherwise the water will all drain on the floor when you remove the pump. Then remove the two screws on the kickplate on the front of the unit below the door. Remove the kickplate/maintainence access cover. The drain pump is on the right about 8 inches in. Using two hands you grasp the drain pump with your right hand and use the left hand to push the retaining clip down. Then the drain pump will rotate 1/4 turn counterclockwise and can be removed without pulling the dishwasher out. There is likely to be some water leak out that was traped in the pump housing that you can not reach with the vac. Disconnect the wire. Connect the wire to the new pump, put it in place and 1/4 turn clockwise to install it. Replace the kickplate and you're done.
1) Remove top and bottom dish baskets from the dishwasher, this will give you room to work. To remove top basket there are clips at the end of the slide rails. 2) Remove lower spray arm by unscrewing plastic screw, it should only be hand tight. 3) In order to remove the strainer cover, you will need to remove the plastic tube that takes water to the middle and top spray arms. Unclip this tube from the top and middle clips and then work it out of the strainer assembly tube. Now you should be able to remove the tube at the bottom of the dishwasher by unscrewing it 1/4 turn. 4) Remove the strainer cover by unscrewing the 4 Torqs screws. 5) You will now see two smaller torqs screws that hold the hold the Chopper Assembly cover down. Take these two screws out and remove the two piece cover. 6) Pull out the broken Chopper Assembly, make sure you get all the pieces! 7) Install the new Chopper Assembly. Make sure that you install the Assembly with the small part of the screen towards the bottom of the housing. Also make sure you compress the spring as you install the part. I used a small pair of neddle nose pliers to compress the spring behind the screen in order to install the chopper assembly. 8) Put everything back together and make sure it works!