


66513222N414 Kenmore Dishwasher - Overview
Sections of the 66513222N414
[Viewing 4 of 4]
Keep searches simple, eg. "belt" or "pump".

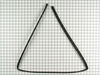
Door Balance Link Kit
PartSelect #: PS972325
Manufacturer #: 8194001
The door balance kit helps support the dishwasher door. This kit includes 2 door balance links and 2 door balance mounts with wheels.
$41.99
In Stock
Order within the next 10 hrs and your part ships today!

Dishwasher Mounting Bracket
PartSelect #: PS11745496
Manufacturer #: WP8269145
Sold individually. This part secures the upper side of the dishwasher to the underside of the counter or cabinet to prevent the dishwasher from moving, shaking, or tilting forward.
$18.59
In Stock
Order within the next 10 hrs and your part ships today!

Dishwasher Door Seal
PartSelect #: PS12348515
Manufacturer #: W11177741
Prevent leaks and maintain optimal cleaning performance with this durable dishwasher door seal. It creates a secure barrier to keep water contained during wash cycles, ensuring reliable operation. Rep...
$75.04
In Stock
Order within the next 10 hrs and your part ships today!

Dishwasher Heating Element
PartSelect #: PS9494999
Manufacturer #: W10703867
This dishwasher heating element is a genuine replacement component designed for select models from Whirlpool, KitchenAid, Maytag, Kenmore, and affiliated brands. Constructed from a durable nickel-chro...
$100.99
In Stock
Order within the next 10 hrs and your part ships today!

Dishwasher INLET VALVE
PartSelect #: PS12578165
Manufacturer #: W11175771
This water inlet valve should be located behind the lower kick plate panel in either the right or left corner. The attaching solenoids on the valve open and close according to the desired amount of water needed.
$81.15
In Stock
Order within the next 10 hrs and your part ships today!

Dishwasher Retainer Clip
PartSelect #: PS11755736
Manufacturer #: WPW10503548
This part is used to hold the access panel in place. Sold individually.
$26.50
In Stock
Order within the next 10 hrs and your part ships today!

Dishwasher Retainer Clip
PartSelect #: PS11755737
Manufacturer #: WPW10503549
This part is used to hold the access panel in place. Sold individually.
$9.39
In Stock
Order within the next 10 hrs and your part ships today!

Seal
PartSelect #: PS11731683
Manufacturer #: W10864081
This seal is attached to the inner cabinet to reduce noise.
$81.32
In Stock
Order within the next 10 hrs and your part ships today!

Door Seal Lower
PartSelect #: PS11766757
Manufacturer #: W10909089
The lower door seal prevents water leaks by sealing the gap between the dishwasher door and tub. Suitable for select Whirlpool and related brands, it’s ideal for restoring leak-free operation. Ensure ...
$76.02
In Stock
Order within the next 10 hrs and your part ships today!

Dishwasher Drain Hose
PartSelect #: PS11756139
Manufacturer #: WPW10545278
This part is used to drain water from your dishwasher.
$83.00
In Stock
Order within the next 10 hrs and your part ships today!

Dishwasher Door Spring
PartSelect #: PS11745526
Manufacturer #: WP8270020
This dishwasher door spring is sold individually. It is recommended if you are replacing one side, to replace both.
$34.54
In Stock
Order within the next 10 hrs and your part ships today!

Dishwasher Upper Wheel Gasket
PartSelect #: PS11747067
Manufacturer #: WP9743002
Sold individually.
$15.01
In Stock
Order within the next 10 hrs and your part ships today!
Questions And Answers for 66513222N414
We're sorry, but our Q&A experts are temporarily unavailable.
Please check back later if you still haven't found the answer you need.
- < Prev
- 1
- Next >
Sort by:
Search filter:
Clear Filter
Your search term must have 3 or more characters.
Keep searches simple. Use keywords, e.g. "leaking", "pump", "broken" or "fit".
Sorry, we couldn't find any existing answers that matched.Try using some different or simpler keywords, or submit your new question by using the "Ask a Question" button above!
Tina
August 25, 2023
I need the plastic part that snaps into the upper rack rollers. 2 of the fingers have broken off
For model number 66513222N414

Hi Tina, thank you for getting in touch. The part you are looking for is not available separately but comes in an assembly with the upper rack adjuster kit, part number PS10065979. Let us know if you have further questions!
2 people found this helpful.
Was this helpful?
Thank you for voting!
Related Parts:
Upper Rack Adjuster Kit - White Wheels, Left and Right Sides


$66.53
In Stock
Clint
January 31, 2025
I NEED A BASKET FOR MODEL NUMBER 665-13222NN14
For model number 66513222N414
Hello Clint, Thank you for contacting us. Checking your model, we show the compatible upper rack as part# PS11753469, the compatible lower rack as part# PS16543613, and the silverware basket as part# PS11749679. We hope this helps you.
Was this helpful?
Thank you for voting!
Related Parts:
Dishwasher Upper Dishrack

$338.55
In Stock
Joanne
April 12, 2025
I need the white wheels that the upper rails have to keep the rack from falling.
For model number 66513222N414
Hi JoAnne, thank you for reaching out. The white wheels for your model comes with the upper rack adjuster kit, part number PS10065979. They do not come separately. We hope that helps!
Was this helpful?
Thank you for voting!
Related Parts:
Upper Rack Adjuster Kit - White Wheels, Left and Right Sides
$66.53
In Stock
Aaron
March 9, 2023
I’m looking for rollers for the upper tray. Can you tell me part number so I can replace mine
For model number 66513222N414
Hello Aaron, thank you for contacting us. The roller, part number PS11748145, works with your model. We hope this is what you were looking for!
Was this helpful?
Thank you for voting!
Related Parts:
Tub Wheel

$67.67
In Stock
Alexandra
April 18, 2023
I need an upper rack. Mine fell apart.
For model number 66513222N414
Hello Alexandra, thank you for your inquiry. The part you are looking for is the upper rack, part number PS11753469. We hope this is helpful!
Was this helpful?
Thank you for voting!
Related Parts:
Dishwasher Upper Dishrack
$338.55
In Stock
- < Prev
- 1
- Next >
Common Symptoms of the 66513222N414
[Viewing 10 of 10]Leaking
Fixed by
these parts
these parts


Show All
Door latch failure
Fixed by
these parts
these parts


Show All
Door won’t close
Fixed by
these parts
these parts
Show All
Not drying dishes properly
Fixed by
these parts
these parts


Show All
Will not fill with water
Fixed by
these parts
these parts


Show All
Not cleaning dishes properly
Fixed by
these parts
these parts
Show All
Noisy
Fixed by
these parts
these parts

Show All
Not draining
Fixed by
these parts
these parts

Show All
Will not dispense detergent
Fixed by
these parts
these parts

Show All
Will Not Start
Fixed by
these parts
these parts
Show All


Keep searches simple. Use keywords, e.g. "leaking", "pump", "broken" or "fit".
Replaced Hinge Link
Pulled dishwasher from under counter, attached link to spring, hooked spring back into frame/chassis, threaded link through pulleys, attached other end of link onto door, reinstalled dishwasher under counter. All's well. Note-I purchased an extra link anticipating that the other one will fail. They're cheap enough.
Parts Used:
-
Scott from Fort Lauderdale, FL
-
Difficulty Level:Easy
-
Total Repair Time:Less than 15 mins
-
Tools:Screw drivers
636 of 685 people
found this instruction helpful.
Was this instruction helpful to you?
Thank you for voting!
Door spring link broken
1. Open the dishwasher and remove the two plastic grommets about halfway down on either side of the opening. Then remove the two screws under the grommets.
2. Remove the kick plate under the door. May have to lower unit by turning the feet using the adjustable wrench.
3. Make sure you have enough slack in the water input line and electrical wiring that you can pull the dishwasher out about 12 inches or more.
4. There is a spring and nylon rope link on both sides of the unit. Probably just one link is broken, but the replacement comes with two, so you can replace both or save one as a spare. Look at the good side and it should be pretty self explanatory how it attaches. I found it easiest to first thread the link around the lower pulley, then attach the link to the spring, then spring to the rear support, then the link to the door.
5. Reverse (2 to 1) to reinstall the dishwasher.
Parts Used:
-
Sean from Ramona, CA
-
Difficulty Level:Easy
-
Total Repair Time:15 - 30 mins
-
Tools:Screw drivers, Wrench (Adjustable)
157 of 196 people
found this instruction helpful.
Was this instruction helpful to you?
Thank you for voting!
The door would drop open when it was released
This was the second time I had this problem so I knew the symptoms and remedy. The tools needed were two nut drivers a ¼” and 5/16” along with a flat pry bar and Phillips screw driver. I started by removing the lower front panel by removing the two ¼” screws on either side. The lower panel will lift up and then can be removed by pulling on the bottom. There is a flat sheet metal piece behind the front panel with insulation that can be removed very easily along with the front panel. When the front panel is removed it exposes the front legs that may need to be dropped to let you lift the dishwasher over the tile (if you have ceramic tiles). The next step would be to remove any ties to the counter top if it is attached. Mine were attached by the two straps on either side with Phillips screws. After the top is free, lower the front legs by lifting the dishwasher with the flat pry bar and threading the legs up into their holders. With the legs lifted the dishwasher can be pulled out to expose the tension springs located along the sides at the very bottom. Chances are the ropes are broken off the plastic holders that fit over the door hooks.
Remove the plastic guides by removing the 5/16” nut from the middle of the lower roller. Remember to note which hole the screw is coming from this also sets the tension for how fast or slowly the door drops. Placing the nut closer to the front will drop the door slowly and toward the back will drop the door more quickly. I placed mine in the middle hole. When the plastic guides are removed attach the nylon pope to the spring and attach to the back of the dishwasher. There is a hole located on a flat piece of sheet metal the spring will attach to at the back of the dishwasher (if it is broken). Check the other side if it is still in tact. With the spring in place weave the rope around the plastic guides then pull the springs to help get the plastic end over the door hook located at the bottom of the door. Repeat this operation for the other side (kit has a both sides covered) and reinstall dishwasher in cabinet.
Steps
1) Remove front panel (1/4” nut)
2) Release Dishwasher from Cabinet
3) Lower front legs
4) Pull Dishwasher out from under Cabinet
5) Remove Rope Guide (5/16” nut)
6) Install new Rope Guide (Supplied in Kit)
7) Attach new rope to Spring and attach spring to dishwasher
8) Weave rope through rope guide
9) With door closed pull spring to relieve tension so rope can be attached to door
10) Repeat for other side (Kit has both sides)
Parts Used:
-
David from La Quinta, CA
-
Difficulty Level:Easy
-
Total Repair Time:30 - 60 mins
-
Tools:Nutdriver
125 of 147 people
found this instruction helpful.
Was this instruction helpful to you?
Thank you for voting!