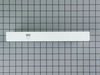
This center crisper drawer rail supports the edges of refrigerator crisper drawers, ensuring smooth sliding and proper alignment. At 13.5 inches long, it fits between the drawers on the shelf frame. Q...
Sold individually. This crisper drawer is for refrigerators.
Crisper drawer stores fruits and vegetables at a humidity level that helps keep them fresh longer.
This refrigerator crisper drawer frame is a durable white plastic component designed to support the crisper drawer and secure the glass shelf that serves as its lid. Engineered for long-lasting perfor...
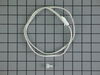
The water inlet valve is a solenoid-operated switch that, when activated, releases water from the supply line to the water valve and into the compact icemaker mold and to the water line.
This is a replacement pan glide for your refrigerator. The pan glide can be found attached to the refrigerator shelf, and allows the pan to slide in and out efficiently. If your refrigerator pan will ...
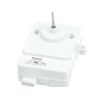
This includes both the run capacitor and the start relay. The capacitor helps the compressor kick on and off while maintaining a constant temperature to keep things frozen in your freezer.
The start ...
Need a simple yet effective fix to help get your Whirlpool refrigerator in order? Look no further than this Door Retaining Shelf designed specifically to bring organization and efficiency back to your...
This is a deli drawer glide for the right side of your refrigerator. It allows the deli drawer to glide in and out smoothly. In order to access your glider, you will have to remove drawer and shelf, a...
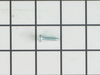
This is a multi-use and multi-appliance screw. It can be used on a microwave, refrigerator, range/oven, air conditioner, dehumidifier, washer, or dryer. The measurements of this screw are 8 x 1/2 inch...
This light switch may also be known as a refrigerator door switch or a light switch kit, and is compatible with your refrigerator. The function of the refrigerator door switch is to turn on the light ...
$37.27
In Stock
Questions And Answers for 59668943800
Be the first to ask our experts a question about this model!
✖
Ask a Question
Ask our experts a question on this model and we'll respond as soon as we can.
This is the 2nd time I have used PartSelect, and this experience was as pleasant as the 1st. The exploded-view diagrams make parts identification very easy; and the photo of the actual part is such a great idea, it allows you to verify what you need. I also got my part (cross country, in 3 days)
Repair Procedure: Shut off water supply. It may be easier to work if you disconnect the water supply tube, but it is not required. On the backside of the refrigerator, remove the bottom, black plastic protection panel. You will need a nut driver or battery-powered screw driver with a 3/8" socket tip on it. Next, remove the black metal panel that holds the water inlet valve in place. Remove screws with a nut driver. 1st remove the two flat-pin power connectors. (They are different sizes and color-coded, so there is no room for making a re-hookup mistake). Then proceed to remove the hoses. The hoses are pressure-lock tubing, so push the plastic disk in or down where the tube goes into the main body of the valve. Do this for all three hoses (tubes). Switch water valves and reverse the procedure. **Be certain that the tubes are pushed back in as far as they can go; if you do not re-seat the tubes, the pressure from the water going back in the valve, will blow the tubes right out the valve (ask me how I know this!). Once reassembled, turn the water back on slowly. Make sure you turn the water supply valve all the way open, it seats itself internally when you do and is less prone to drip leaks. That's it! (As a former kitchen remodeler, I find this a great DIY project).
I used a flat-head screwdriver to pop out the old light rocker switch. Then, I unplugged the wires, plugged them into the new light rocker switch, and then popped the new switch into the hole. That's it! Lights began working again.