This authentic manufacturer-sourced part which is specially designed for use with Craftsman equipment. The ball bearings are generally utilized to reduce the friction between rotating parts. The balls...
This is sold as a set that contains eight washers. These parts attach to the tank and are made out of metal. They are genuine items that are supplied by the original equipment manufacturer for use wit...
This is an authentic Craftsman replacement part, sourced from the original manufacturer for use with air compressors. The special screw is used with several different models of compressors and the app...
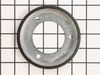
This replacement washer is supplied by the original equipment manufacturer for use with Craftsman equipment. It helps to distribute the pressure evenly and provide a tight seal between the connected p...
During the installation process, a wrench will be needed to replace this part. It may become broken or stripped and will need to be replaced. It is an authentic OEM sourced item which is specially pro...
Ask our experts a question about this model and we'll get back to you as soon as possible!
1 question answered by our experts.
< Prev
1
Next >
Sort by:
Search filter:
Clear Filter
Your search term must have 3 or more characters.
Keep searches simple. Use keywords, e.g. "leaking", "pump", "broken" or "fit".
Sorry, we couldn't find any existing answers that matched.Try using some different or simpler keywords, or submit your new question by using the "Ask a Question" button above!
Ray
January 25, 2022
Only left auger turning? right side does engage. what do I check? Thanks
For model number 536887750
Hi Ray,
Thank you for your question. If only the left side auger is turning, the shear pins may have broken.
The part number listed under your model number for the shear pin spacer sleeve is PS12093398. You may also need the screw, part number PS11979468, and the nut, part number PS10222313. If you would like to place an order for these parts, customer service is open 7 days a week and anyone will be happy to assist you. Please feel free to give us a call. We look forward to hearing from you!
Was this helpful?
Thank you for voting!
< Prev
1
Next >
✖
Ask a Question
Ask our experts a question on this model and we'll respond as soon as we can.
I replaced the auger belt and drive belt by separating the machine. The auger belt alone can be replaced by simply tilting without separating but the drive belt can not. So after separating the machine, I removed the auger belt by loosening the belt guide and removing the tensioner. I then loosened the nut that secures the drive wheel. This gave me enough play to remove the drive belt from the drive tensioner and then wiggle it from the drive wheel and out of the machine. Install by wiggling the belt back behind the drive wheel until you can slip it on the wheel. pull tensioner pulley out of the way to get the belt on the top pulley. Tighten the nut to secure the drive wheel. Reconnect the machine at the bottom of the auger housing and replace the auger belt, tensioner, and belt guide. Complete by replacing the upper bolts that hold the two parts together. I have not replaced the friction wheel as of yet. My process took 30 - 45 minutes for both belts.