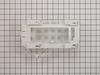
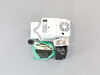
This is a genuine Frigidaire part for your refrigerator. This is an ice maker, which connects to the water lines to provide fresh ice. The most common reason to replace this part is if your refrigerat...
This screw is used in refrigerators. The screw can be loosened or tightened with a Phillips-head or square-head screwdriver. This screw is used to secure the refrigerator handle to the refrigerator do...
This small but important part helps your fridge defrost safely. It keeps an eye on the temperature of the coils and shuts off the heater when things get warm enough. That way, your fridge doesn’t over...
This center flipper door hinge helps seal the gap between refrigerator doors when closed, ensuring proper alignment and maintaining consistent internal temperatures. By improving the seal, it enhances...
Introducing the Frigidaire Crisper Pan Support for the right side ? an essential part of keeping your refrigerator running at its best. This genuine OEM product is intricately designed to create balan...
This air handler housing ensures proper airflow within your appliance, helping maintain consistent cooling performance. Its sturdy design supports efficient operation and prevents overheating.
Is your refrigerator's crisper drawer wobbly or unreliable? The Frigidaire Crisper Pan Support could be the perfect solution. It authenticates OEM (Original Equipment Manufacturer), which means it's s...
This defrost thermostat kit is an essential component for maintaining proper temperature regulation in your refrigerator or freezer. Designed to monitor the evaporator coil temperature, it prevents ov...
Simple three steps... 1) There's an front section to the ice-maker to take off. One Phillips screw is on the side, one screw is underneath near the inside of the refrigerator wall. Just unscrew and store. 2) There's a small plastic unit just inside the ice maker to take out. It's held in by a small nut that requires about a 4" extension to reach. (You may be able to unscrew the nut with small needle-nose pliers). Just unscrew and take out the unit - the unit functions just to keep the ice maker wiring in place. 3) The wiring looks a mess, but there's just one wiring connector to the ice maker assembly. Unsnap it. The ice maker is not screwed in, it just slides in -- reach in and pull the assembly straight out; when it stops, lower it a bit and it will come free. Reverse the instructions to install the new unit.
We replaced the damper, but it didn't fix the problem. We then purchased and replaced the thermistor. (We had previously replaced the defrost thermostat). The refrigerator side is now cooling better, but not enough. The damper doesn't seem to be opening. So we have now unplugged the damper and left the opening between the refrigerator propped open and the refrigerator side is now cool enough. (We had previously tried keeping the damper open before we replaced the thermistor and the refrigerator didn't cool off. So the thermistor did fix something, but the damper doesn't seem to have been the problem).
First: I could not watch any videos. Big downer. Read the reviews and read a post about “three screws”. Opened the freezer and emptied everything in it. Remove the bin. Two screws are on the left side. They go into the side wall. Here’s where things get weird. The plastic “box” holds the “ice making assembly”. That box is attached by FOUR slots. You will need to remove the wire rack below the frame. There’s a plastic spacer on the left side with a slot on it. You can pull it of with your fingers when you rotate it. Slide the rack to the left and pull down the rack from the RIGHT side holes. You have move the box toward you about a inch, then it drops down. Now, there is a electrical connection from the box to the rear of the refrigerator wall. You need a small screwdriver to lift the tab on the TOP of the connector to release it. Once that is done, slide the box forward and put it in the sink. While all this is happening, the freezer is thawing out. Once you remove the box, you will get error codes on the digital display. This is a good thing. There are two “square head’” screws that you have to remove to separate the TWO parts that make the box. Slide the outer trim towards you. The icemaker assembly slides into four slots. You put the new wires in the same place as the one you removed. Put everything back together the opposite of the removal. Now for the secret. All that food you removed? Put it back in until you can slide the box into place. Then you plug the connector in. The box should be sitting on the food. THIS IS THE SECRET. The ice maker has two options. Cubed or Crushed. There are two components that make them happen. On the left side there is a slot with a gray lever the moves up an down. There is an piece of aluminum on the right side the drives the screw in the box. Rotate the screw drive to 45 degrees. THIS IS THE SECRET. On the left side of the box is a rod that is spring loaded and has a bent end. It’s about “timing”. Find a piece of “kite string”. I used the string from the yellow energy tag that came with the fridge. The box is sitting on the frozen food. The wire in the back is connected. Loop the string around the lever AND PULL UP. Slide the whole thing into place using the slots. When it’s in place, let go of the string. Put the two screws back in.
FINAL. You have to PRESS AND HOLD the IceMaker button to reset. You’ll get ice cubes in a couple of hours. Through the first 24 hrs away. You’re welcom.