This plastic freezer door key is designed to operate the lock mechanism on upright and chest freezers, providing secure access to the appliance’s contents. Compatible with a range of models, it helps ...
The run capacitor is attached to the compressor. This part is 120 volts and 15 mfd. The run capacitor helps the compressor kick on and off while maintaining a constant temperature to keep things froze...
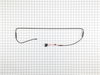
This replacement door gasket forms a tight seal around the perimeter of the freezer door, helping maintain consistent internal temperatures and energy efficiency. By preventing warm air from entering ...
This evaporator fan motor is located in the back of the freezer, and circulates air over the refrigerator coils. These coils will convert the heat into cool air, which is then circulated.
Turned gray knob on defrost timer (located bottom left back of freezer) past defrost position to verify compressor would run...it would not, but fan would run. Tested run capacitor...found borderline defective (weak, wrong value ohm meter kick). Just to be sure, removed interior shelves and interior rear and gasket to check heater at 20 ohms as OK and removed thermostat and verified contact closure after exposure in another freezer....re-installed, hooked heater back up and re-installed interior rear panel. Replaced defrost timer by unplugging 4-pin connector, then removed 2 screws that hold it to the bracket. Installed new one in reverse order. Then removed wire bail holding run capacitor to compressor plug assembly, removed run capacitor, plugged in new one. Turned on freezer......now making ice and holding cold temperature and cycling properly between freeze and defrost modes. Two problems made this repair a bit more difficult. This is the second time that defrost timer has failed...only got 3 years from last one.
I accidently threw away both freezer keys to our upright Gibson and G.E. Freezers!!!! I had no luck finding replacements locally, so I got on the internet and came across PartSelect.com. I called them on the telephone; and after giving the model numbers of my freezers, the keys were on their way!! I received the keys very quickly and both worked perfectly. I would highly recommend Partselect.com. Charlotte M. Bishop
The old gasket was obviously gapping, partially from age and partially from damage during a move. To make the repair, I loosened the screws that are under the gasket and hold it in, but did not remove them. Once all were loose, I removed the old gasket, then starting at the top, ran a thin bead of food grade RTV under the portion of the door that captures the gasket. I put the sealant on that edge only, then carefully worked one of the short edges of the gasket under the plastic and tightened all but the corner screws. I then ran the RTV down the inside of the hinge side of the door and repeated the process, this time tightening the top screw and the hinge side screw at the top, but leaving the bottom most screw loose. I repeated the process on the opening side of the door. The bottom was the hardest because the gasket seemed just a little long and it was hard to get the RTV up and behind the door portion, but after a couple tried I got a good bead of sealant then slid the gasket under the door capture and tightened all the remaining screws. After closing the door, it was obvious that there were places were it did not seal well. I used some cardboard strips, cut from the box the gasket came in, to place inside the freezer, between the hard plastic of the door and the inside of the gasket where it laps over the screws. This helped a lot, but there were still a couple small areas, so I used more cardboard, from the outside, between the main portion of the gasket and the rim of the gasket. This eliminated all the gaps. I let this sit overnight and this morning removed all the cardboard for a great sealing freezer.


 – Part Number: 297309000")