This authentic defrost thermostat is sourced directly from the original equipment manufacturer and is designed for use with Frigidaire freezers. It regulates the internal temperature to ensure the fre...
$38.00
In Stock
Order within the next 12 hrs and your part ships today!
This plastic freezer door key is designed to operate the lock mechanism on upright and chest freezers, providing secure access to the appliance’s contents. Compatible with a range of models, it helps ...
$16.43
In Stock
Order within the next 12 hrs and your part ships today!
This 3.8-watt LED light bulb is designed to illuminate the interior of select refrigerator models, providing bright and efficient lighting when the door is opened. If your current bulb is dim, flicker...
$86.25
In Stock
Order within the next 12 hrs and your part ships today!
This replacement door gasket forms a tight seal around the perimeter of the freezer door, helping maintain consistent internal temperatures and energy efficiency. By preventing warm air from entering ...
$199.59
In Stock
Order within the next 12 hrs and your part ships today!
This small, Phillips-head screw works with your refrigerator/freezer. It screws in to the freezer door and connects to the door handle. This part is made of stainless steel and is sold individually. T...
$32.89
In Stock
Order within the next 12 hrs and your part ships today!
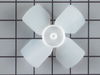
This evaporator fan motor is located in the back of the freezer, and circulates air over the refrigerator coils. These coils will convert the heat into cool air, which is then circulated.
$80.07
In Stock
Order within the next 12 hrs and your part ships today!
If your fridge isn’t cooling like it used to, this run capacitor might be the fix. It helps the compressor motor start and stay running by managing the flow of electricity. A faulty capacitor can lead...
$88.58
In Stock
Order within the next 12 hrs and your part ships today!
Questions And Answers for 25323725101
Be the first to ask our experts a question about this model!
✖
Ask a Question
Ask our experts a question on this model and we'll respond as soon as we can.
I accidently threw away both freezer keys to our upright Gibson and G.E. Freezers!!!! I had no luck finding replacements locally, so I got on the internet and came across PartSelect.com. I called them on the telephone; and after giving the model numbers of my freezers, the keys were on their way!! I received the keys very quickly and both worked perfectly. I would highly recommend Partselect.com. Charlotte M. Bishop
The old gasket was obviously gapping, partially from age and partially from damage during a move. To make the repair, I loosened the screws that are under the gasket and hold it in, but did not remove them. Once all were loose, I removed the old gasket, then starting at the top, ran a thin bead of food grade RTV under the portion of the door that captures the gasket. I put the sealant on that edge only, then carefully worked one of the short edges of the gasket under the plastic and tightened all but the corner screws. I then ran the RTV down the inside of the hinge side of the door and repeated the process, this time tightening the top screw and the hinge side screw at the top, but leaving the bottom most screw loose. I repeated the process on the opening side of the door. The bottom was the hardest because the gasket seemed just a little long and it was hard to get the RTV up and behind the door portion, but after a couple tried I got a good bead of sealant then slid the gasket under the door capture and tightened all the remaining screws. After closing the door, it was obvious that there were places were it did not seal well. I used some cardboard strips, cut from the box the gasket came in, to place inside the freezer, between the hard plastic of the door and the inside of the gasket where it laps over the screws. This helped a lot, but there were still a couple small areas, so I used more cardboard, from the outside, between the main portion of the gasket and the rim of the gasket. This eliminated all the gaps. I let this sit overnight and this morning removed all the cardboard for a great sealing freezer.
After building a test box and determining the Controller was bad simply ordered parts and installed. Installation was a little difficult due to locking spades on electrical connections.
Unplug all power from freezer. Remove Bail wire from controller capacitor unit and remove from compressor by pulling STRAIGHT from compressor body to avoid bending contacts.
Use a very small instrumentation screwdriver to release locking spade on yellow and white wires. To unlock slide screwdriver in slot along wire entry to controller body while gently pulling on wire. Note position of wires and replace on new unit in same position/order. Plug new run capacitor into new controller being careful to orient capacitor to proper position (hole matches guide on controller unit). Plug newly installed controller and capacitor into condensor and replace bail wire.
Make sure timer is not in defrost mode - manually advance timer if necessary to ensure timer is in run mode. Turn temperature control to coldest setting. Plug in and hopefully enjoy the humming noise of your newly repaired and operational compressor and freezer.


 – Part Number: 297309000")