The drum support roller kit (Dryer Repair Kit) allows the dryer to tumble properly by supporting the drum cylinder. The idler pulley provides the tension required for a multi-ribbed belt. The belt att...
This 18 ml bottle of white appliance touch-up paint is used to cover scratches or marks on your appliance. The white touch-up paint can be used on refrigerators, microwaves, ranges, clothes dryers, an...
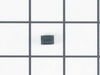
This manufacturer-certified dryer lint filter is used to collect lint during the dryer cycle, to prevent damage to the machine and to prevent lint from sticking to clothes. This model comes in white a...
This white dryer drying rack is designed to fit securely inside the drum of select dryers, allowing delicate items such as shoes and sweaters to dry without tumbling. It remains stationary while the d...
Meet the Whirlpool Relay-PTS, also known as the Push-to-Start switch. Designed for reliability and optimal performance, this genuine part is just what you need to breathe new life into your clothes dr...
We're sorry, but our Q&A experts are temporarily unavailable.
Please check back later if you still haven't found the answer you need.
1 question answered by our experts.
< Prev
1
Next >
Sort by:
Search filter:
Clear Filter
Your search term must have 3 or more characters.
Keep searches simple. Use keywords, e.g. "leaking", "pump", "broken" or "fit".
Sorry, we couldn't find any existing answers that matched.Try using some different or simpler keywords, or submit your new question by using the "Ask a Question" button above!
William
April 29, 2023
Drum seems loose. Rollers need replaced?
For model number 110C60222511
Hi William, thank you for reaching out. Based on the description that you have provided, we would recommend replacing the rear drum support roller kit, part number PS347627, to fix this issue. We hope this solves your problem!
Grow a second set of hands. Always unplug any appliance. Remove lint screen. remove two screws (philips Head). I took a wooden shim lightly tapped w/hammer to pop front of dryer top free. Mine worked on hinges and just flipped back til it rested against the wall. Removed two 5/16 screws inside holding face on carefully raise face section off the support clips at either side on the bottom. Pull drum out (I have the large style drum commercial size [approx.). Clean the inside free of all lint (known to be fire hazard). Sling new belt around drum. Get newly grown set of hands to hold drum in place. Pinch belt to fit between tensioner, lift tensioner and place belt around motor pulley. Spin drum couple times to make certain belt isn't twisted. Reverse dismantle proccess to put back together. Replace all parts that come with kit, you'll feel better knowing you got a new dryer, almost.
1st Unpluged power. 2nd removed two screws under lint screen cover. 3rd poped up lid with flathead screwdryer, then removed (2) 5/16 screws from door cover and unpluged lid switch, lifted up dryer door pannel 4th removed drum 5th took out plastic triangle wheel rings 6th removed old belt guild (to motor pully) 7th removed old wheels and plastic rings stops 8th cleaned excessive hair dust with shopvac 9th put new replaicment part in dryer. made sure to turn manually to make sure belt was lined up properly, then put all dryer peices back. 10th aditional work, took back cover off and removed the (4) 1/4 screws for lint screen case (left side in dryer) vacumed out any excessive dirt lint ect, also cleaned any excessive dust I found in back of dryer, dryer , exhaust ect, and put all back together. JUst like a new dryer aain after all PM was complete.
super fast shipping, got the part in two days, and had it done in 15-20 min, remove the front pannel, remove the belt and tenssioner,took the drum out , took the old rollers , lubed the shafts,replaced the old rollers with the new ones, intalled the drum back, the tenssioner and the new belt, reinstalled the front pannel, and done...easy and fast job, like new dryer, works nice...save some money...the new one will do the same..just dry the clothes.


 Diagram and Parts List for Kenmore Dryer")