This 18 ml bottle of white appliance touch-up paint is used to cover scratches or marks on your appliance. The white touch-up paint can be used on refrigerators, microwaves, ranges, clothes dryers, an...
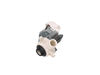
If your washer is noisy, spins slowly, or leaves clothes soaking wet, this splutch cam kit might be the fix. It helps your machine switch between washing and spinning by connecting the motor to the ba...
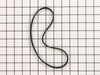
If your washer isn’t spinning or making strange noises, the drive belt might be worn out. This genuine replacement belt connects the motor to the drum, helping it spin and tumble your clothes properly...
This hose clamp extends from half an inch to an inch in diameter. It is made entirely of metal and is intended for use with Maytag brand washing machines.
Having a problem with a funky-smelling washing machine, or one that just doesnt seem to clean your clothes as well as it used to? Say hello to the Affresh Washing Machine Cleaner by Whirlpool. This po...
This part is the replacement lid latch or latch assembly for your top-load washer. The lid latch holds your washer door closed, and allows the washer to run its cycle. If the lid latch is damaged, you...
This washing machine drain pump is a key component responsible for removing water from the tub during the drain cycle. Designed for select top-load washers, it ensures efficient water expulsion and su...
Well, first investigated and found loose nut on drive clutch. First take off the two screws with nut drive then cover off using a screwdriver blade to snap off the cover. Then socket ratchet to take off the nut on drive clutch. take off belt by slowly rotating the drive gear. two screws that hold the electronics to the upper drive clutch and put aside, so you can snap off the cover for drive clutch on upper part with screwdriver and off the parts come and install whole unit back as took it apart. Line up the new upper clutch so that is position as was before. (Using parts diagram helps a lot as www. partsselect.com has for you or Maytag.com.) Then put the electronic part board back on and the gear and nut. Make sure it is tight by several attempts to make sure it's snugged up good and then slowly roll belt back on the pulley and motor drive. Put your cover guard back on with two screws and done.
This was a learning experience but it appears to have worked out in the end. Our 3 1/2 year old washer was not agitating much and I attributed that to a loose bolt. I would tighten the bolt and it would work ok for a load or two and then stop agitating. I would find that the bolt was loose again. I took a number of steps to try to get the bolt to stay on tight - threadlock, a new bolt, more threadlock, and applying progressively more force on the bolt, with no better results. Yet the repair guys on you tube were saying the bolt only needs to be snug, not super tight - something was amiss. I even went so far as to secure the basket with a rope so I could use two hands on the socket wrench (please don't do this). But when I tried the washer again there was no agitation at all! I observed the agitation output in manual test mode and the bolt was turning in lock step with the shaft but the agitator wasn't turning at all. That's when I suspected that the problem was actually a worn lower agitator. Trouble was that now I couldn't seem to get the bolt off. Turning the wrench caused the shaft itself to rotate so I couldn't loosen the bolt from the shaft. I thought I broke the washer. Then I considered that maybe the shaft was rotating because the washer was in an agitation mode when I turned it off. I went back into manual test mode, made the washer spin, then turned it off. Fortunately, this worked. The shaft was again stationary and, albeit with great difficulty, I got the bolt off.
I removed the agitator, and as a pro would have figured out long before, the ridges inside the top of the lower agitator were almost completely worn down. I realized then that the contact between these ridges and the splines on the shaft is what is supposed to cause the lower agitator to move with the shaft. The purpose of the bolt is just to keep the agitator in the correct position and from coming off the shaft. I had been trying to compensate for the worn agitator ridges by over-tightening the bolt, creating some contact at the top of the shaft. This would work for a little while, then the agitator would start slipping, and the slipping agitator was acting just like a wrench loosening the bolt (until my stupid rope trick, that is.)
So I ordered a new agitator (only the lower agitator was bad, but the price of an entire agitator isn't a lot more than just the lower part and I was reading that the upper agitator parts will wear over time) and another new bolt (because my repeated attempts to over-tighten the first one I ordered had split the rubber gasket apart and worn the bolt head).
The new agitator fit snugly on the splines of the shaft so I sensed no need to use excessive force on the bolt. Just an easy one-handed snug tightening with the socket wrench, using the other hand to hold the lower agitator. The washer is now working again.


 Diagram and Parts List for Kenmore Washer")