Models > 11026182029A

11026182029A Kenmore Washer Dryer Combo - Overview

Sections of the 11026182029A

[Viewing 14 of 14]
Keep searches simple, eg. "belt" or "pump".
Direct Drive Motor Coupling – Part Number: 285753A
Direct Drive Motor Coupling
★★★★★
★★★★★
(61)
PartSelect #: PS1485646
Manufacturer #: 285753A
This coupling kit is located between the motor and the transmission on direct drive washers with no belt. This is the newer version and is made with new metal sleeves for added strength.
$35.54
  In Stock
Order within the next 3 hrs and your part ships today!
Clutch Assembly – Part Number: 285785
Clutch Assembly
★★★★★
★★★★★
(40)
PartSelect #: PS334641
Manufacturer #: 285785
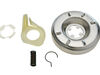
A worn clutch can cause a slower spin speed which will leave your clothes wet after a cycle. This clutch assembly comes with brake cam driver, blue spring for large capacity washers and black spring f...
$38.04
  In Stock
Order within the next 3 hrs and your part ships today!
Tub Spring – Part Number: WPW10250667
Tub Spring
★★★★★
★★★★★
(18)
PartSelect #: PS11751118
Manufacturer #: WPW10250667
This part is used to balance the tub during spin cycle. Sold individually.
$8.98
  In Stock
Order within the next 3 hrs and your part ships today!
Agitator Bolt – Part Number: WP358237
Agitator Bolt
★★★★★
★★★★★
(5)
PartSelect #: PS11741866
Manufacturer #: WP358237
This kit contains one screw with rubber gasket and threaded sealant. The screw head is 7/16".
$8.98
  In Stock
Order within the next 3 hrs and your part ships today!
Seal, Inner Cap – Part Number: WPW10072840
Seal, Inner Cap
PartSelect #: PS11748108
Manufacturer #: WPW10072840
Also known as an O-Ring. This black o-ring seal is three inches in diameter.
$19.47
  In Stock
Order within the next 3 hrs and your part ships today!
Centerpost Gasket – Part Number: W10814296
Centerpost Gasket
★★★★★
★★★★★
(5)
PartSelect #: PS11723081
Manufacturer #: W10814296
Also known as Main Outer Tub Seal. This part helps to prevent leaking from the bottom of the tub.
$7.34
  In Stock
Order within the next 3 hrs and your part ships today!
Washer – Part Number: WP3949550
Washer
PartSelect #: PS11742027
Manufacturer #: WP3949550
This part goes on the agitator retaining bolt.
$9.81
  In Stock
Order within the next 3 hrs and your part ships today!
Gearcase – Part Number: 3360629
Gearcase
★★★★★
★★★★★
(3)
PartSelect #: PS341974
Manufacturer #: 3360629
This is used in your direct drive washer that has a neutral drain.
$484.14
  In Stock
Order within the next 3 hrs and your part ships today!
Lid Switch Kit – Part Number: WP3355806
Lid Switch Kit
★★★★★
★★★★★
(4)
PartSelect #: PS11741201
Manufacturer #: WP3355806
The pin on the lid pushes on the lever of the lid switch to tell the machine that the lid is closed.
$67.02
  In Stock
Order within the next 3 hrs and your part ships today!
Agitator Cam Kit – Part Number: 285751
Agitator Cam Kit
★★★★★
★★★★★
(2)
PartSelect #: PS334624
Manufacturer #: 285751
This agitator cam kit contains an almost three inch white retainer and four agitator dog ears. This kit is used to move the upper agitator and it connects the base of the agitator with the agitator top (mover).
$19.25
  In Stock
Order within the next 3 hrs and your part ships today!
Pump Retainer – Part Number: WP8546127
Pump Retainer
PartSelect #: PS11746362
Manufacturer #: WP8546127
Sold Individually.
$14.00
  In Stock
Order within the next 3 hrs and your part ships today!
Screw, 8/18 x 3/8 – Part Number: WP90767
Screw, 8/18 x 3/8
PartSelect #: PS11746840
Manufacturer #: WP90767
This screw is sold individually.
$6.91
  In Stock
Order within the next 3 hrs and your part ships today!

Questions And Answers for 11026182029A

Be the first to ask our experts a question about this model!

Common Symptoms of the 11026182029A

[Viewing 13 of 13]
Will not agitate
Fixed by
these parts
Fixing Fixing Fixing
Show All
Spins slowly
Fixed by
these parts
Fixing Fixing Fixing
Show All
Leaking
Fixed by
these parts
Fixing Fixing Fixing
Show All
Will not drain
Fixed by
these parts
Fixing Fixing Fixing
Show All
Burning smell
Fixed by
these parts
Fixing Fixing Fixing
Show All
Will Not Start
Fixed by
these parts
Fixing Fixing Fixing
Show All
Spinning Issues
Fixed by
these parts
Fixing Fixing
Show All
Shaking and Moving
Fixed by
these parts
Fixing
Show All
Does not dispense fabric softener or detergent
Fixed by
these parts
Fixing
Show All
Noisy
Fixed by
these parts
Fixing
Show All
Touchpad does not respond
Fixed by
these parts
Fixing
Show All
Marks left on clothes
Fixed by
these parts
Fixing
Show All
Lid or door won’t close
Fixed by
these parts
Fixing
Show All
Keep searches simple. Use keywords, e.g. "leaking", "pump", "broken" or "fit".
No movement from Basket & agitator
The job looked intimidating but turned out to be very easy.
First take off the water pump by removing the two clips that hold it in place. Place a shallow pan under the pump to catch the water that is in the pump and hoses. Open the hose clamps with a pair of pliers or channel locks (better) and slide the hoses off of the water pump.
The motor comes off next. Unplug the electrical connector from the motor and two wires from the capacitor. Remove the two screws holding the clamps in place and then pop off the two clamps. You will need to hold up the motor with one hand while you remove the clamps or it will fall to the floor once the clamps are removed.
One piece of the coupling assemble will be attached to the motor and the other will be attached to the gearcase drive shaft. If you want to clean up the mess created by the shredded rubber center piece of the coupling assembly you will have to take off the motor mounting plate. It is held on by two bolts and removing it makes installing the coupling easier but probably not necessary.
Push the back half of the coupling on to the gearcase drive shaft until the shaft is flush with the face of the coupling. Install the new rubber center piece on to the coupling then re-install the motor mounting plate. Install the other half of the coupling on to the motor shaft and lift the motor up to the coupling. You have to rotate the motor shaft by spinning the fan blades until the coupling lines up so you can slide it into the other half of the coupling. Then just reattach the motor, connectors and water pump in the reverse order of disassembly.
Parts Used:
Direct Drive Motor Coupling
  • Jeff from Wayne, NJ
  • Difficulty Level:
    Easy
  • Total Repair Time:
    30 - 60 mins
  • Tools:
    Pliers, Screw drivers, Socket set
1089 of 1168 people found this instruction helpful.
Was this instruction helpful to you?
Thank you for voting!
spin cycle did not engage
researched potential causes, found cluch dust under the washer and determined that it wouldn't engage because clutch was too worn. ordered the assembly, removed agitator from inside the tub as it is connected to the gear shaft, turned washer on it's back for access to motor, unattached the direct drive water pump from the motor drive, unbolted the 3 gearcase mounting bolts and took the entire gearcase, shaft, motor, etc... together, out from under the washtub. the clutch slides off the gearshaft with a little fidgeting and the new assembly is easily installed where the previous was. put everything back together... then... spin spin! worked perfectly
Parts Used:
Clutch Assembly
  • Andrew from SLC, UT
  • Difficulty Level:
    Easy
  • Total Repair Time:
    30 - 60 mins
  • Tools:
    Nutdriver, Pliers, Socket set
487 of 520 people found this instruction helpful.
Was this instruction helpful to you?
Thank you for voting!
Clothes washer would not spin with more than a couple socks in it. It would barely spin when empty.
Diagnosing the problem was the toughest part. I originally called a repair man - described to him the problem and he said it was most likely the transmission (gearbox)... of course that is one of the most expensive parts! I asked him if it was maybe the clutch... he said there was no clutch.. only a brake... I knew he was wrong after researching. The fact that the washer would agitate fine and spin very light loads but not spin anything heavy told me it was NOT the gearbox.. or the brake.. it was the clutch.. it had to be... so I called the repair man and canceled the appointment I had made then ordered the clutch assembly. Showed up very quickly. Now to the repair. I realized that I did not have to take apart the cabinet section of the washer.. I only needed access to the bottom. My washer - a 5 year old Whirlpool Gold Ultimate Care II had just a piece of foam blocking off the bottom of the washer... Easy access... I disconnected the hot and cold water and the drain tube. I removed the hot and cold water tubes from the back of the washer also so they would not get crushed when I laid the machine on its back. I unplugged the washer also. The drain tube I left connected to the washer.. I was afaid of it getting crushed while on its back, so I bunched up a large towel put it on the floor and tilted the washer slowly back onto it... the towel was enough of a spacer to keep the drain hose from getting crushed. I used a couple pieces of Duct Tape to hold the lid shut while on its back. I then removed the foam insert on the bottom. Then I unplugged the wiring harness. and a single wire that had a spade connector in the same area. I then removed the clips from the plastic water pump and slid it off the motor (I used Duct Tape again to suspend the water pump up and out of my way while I proceeded) I did NOT have to remove the motor from the gearbox. I used a socket wrench and unbolted the 3 gearbox bolts. I was able to take the whole unit, gearbox and motor out in one piece.. it slid right out (you will have to unscrew the the bolt in the top of the agitator/dispenser shaft - then the gearbox unit with the shaft will slide right out, I did this before I put the washer on it's back) Once it was slid out, I removed the clutch then reinstalled the same way I took it off. The only hard part was the circular wire retainer install for the clutch. It CAN all be done .. I ended up using 2 screwdrivers to put the new retaining ring into the new clutch assembly.. One screwdriver would hold down part of the retaining ring and the other I used to continue pushing the ring into place.. don't give up! You will get it in.. even with normal tools (This was the hardest part of the whole install) It took me 5 minutes with some force and fiddling. I also swapped in the new plastic piece that came with the clutch assembly... you will see where it goes... the old plastic piece looked fine, but I changed it out anyways - it hooks the clutch to the brake system it looks like. After the new clutch assembly was installed I just put it all back together the way I took it apart. One thing I will add was I was not sure if the clutch had to be lined up when I slid the shaft back into the washer.. It does not have to be.. It will align itself automatically. You know when you hear that click/pop when the washer is about to spin?.. well that is that plastic piece engaging with the clutch... there was a piece or two that fell off the shaft when I had removed it.. While sliding the shaft back into the washer I had to just put the pieces back on the shaft before I put the bolt back into the top of the agitator/shaft...

Summary:
Get the washer on its back - unplugged!
remove wire(s) Harness from motor
remove water pump
unbolt 3 bolts holding the gearbox
slide gearbox and motor out as one piece ( a bit heavy)
remove and replace clutch assembly (pay attention to how things are removed)

Done! put it all back together... hope that helps. It worked perfect for me.. and m
Parts Used:
Clutch Assembly
  • Shawn from Longmont, CO
  • Difficulty Level:
    Easy
  • Total Repair Time:
    30 - 60 mins
  • Tools:
    Pliers, Screw drivers, Socket set
250 of 258 people found this instruction helpful.
Was this instruction helpful to you?
Thank you for voting!