These agitator directional cogs are commonly referred to as dog ears. They come four to a package and are usually used with direct drive washing machines.
$7.31
In Stock
Order within the next 5 hrs and your part ships today!
The point of the lid switch is for the tub to stop spinning when the washer lid is opened. It is a safety precaution just in case someone decides to stick their hand inside the washer while the tub is spinning.
$85.01
In Stock
Order within the next 5 hrs and your part ships today!
If your washer is noisy, spins slowly, or leaves clothes soaking wet, this splutch cam kit might be the fix. It helps your machine switch between washing and spinning by connecting the motor to the ba...
$49.29
In Stock
Order within the next 5 hrs and your part ships today!
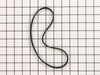
If your washer isn’t spinning or making strange noises, the drive belt might be worn out. This genuine replacement belt connects the motor to the drum, helping it spin and tumble your clothes properly...
$35.94
In Stock
Order within the next 5 hrs and your part ships today!
This suspension rod kit includes four rods that stabilize the wash tub, reducing vibrations and movement during cycles. It is compatible with a range of washing machines and helps improve performance ...
$113.97
In Stock
Order within the next 5 hrs and your part ships today!
If your washer isn’t filling properly, keeps running water, or has a leak at the back, the water inlet valve might be the problem. This part controls how much hot and cold water enters the machine and...
$96.25
In Stock
Order within the next 5 hrs and your part ships today!
This shift actuator is an essential component in washing machines, responsible for switching the motor between spin and agitate modes while also communicating spin speed to the control board. A malfun...
$106.65
In Stock
Order within the next 5 hrs and your part ships today!
Order within the next 5 hrs and your part ships today!
Questions And Answers for 11022102311
Ask our experts a question about this model and we'll get back to you as soon as possible!
2 questions answered by our experts.
< Prev
1
Next >
Sort by:
Search filter:
Clear Filter
Your search term must have 3 or more characters.
Keep searches simple. Use keywords, e.g. "leaking", "pump", "broken" or "fit".
Sorry, we couldn't find any existing answers that matched.Try using some different or simpler keywords, or submit your new question by using the "Ask a Question" button above!
Jean-Yves Perron
January 4, 2020
How do I do to test the lid latch to be sure it is or not functional? Do I use a multimeter with the lid dismounted ?
For model number 11022102311
Hi Jean-Yves, you can test the actual switch with a multimeter, disconnected from the washer. Thank you for your question and good luck with your repair!
2 peoplefound this helpful.
Was this helpful?
Thank you for voting!
Crystal
October 5, 2025
The washer is always off balance during the spin cycle.
For model number 11022102311
Hello Crystal, thank you for getting in touch. According to our research, we would recommend checking the leveling legs and the centering spring for any damage. If they are fine, then the issue is most probably with the suspension rod kit, part number PS11703288. These rods help maintain balance and improve overall performance. We hope this helps.
First pry off the cap of the agitator. Then using a socket remove the bolt that holds the plastic cup in place. Remove this cup by prying it loose from the two tabs that hold it in place. Once this cup is removed you can get to the broken cogs. Slip the new cogs into the underside of the cup, and slide the cup back down in the agitator housing using the slots on the side for a guide. (You may want to remove the entire agitator and assemble everything upside down, then flip it all back over to mount, so the cogs don't fall out). Tighten the bolt, snap the cap back in place on top of the agitator and your'e done. Easy repair.
pull off softner dispenser, pop off agitator cap by inserting straight screw driver into small slot, remove bolt inside agitator with socket wrench and long extension, pull agitator straight up off shaft, place agitator on floor, with feet holding bottom half pull top half apart from bottom half by pulling straight up, note direction of old cogs remove and replace with new, reassemble
The instructions that came with the part were worthless. Essentially, unplug, put in new part, plug it back in. I spent a considerable amount of time on the internet and finally found a video showing how to open the top. Unlike other models, it is held down by clamps in the back rather than clips in the front. Once finding this information the installation was simple. Remove the clamps and the back of the console, slide the top forward and lift, remove and replace the lock and reassemble. You don't even have to remove the hoses.


 Diagram and Parts List for Kenmore Washer")