This Refrigerator Air Filter is a white 1.8x3.2" plastic filter which neutralizes odor and bacteria in the air. It should be replaced every six months at a minimum. Refer to your user manual and model...
The EDR1RXD1 water filter uses advanced filtration technology to reduce over 20 types of contaminants, including pharmaceuticals, pesticides, and lead. Certified to meet NSF/ANSI standards, it deliver...
This 18 ml bottle of white appliance touch-up paint is used to cover scratches or marks on your appliance. The white touch-up paint can be used on refrigerators, microwaves, ranges, clothes dryers, an...
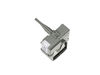
This light switch may also be known as a refrigerator door switch or a light switch kit, and is compatible with your refrigerator. The function of the refrigerator door switch is to turn on the light ...
Need a new shelf bin for your fridge door? This clear bin fits select Whirlpool, Kenmore, and Maytag models and snaps right into place—no tools needed. It’s made from strong, food-safe plastic and is ...
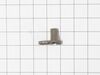
This compressor start relay is for refrigerators. The compressor start relay attaches to the compressor and helps start the compressor motor. Safely store any food that could deteriorate while the pow...
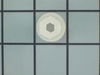
This mounting screw is a genuine OEM replacement part for the door handle in your refrigerator. If you are having trouble shutting the refrigerator door, or opening it, replacing this screw can help s...
If your refrigerator or freezer is too warm, or making noises, you may need to replace the fan blade. The fan blade attaches to the evaporator motor, which is in the freezer section, to help circulate...
Ask our experts a question about this model and we'll get back to you as soon as possible!
15 questions answered by our experts.
< Prev
1
2
3
Next >
Sort by:
Search filter:
Clear Filter
Your search term must have 3 or more characters.
Keep searches simple. Use keywords, e.g. "leaking", "pump", "broken" or "fit".
Sorry, we couldn't find any existing answers that matched.Try using some different or simpler keywords, or submit your new question by using the "Ask a Question" button above!
Nonna
April 4, 2023
Need new light in fridge and freezer
For model number 10651133213
Hi Nonna, thank you for reaching out. Based on our research, the part you are looking for is the LED light, part number PS11755866. The same light is used in both the fridge and the freezer, so you will need to buy two of them. We hope this helps!
The freezer light stopped working and the the fridge light will come on very dim sometimes not at all. If I push the door switch a few times the light will flicker in the fridge. Nothing at all with the freezer. Fridge and freezer are holding temp.
For model number 10651133213
Hi Bob, thank you for your inquiry. We would recommend checking the Door Switches, part number PS12728638, and part number PS12731166. If that does not take care of the issue, we would suggest checking the LED Light, part number PS11755866, and the light control board, part number PS11755867. We hope this information is useful!
Ice maker is making ice but not dispensing. The auger handle is turning freely and there is not blockage. Ice is in the ice bucket and sometimes I hear a very loud clicking. What could be the cause?
For model number 10651133213
Hello Margaret, thanks for reaching out. There are a few parts to inspect that may be causing this problem for you. The Auger Motor (PS12349163) could be jammed or faulty, the Dispenser Switch (PS12347358) may be malfunctioning, or the Control Board (PS11773175) is not communicating correctly with the other ice dispenser parts. If you would like assistance placing an order, please contact customer service. Good luck with your repair!
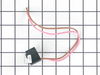
WARNING: REPLACING THIS PART REQUIRES CUTTING AND SPLICING ELECTRICAL WIRES. RISK OF ELECTRICAL SHOCK OR FIRE. DO NOT ATTEMPT THIS REPAIR IF YOU ARE NOT EXPERIENCED WITH ELECTRICAL WIRING.
Part Info: The bi-metal strip is clipped onto the evaporator coils and is designed to regulate the defrost coil temperature. If it is not functioning properly you may notice ice buildup preventing air flow (and preventing proper refrigeration), or more rarely the freezer side may get too warm during the defrost cycle.
1: UNPLUG THE FRIDGE! If there is ice buildup, wait until the ice has melted. A box fan blowing at the ice will help melt it more quickly.
2: Remove the panel covering the evaporator coils. It's located inside the fridge, on the freezer side.
3: Un-clip the bi-metal strip from the evaporator coils.
4: Unplug the wires from the evaporator fan, defrost coil and bi-metal strip, then disconnect the main connector that is plugged into the rear wall.
5: Clip both wires to the old ( bad ) bi-metal strip. Cut close to the casing of the bi-metal strip so there are long wires to splice onto.
6: Strip 1/4 to 1/2 inches of insulation off of the ends of the wires ( depending on the size of the wire-nuts you use). Twist the bare wires slightly to prevent fraying.
7: Do the same for the ends of the wires on the (new) bi-metal strip.
8: Take the ends of the wires belonging to the (new) bi-metal strip and the wires coming from the main plug. Take the like-colored wires, and twist the bare metal ends together.
9: Twist on wire nuts, for both sets of wires. Make sure they are snug, with no bare wire showing.
10: Tape over the wire nuts with electrical tape. Tape over the wires nuts in a spiral fashion, completely covering the nut and both wires that are now spliced together. This will prevent accidental shorting.
11: Plug the main plug back into the rear wall of the fridge. Also re-connect the connectors to the evaporator fan and defrost coil. Make sure the clips on the connectors are snug to ensure a good connection.
12: Clip the new bi-metal strip onto the coils, in the same spot as before. ( Usually just after the small incoming copper tubing that connects to the coils, known as the expansion valve. That is usually the coldest spot on the coils during operation).
13: Replace the panel that covers the coils.
14: Plug the fridge back in... Now you fridge should defrost correctly. If it does not, your defrost coil could be burned out, or the control board could be faulty.
I used a flat-head screwdriver to pop out the old light rocker switch. Then, I unplugged the wires, plugged them into the new light rocker switch, and then popped the new switch into the hole. That's it! Lights began working again.
I used a flat screwdriver and released the lock tab on the bottom of the light switch, and pried the switch out, being careful to not damage the plastic around the mounting place of the switch, unplugged wiring from old switch, plugged in the new one and pushed the new switch into place. Job finished light switch now working.


 Diagram and Parts List for Kenmore Refrigerator")