This advanced refrigerator water filter utilizes Triple Filtration Technology to reduce a wide range of contaminants, including mercury, lead, and trace pharmaceuticals, ensuring cleaner and safer wat...
29% OFF
$49.99
$69.99
In Stock
Order within the next 3 hrs and your part ships today!
This 18 ml bottle of white appliance touch-up paint is used to cover scratches or marks on your appliance. The white touch-up paint can be used on refrigerators, microwaves, ranges, clothes dryers, an...
$17.95
In Stock
Order within the next 3 hrs and your part ships today!
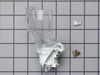
This icemaker can be used with 25-27 cubic feet refrigerators that have a vertical auger dispenser located on the freezer door. Reuse bottom bracket from the original icemaker and attach to the new.
$188.69
In Stock
Order within the next 3 hrs and your part ships today!
This twenty-five watt microwave light bulb is two and a half inches long. It has a small, screw-in base and it carries 120V. This item sells in a quantity of one, though many microwaves require two.
$20.85
In Stock
Order within the next 3 hrs and your part ships today!
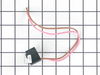
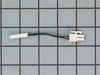
This set of two control boards helps your fridge know when to make ice and when to stop. One board sends a signal, and the other receives it—together, they tell the icemaker when to dump ice and when ...
$343.71
In Stock
Order within the next 3 hrs and your part ships today!
If your refrigerator or freezer is too warm, or making noises, you may need to replace the fan blade. The fan blade attaches to the evaporator motor, which is in the freezer section, to help circulate...
$39.55
In Stock
Order within the next 3 hrs and your part ships today!
Questions And Answers for 10646022800
Be the first to ask our experts a question about this model!
✖
Ask a Question
Ask our experts a question on this model and we'll respond as soon as we can.
Remove the icemaker service door... gently pry the door pins from the hinge sockets. Remove the 3 screws from the under side of the icemaker with a nut driver (1/4"). Gently remove the icemaker . It's a tight fit between the top of the compartment and the icemaker lower support tray. Next, disconnect the electrical connector at the right side. You're done! Reverse procedure for installing. Good luck. Remember, your working with cold plastic...take your time and don't force too much.
First I shut the water off to the refrigerator.then i pushed the big button in the middle of the grille below the refrigerator door. pulled out the old filter, took the front cap off the old filter put it on the new filter. took the two red caps off the new filter. pushed the filter in till it locked in place. all done! Turned the back on.