Order within the next 53 mins and your part ships today!
Fits your LA5510XTW0!
About This Part
What it does. Why it matters. Everything you need to know for an easy fix.
Thrust Spacer Specifications
This white thrust spacer is made of plastic and is also commonly referred to as a retainer ring. It is used in the agitator assembly of many direct drive washing machine models. This is the retaining ring for inside of agitator. May need agitator grease for repair.
Part #285587
Manufactured by
Whirlpool
for Whirlpool, Kenmore, KitchenAid, Maytag
Real ratings from other people who bought this part.
Average Rating:
★★★★★
★★★★★
1 Review
5.0
Out of 5
5 Stars
1
4 Stars
0
3 Stars
0
2 Stars
0
1 Star
0
Search reviews left by others. DIY doesn't mean you have to do it alone. Use simple keywords like "fit", "broken", "easy", or "quality" to find reviews that match!
Search filter:
Clear Filter
Your search term must have 3 or more characters.
Sort by:
Prev
1
Next
Sorry, we couldn't find any existing reviews that matched. Try using some different or simpler keywords.
★★★★★
★★★★★
Sharon P - February 24, 2022
Verified Purchase
Worked as wxpect
Fast service
Prev
1
Next
Repair Tips
See how others fixed this model. Time, tools, difficulty, and steps that lead to victory!
Really Easy
15 - 30 mins
Average repair rating from 76 real customers like you
Sort by:
Prev
1
2
3
Next
Search repair tips from other customers using simple keywords like "replace", "fit", "remove", "inspect". DIY doesn't mean you have to do it alone!
Search filter:
Clear Filter
Your search term must have 3 or more characters.
Sorry, we couldn't find any existing installation instruction that matched.
Washer not agitating
646 of 684 peoplefound this instruction helpful.
Craig from Polk City, FL
Really Easy
Less than 15 mins
Socket set
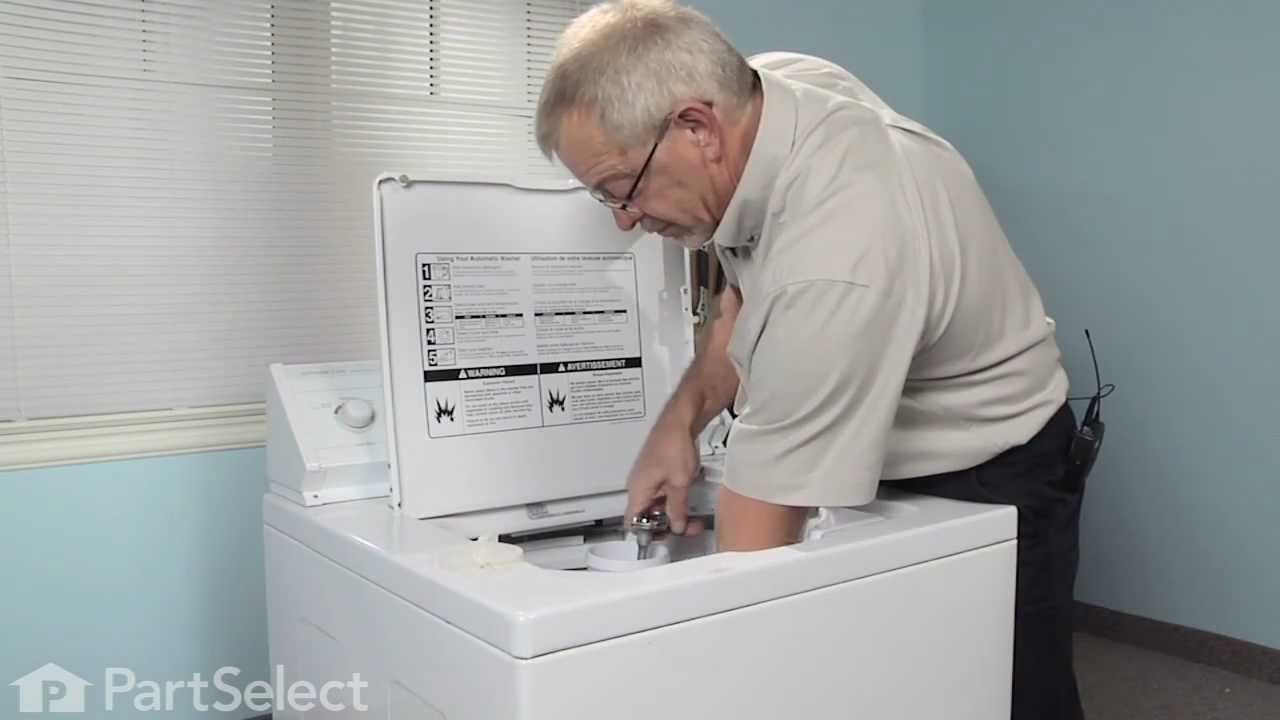
On top of the agitator is a flat cap that is held in place by the friction of an o-ring, there are no fasteners. I would imagine one could get under the lip with a small screwdriver or butter knife to pop it off but I chose simply using my fingernails so as to not disfigure the cap. Under the cap you will find the head of the only bolt
... Read morethat holds the assembly together it is a 7/16 head and because it is in a 4" deep well your will need a 6" extension for your ratchet. Once the bolt is out the top of the agitator, the assembly with the cogs removes by hand. Set the assembly upside down on the counter, slide the black plastic ring off, pull the cogs out with your fingertips, install the new cogs put a new black ring on and set the assembly back in the agitator. Reinstall bolt. As the bolt is down in a tube, you cannot set it in place with your fingers and it will fall out of the socket. To hold the bolt in the socket during positioning you can either put a gob of Vaseline on the bolt head to hold it in the socket or form a small piece of paper over the bolt head and set it into the socket, the friction of the paper will hold the bolt into the socket. Took me less then 10 minutes, good luck
Pried off the agitator cap. Removed the bolt. Removed the agitator. In the process of separating the agitator from the base, a plastic tab broke off which concerned me. BUT, in the directions with the part it explains that the 2 tabs are for factory assembly and to break both of them off. Broke off the second tab and reassembled. My
... Read more18 year old Kenmore is back in action.
wife complained about washing machine making bad noise and she said it was not spinning. So being the good husband that I am, after she yelled at me 8-10 times I stopped what I was doing and sure enough she was right , the washing machine wasn't working correctly. Started testing the agitator by spinning it back and forth. it would only c
... Read moreatch on the dogs every once in a while. the washer is only 3 years old, thought maybe one of the kids toys or lint was interferring with the dogs, pulled this dispenser off the top and then another plastic cap with a black o-ring off and found the agitator and dogs gears worn down and chipped. think it was a 3/8" socket I used, but you need a long extension to get to it. Part was labelled well and it was very easy to order. problem I had was when the new parts came in I had ordered the agitator repair kit ($16) and the thrust spacer ($5). Well it's not that $5 is alot of money but the spacer I had was worn and I was in there anyway so why not. The agitator repair kit comes with a thrust spacer but it was not shown on the otherwise very detailed pictures. So it would cost more for me to pay the shipping to return the unused part than not. the agitator repair kit description reads "This nine piece agitator repair kit comes with a two and a half inch cam, a thrust spacer, and four dogs (agitator dogs) but the thrust spacer is not shown. You could say I was 30% more into parts cost and make it sound worse. Had I been an actual repair man instead of a home do it yourself kind of person, probably would have known to call and speak with a rep vice going at it online solo. anyway, 5 minutes and the washer was back up, wife was happy, and I was able to continue with what i was originally doing.
took off back and sides to the washer. laid the washer on it's back and removed worn and broken parts. replaced these parts and put everything back together. The top part of the agitator hasn't worked in a while, while we had it apart we also replaced the clogs. The washer works better than it has in a long time. Spins a lot more wat
... Read moreer from the clothes which makes drying faster. I would surely do this again. A lot cheaper than a new washer.
removed agitator top by pulling up with hands. Removed inner agitator seal body by grasping with pliers and pulling up. Used 7/16 socket with extra extension to remove top agitator retension bolt. Removed top agitator body and thrust spacer by lifting off of agitator base. Assembled dogs on body as shown in instructions. Replaced thrust s
... Read morepacer on top of agitator base. Installed upper agitator body. Placed dog body inside upper agitator. Placed small piece of paper over 7/16 socket and forced bolt into socket. This held bolt in upright position as I replaced it down inside the upper agitator body and dog assembly with the long extensions. Replaced O-ring on inner agitator seal body and replaced into the upper agitator body using the long extensions to tap it into place. Pressed top agitator cap onto top of upper agitator body. All done. The agitator repair kit purchased had a thrust spacer in it but was not the correct one for my model so I purchased the correct spacer separate. The website is great because it shows the parts in detail so you can take your time and get the proper parts first time, everytime.
Top part of agitator was not locking in and turning
47 of 55 peoplefound this instruction helpful.
Glenn from Merrick, NY
Really Easy
Less than 15 mins
Socket set
Remove top "cap" on agitator to expose the bolt that holds the agitator to the drum shaft. Undo the bolt and pull out the agitator. Disassemble, toss the old parts and install the new parts in reverse order. Repair took less than 5 minutes and we can now do full loads of laundry again!
the agitator arm that rotates the clothes was not moving
41 of 719 peoplefound this instruction helpful.
Robin from Westwood, NJ
Really Easy
15 - 30 mins
Socket set
pull up and off the fabric dispenser, remove the nut in the middle, and pull the piece off. underneath are 4 plastic things (dogs) that will just fall out. replace them (because they have little plastic things that jut out) and wear away. maneuver the piece back in place and tighten the screw back into place. SAME JOB BY REPAIR CO. C
... Read moreOST ME $95.00 THE FIRST TIME. WE USE HEAVY LOADS AND THE DOGS WEAR OUT AFTER A FEW YEARS. NOW I JUST CHANGE THEM MYSELF.***DID I ADD THAT I AM A WOMAN****
Job was easy! Just remove the top cap with a screw driver. With a socket and extension, remove the bolt that holds the agitator to the transmission shaft. Pull up on the agitator and lift it off the shaft. I had to use the screw driver to pry off the center piece that held the cogs because it did not what to separate from the rest of the
... Read moreagitator. Removed the pieces of the old, broken cogs, cleaned up the parts and installed the new cogs with the center piece upside down. I then took some silicone lubricant and lubed the area the cogs rub on and the opening the center piece spins in on the rest of the agitator. I then removed the Thrust Spacer on the mail part of the agitator but just lifting off the old one and putting on the new one. Then, with the center piece that holds the cogs upside down I inserted it into the upper corkscrew section of the agitator so that the cogs would not fall out. While holding the two pieces together, I turned it back right-side-up and installed it back onto the other part of the agitator and then on the shaft. Re-installed the bolt and tightened with the socket. That's it! It sounds more complicated then it really was.
It was extremely easy. I removed the plastic cap under the softener dispenser, removed the nut and washer that holds the upper agitator in place and then replaced the parts that came in the kit. The most important note for those who may be doing this job is that the o-ring for the cap under the softener dispenser, the seal washer for th
... Read moree bolt and the thrust spacer under the upper agitator all came with the kit. I did not realize that and ordered them all seperately.
cam dogs worn out and the agitator wouldn't rotate.
31 of 707 peoplefound this instruction helpful.
Raymond from Speedwell, TN
Really Easy
15 - 30 mins
Removed softner dispenser on top of agitator. Removed next was cap and seal cover at base of the agitator by just pulling it up. Used 1/4" drive w/ 7/16" socket w/long extension to remove the agitator mounting bolt. While holding the bottom of the auger, pull the agitator up, removing the top agitator assembly. Replace the necessary
... Read moreworn parts. Read the directions which came with your ordered parts. Also, the agitator grease which you are to use to lube the top of the Thrust washer is not included in the repair kit. You can use non water soluable grease to lube the thrust washer or order part number 350849. Total time, 15 minutes. Happy washing...
Ask our experts a question about this part and we'll get back to you as soon as possible!
We may have answered a similar question already! Search questions and answers left by others using simple keywords like "fit", "broken", "easy", or "quality" to find questions that match.
Search filter:
Clear Filter
Your search term must have 3 or more characters.
Sort by:
Prev
1
Next
Sorry, we couldn't find any existing answers that matched.Try using some different or simpler keywords, or submit your new question by using the "Ask a Question" button above!
Erin - For model number RTW4340SQ0
May 14, 2018
Hello i have a Roper washing machine that will fill with water and spin, but the agitator only seems to move about 1/2 an inch (maybe 1/30 of a rotation) back and forth. I replaced the dog ears and thrust washer and the splines on the drive block appear normal. If i spin the agitator by hand it moves (with what feels like normal friction) and the dogs catch as they should. Any thoughts or advice would be much appreciated!
Hello Erin, thank you for your question. To diagnose the agitating problem, I would recommend pulling the agitator out and see if the shaft is rotating to move the agitator when in the wash cycle. If not then it is a problem with the gearcase. If it is then the agitator splines may not be catching on the shaf, and would need to be replaced. I hope this helps!
11 peoplefound this instruction helpful.
Was this helpful?
Thank you for voting!
Rebecca
February 4, 2022
Spins but clothes are still soaking wet?
Hello Rebecca, thank you for writing. The most likely culprit for a washer that spins but still turns out soaked clothing is a drain hose problem. It could be clogged, kinked, or even positioned incorrectly. . For us to locate the correct parts and repair information we will require the model number of the unit. Once you have located the model number, please feel free to resubmit the question and we will be happy to help you. We are looking forward to hearing from you!
1 personfound this instruction helpful.
Was this helpful?
Thank you for voting!
Kathy - For model number LXR9245EQZ
March 16, 2023
Need a Thrust Spacer (washer) for my Whirlpool washer model lxr9245eqz
Hello Kathy, thank you for contacting us. The thrust spacer compatible with your model is part number PS334562. We hope this is helpful!
Was this helpful?
Thank you for voting!
Richard - For model number kenmore 110 269245 03
April 14, 2023
thrust washer is thin with 4 sides
Hi Richard, thank you for reaching out. Based on our research, the thrust washer, part number PS11744870, is compatible with your model. We hope this helps!
How do i replace o ring and where can i find replacement o ring?
Hello Orlando, thank you for your question. The o ring that goes inside the agitator is PartSelect Number: PS11748108. Please enter the part number into the site for current price and availability and to order. Good luck with your repair!
Was this helpful?
Thank you for voting!
Prev
1
Next
✖
Ask a Question
Ask our experts a question on this part and we'll respond as soon as we can.



 My Orders