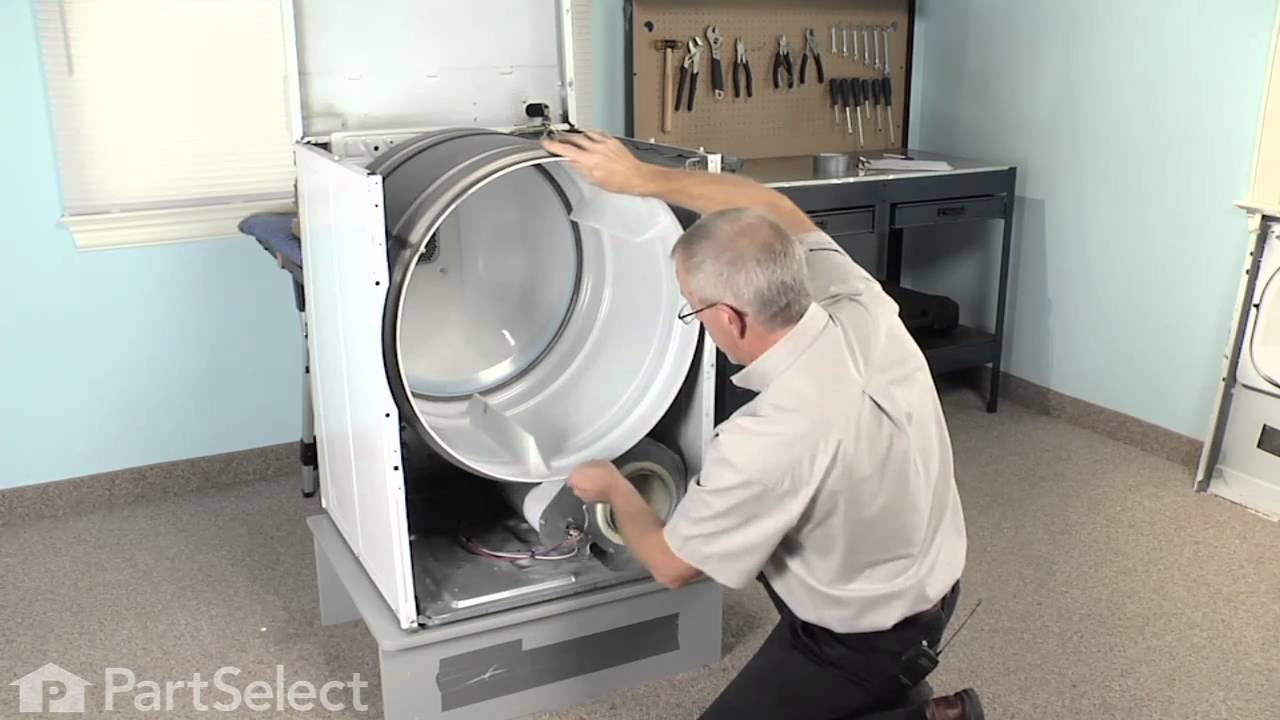
What it does. Why it matters. Everything you need to know for an easy fix.
Multi Rib Belt Specifications
This dryer drum belt from Amana has five ridges and is 93-3/8" inches in length, and 3/8 of an inch wide. It is flat, black in color, and is made entirely of rubber.
Part #WP40111201
Manufactured by
Whirlpool
for Amana, Whirlpool, Speed Queen, Maytag
Real ratings from other people who bought this part.
Average Rating:
★★★★★
★★★★★
40 Reviews
4.9
Out of 5
5 Stars
37
4 Stars
2
3 Stars
1
2 Stars
0
1 Star
0
Search reviews left by others. DIY doesn't mean you have to do it alone. Use simple keywords like "fit", "broken", "easy", or "quality" to find reviews that match!
Search filter:
Clear Filter
Your search term must have 3 or more characters.
Sort by:
Prev
1
2
3
Next
Sorry, we couldn't find any existing reviews that matched. Try using some different or simpler keywords.
★★★★★
★★★★★
DALE R - May 11, 2023
Verified Purchase
Easy, Inexpensive Repair
Part was received the next day! Couldn't have been easier. I'm glad and fortunate to have found this shop!
★★★★★
★★★★★
Adrian M - June 30, 2020
Verified Purchase
Easy Repair, great part.
The part was in new condition and came fast. My dryer is running like new now.
★★★★★
★★★★★
Trevor J - June 9, 2021
Verified Purchase
easy repair, worked as expected
no problems. worth it to bypass those expensive and uninterested repair shops who would rather try to sell you a new machine than break a sweat and fix the old one!
★★★★★
★★★★★
Andre F - June 9, 2021
Verified Purchase
Fit perfect easy to instal
Fast shipping and great service tank you my dryer run like new
★★★★★
★★★★★
Denis H - January 22, 2020
Verified Purchase
good service
exact part . fast delivery
★★★★★
★★★★★
Ian K - April 24, 2019
Verified Purchase
Partsselect makes it easy
Tbh I have not installed it yet but part source made it easy to select the right parts from the second I put my dryers model in. That paired with the videos of “how to” with each part made me feel at ease and give me some insight on the repair ahead. Quick shipping as well. Will be my go to from now on.
★★★★★
★★★★★
Mazhar K - November 17, 2021
Verified Purchase
Works great
Easy to install with the help of the video.works great.
★★★★★
★★★★★
Dallis F - January 18, 2019
Verified Purchase
Genuine Maytag part
Good part, easy repair. Inspect the idler pulley as well.
★★★★★
★★★★★
Nickolas E - August 5, 2022
Verified Purchase
Exactly what I needed
The part I needed for my repair. Good quality, arrived fast, no issues to speak of. What really impressed me most about parts select is how well their website is set up. Helpful videos and advice to guide you to the parts you need.
★★★★★
★★★★★
Marie L - August 24, 2021
Verified Purchase
Easy repair
First time repairing a dryer belt and it went really well. The part arrived only 3 days after my order ! Easy repair, fast shipping, huge money saving, very satisfied !
Prev
1
2
3
Next
Repair Tips
See how others fixed this model. Time, tools, difficulty, and steps that lead to victory!
Easy
1- 2 hours
Average repair rating from 115 real customers like you
Sort by:
Prev
1
2
3
Next
Search repair tips from other customers using simple keywords like "replace", "fit", "remove", "inspect". DIY doesn't mean you have to do it alone!
Search filter:
Clear Filter
Your search term must have 3 or more characters.
Sorry, we couldn't find any existing installation instruction that matched.
Replace drive belt
306 of 356 peoplefound this instruction helpful.
Robert from Skokie, IL
Difficult
1- 2 hours
Nutdriver
Remove front panel, lint basket, motor mounts,exhaust hood, front drum brackets. Then slip serpentine belt around drum, pressure w/ tension idler pulley and slip around drive motor spindle. Replace all parts in reverse order (a two person job). Vacuumed inside of dryer (full of lint.)
Was this helpful?
Thank you for voting!
Loud banging sound. Worn out roller.
163 of 234 peoplefound this instruction helpful.
David from Underwood, IA
Really Easy
15 - 30 mins
Socket set
Pulled off the lower panel with 5/16 socket.Pulled off the door assembly by removing the two screws at the bottom of the door assembly. I pulled down a little and then out. be carefull of the wires. Other posts said to remove. The wires were long enough I did not have to remove them. I just leaned it against the wall. I then removed the 4
... Read more screws that hold the front piece in.pulled it off replaced brackets , installed self adhesive felt(stuck good) and then glides. Mine were thin but not the problem. I then reached under the drum and released the belt from the tensioner. I then pulled the whole drum out.This is the time to vacum out good. I could get to the rear rollers very easy. The left roller was shot and the shaft half wore into(the problem). I pulled off the two screws holding the roller support. Normally You have to remove the wheel with snap ring pliers first to remove the support. In this case snap ring long gone. Replaced support shaft, installed thrust washers and roller with grease for both sides. The right support shaft was still good. Removed tensioner pulley and inspected. It was just as good as the new one. Cleaned and greased and reinstalled. Put new belt on the tub and slid it back in. Be carefull to get the belt on the proper side of the tensioner. I then installed the front supprt in place to support the tub with the 4 screws. Spun the tub(felt good) then reached under and reinstalled belt to motor and tensioner. Spun again to check for belt alignment. (Check) Reinstalled door an lower panel. Test Quiet Sounds like new. Very easy! I hope this helps someone just as the other post has helped me. Blessings to all.
Washer on spin cycle would shake, rattle, and roll. Walking accross the floor.
58 of 67 peoplefound this instruction helpful.
john from Blue Springs, MO
A Bit Difficult
More than 2 hours
Pliers, Screw drivers, Socket set
Damper kit and Springs corrected the problem. Follow the instrutions listed on this web site and all went well..The only problem was with the damper kit. The "kit" did not include the glue needed to replace the damper pads. This cost a delay on a day and trip to a local parts store that I did not want to make. So be sure to order glue
... Read more for the damper pads.
removed front cover and top took drum out remove heating unit replced limit switch and fuse reinstalled installed new idler put new belt around drum installed drum replaced glides put top back on and front cover . then replaced boosting heater witch is on the blower also cycling thermostat
Nutdriver, Pliers, Screw drivers, Socket set, Wrench (Adjustable), Wrench set
Unplugged dryer, turned off gas, raised front of dryer with two 2X4's on edge resting on legs, removed two lower panel screws, removed lower panel. Removed lower blower & filter assembly, screws (3) are on the inside of drum. (Good chance to clean it out) Removed two lower front upper main panel screws. Supported top panel with wood for a
... Read moreccess. Removed panel slowly, marked wires that go to door switch, set panel aside. Removed tension on belt by reaching in on the right lower side and unhooking the tensioner from belt, look to see how it is installed, for reinstallation on assembly. Pulled drum out slowly as not to damage seals on drum. replaced parts, attached with self tapping screws.(screws all the same size) reassembly in reverse order. Will need to put belt on drum before installing drum. Check drum alignment with rollers and seals. Used very small amount of high pressure grease on roller bracket and shaft assembly where the support roller shaft spins for lubrication. All's quiet. (Vacuumed out inside while dissassembled)
Removed top, remove front panel, removed drum assembly brace, removed drum and belt . The belt and rotor were shot. I replaced both drum support rollers since i was there. Then replaced the motor and Idler lever and pulley, the put the belt on and put everything back. This unit will last a while longer and the grand total including next
... Read moreday air 175.00. I tried to just by the motor locally but for 242.00 I got every thing listed above. Thanks
First, I unplugged the dryer. Then I used a flat screw driver to pop the top open. I removed 2 bolts from the front cover and removed the front door cover. I also took pictures of the electrical connector on the door so I would remember how the wires went back on. Then I removed 4 bolts from the front drum guide and lint screen holder. Th
... Read moreis allowed me to remove the drum & old belt. While the drum was out, I pried an access panel open on the side of the dryer. I then glued the new back felt piece in place. I put the new belt around the drum and re installed it. I re-installed the front guide and front cover re-connecting the door electrical switch. With the access panel open, I attached the belt to the motor. I then plugged it back in and turned it on to verify operation pryor to snapping the top cover back in place. Very easy repair.
Simply remove the front panel screws(2) at the bottom of the dryer. Pull bottom of panel outward until it swings free of the top(taking care not to pull the wires out). Rotate out of the way and remove the two left side screws holding the drum plate and snake the belt around the flange. Reinstall those screws and remove the same ones on t
... Read morehe right side. Snake the belt behind that flange and reinstall screws. Then all you have to do is run the belt around the motor sheave and the idler pully and your done. Reinstall the front panel.
Read less
Was this helpful?
Thank you for voting!
Dryer wouldn't rotate the drum.
23 of 607 peoplefound this instruction helpful.
Dan from Newfield, NY
A Bit Difficult
1- 2 hours
Nutdriver, Screw drivers, Socket set, Wrench set
Removed the screws holding the bottom to the sides (but after taking it all apart, I think I could have done the repair by just taking the front off :-(. Removed the screws holding the front to the sides. Noted the wiring (three wires go to the front door switch). Removed the wires from the switch (they are quick connects, so no t
... Read moreools necessary). Removed the front. Pull the drum out. Disconnected the spring from the idler pulley lever. Removed the bolt and nut holding the idler pulley lever assembly to the bottom. (The old pulley had basically frozen in place which caused the belt to break). Put the new washers, wheel assembly and retaining ring on the new idler pulley lever. Bolted it back in place. Connected the spring. Put the new belt around the drum and slid the drum into place. Put the belt around the motor pulley and past the idler wheel (make sure it is on the correct side so this takes up the tension). Put the bottom screws back in. Connected the wires back up to the front. Put the front in place. (Make sure that the drum is properly seated in back so the front goes on and the drum will turn). Put the front screws back on.
Squeling from inside dryer. To Fix- Pry dryer top cover off by popping cover off the two fastening clips located at about 3" inward from the two front corners. A screw driver at these two locations is easily inserted between the top cover and front panel. Next remove the two screws on the top inside of the driver approximate si
... Read moreze 5/16 inch. Pull the top of the front panel outward and then note how the lower portion clips into the fram, lift the front panel off the clips and roll it to the right. Remove the 4 screws and bulkhead. Draw a picture of how the belt wraps around the drum and idler. Also note the belt orienation on the drum. Roll the belt off the idler pully and reomve the drum. Replaced Idler asembly by first removing the tension spring and lastly the retaining bolt. Reinstall everything in reverse order. Can be a bit tough getting the belt around the idler and motor pulley however this is managable. My machine runs great now! Once again Parts Select comes through with great delivery, perfect fit, good pricing, accurate parts list. This is my third purchase and I have been 100% pleased. By far the best on line service I have ever experienced.
Ask our experts a question about this part and we'll get back to you as soon as possible!
We may have answered a similar question already! Search questions and answers left by others using simple keywords like "fit", "broken", "easy", or "quality" to find questions that match.
Search filter:
Clear Filter
Your search term must have 3 or more characters.
Sort by:
Prev
1
2
Next
Sorry, we couldn't find any existing answers that matched.Try using some different or simpler keywords, or submit your new question by using the "Ask a Question" button above!
Lorna
July 20, 2017
Hi, my dryer is emitting a burning smell this happened one before and I replaced the belt (which fixed the problem) but now it is happening again. Should I be replacing something else or could the belt be faulty already??? Thanks
Hi Lorna, great question! Based on your symptoms we recommend checking the idler pulley and rollers on your dryer for tightness. If they are quite tight they should be replaced, and that should stop the burning smell. Please let us know if you have any further questions.
17 peoplefound this instruction helpful.
Was this helpful?
Thank you for voting!
Rene
July 20, 2017
I bought this part and I am replacing the old belt. I see a few groove options to wrap it around, one is prettttty deep and the other seems just out of reach? Which do I use?
Hello Rene, great question! The belt does not usually slide in a groove, it is simply wound around the drum. When the belt is installed try turning the drum slowly to let it align properly. Best of luck with this repair!
12 peoplefound this instruction helpful.
Was this helpful?
Thank you for voting!
Avery
July 20, 2017
So my dryer goes hot and sometimes tumbles, but sometimes it is very slow and other times it is normal… from what I can tell. Reading around I thought to change the belt but now I dont know if that will fix it. Thoughts? Advice? Help?
Hello Avery, our advice to you is to first check the rollers on your dryer to make sure they are not seizing up and sticking. This could be caused by excessive wear and visible damage. I hope this helps!
10 peoplefound this instruction helpful.
Was this helpful?
Thank you for voting!
Richard - For model number Sdg3606aww
December 30, 2017
The dryer will not turn unless I lighten the load inside. Anything more than a few items and it refuses to spin. Is it the belt or something else?
Hello Richard,
Thanks for your question. Usually this is due to the belt, assuming the clothes are not over-capacity for the dryer. You may also want to check the drum glides to see if they are intact, along with the idley pulley wheels.
I hope this helps.
Hi Michael,
Thank you for your inquiry. There are some parts that you will need to check to see which one is causing the issue. If you have an electric dryer you will need to check the heating element, the high limit thermostat and the cycling thermostat. If you have a gas dryer you will need to check the igniter, the radiant flame sensor, the gas control valve and the coils. There are some other parts you will need to check as well. They are the temperature sensor, the timer and the thermal fuse. I hope this helps. Thank you and have a great day!
6 peoplefound this instruction helpful.
Was this helpful?
Thank you for voting!
Mike - For model number MDE308DAYW
December 30, 2017
My dryer was making a loud squealing sound so I took it apart as per your videos but how do I know if the belt is bad or if it is the rollers or the idler pulley? I do not know how to tell if they are good or bad.
Hello Mike,
Thanks for your question. A bad squealing noise is typically due to bad rollers or the idler pulley. Inspect the rollers and the pulley for any signs of wear or damage visually and replace them if they are damaged.
I hope this helps.
My dryer won't start. If i press the knob to start it, it just makes a loud noise like it's trying to start but the drum does not move. If i turn the drum then try pressing the knob it will start up for a minute but quits again. Then only makes the same noise if i try again.
Hello Starla, Thank you for the question. The first thing to check is the belt to ensure it is not wore out and lose and able to grip and tumble the drum. In most cases with a loud noise and no tumbling or a slow tumble, the motor would be defective and needs to be replaced. Hope this helps!
2 peoplefound this instruction helpful.
Was this helpful?
Thank you for voting!
Mario - For model number MDG308DAWW and SER#11806493JR
August 1, 2019
My dryer is gas and when i run it on empty it gets hot the steam comes out hot the drum is hot when i touch it ,but as soon as i load it with clothes and run it , it does not get very hot i have to do two 60 minutes cycles in order to dry the clothes i check the belt is fine what else do you suggest can be wrong please advise thank you very much
Hi Mario, thank you for your question. When you are experiencing an issue like this there are a few parts that you will have to test to determine what is causing your issue. For all of these parts you can test them with a multi meter. First you will have to test your thermostats and thermal fuses to make sure they are all functioning correctly. After that you will want to test parts in this order, your m series coils, igniter itself, or your radiant flame sensor. You may also want to check your regulator just to make sure that part is functioning properly as well. Something else you should also check would be your filter and ducts. Make sure there is absolutely no blockage that would restrict air flow in your appliance. I hope that helps. Good luck with your repair.
1 personfound this instruction helpful.
Was this helpful?
Thank you for voting!
Gary - For model number MDE508DAYW
November 3, 2017
Just replaced belt and it still squeaks,any help?
Hello Gary,
Thank you for your question.
If you have just replaced the belt and it still squeaks, there could be a couple of causes. It could be that the belt was installed with the grooves facing out which is allowing it to slide on the drum. However, the most likely cause would be a lack of tension on the belt. I would recommend double checking the belt path and that the idler is installed correctly and providing tension on the belt.
I hope this helps!
1 personfound this instruction helpful.
Was this helpful?
Thank you for voting!
Steve - For model number LGA30AW
February 16, 2018
Dryer ignites 5 seconds then shuts off and continues same process
Hello Steve, Thank you for your inquiry. We would recommend checking the following parts to fix your issue: high limit thermostat, cycling thermostat, "M" series new style coil kit, radiant flame sensor, thermostat boosting heater, and the door switch kit. You can test the parts with a multimeter. Hope this helps!
1 personfound this instruction helpful.
Was this helpful?
Thank you for voting!
Prev
1
2
Next
✖
Ask a Question
Ask our experts a question on this part and we'll respond as soon as we can.



 My Orders