




















91147699100 Kenmore Microwave - Instructions
Keep searches simple. Use keywords, e.g. "leaking", "pump", "broken" or "fit".
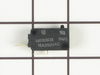
Microwave would turn on when door opened
Unscrewed numerous screws holding the "body/shell" to the microwave. Removed body. I then unplugged top door switch, replaced it with new one, and "tested" the new one. I fixed our $400 convection micro with an $18 switch. NICE!
Parts Used:
-
Lois from El Segundo, CA
-
Difficulty Level:Easy
-
Total Repair Time:15 - 30 mins
-
Tools:Screw drivers
5 of 8 people
found this instruction helpful.
Was this instruction helpful to you?
Thank you for voting!
Incorrect oven temperature due to defective temperature sensor.

-
Anthony from FARMINGVILLE, NY
-
Difficulty Level:Really Easy
-
Total Repair Time:Less than 15 mins
-
Tools:Nutdriver
3 of 3 people
found this instruction helpful.
Was this instruction helpful to you?
Thank you for voting!
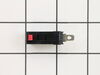
Microwave wouldn’t shut off when door was opened
Followed the online videos to enter the cavity to the switch holder. Noticed right away the dreaded capacitor was in back right corner behind where the touch pad had been removed. I isolated the capacitor with an old computer mouse pad for extra safety. Took some manipulations to get the switch mount out from behind the wire bundles. Once out front, easy to use small flat blade screwdriver to release each switch and replace with matching new switch. Only one switch was bad but replaced all three. Back together and working great.
Parts Used:
-
John from POWHATAN, VA
-
Difficulty Level:Easy
-
Total Repair Time:30 - 60 mins
3 of 3 people
found this instruction helpful.
Was this instruction helpful to you?
Thank you for voting!
Smelling and smoking. Than stop.
I took the cabinet off and saw where the switch had been burnt. So I remove it and order another one from your company. And I put new clips on it with heat shrinks. We might get another 30 years out it, Although I'm 80 years old.
Parts Used:
-
CHARLES B. from CLARKSVILLE, TN
-
Difficulty Level:Really Easy
-
Total Repair Time:30 - 60 mins
-
Tools:Pliers, Screw drivers
3 of 3 people
found this instruction helpful.
Was this instruction helpful to you?
Thank you for voting!
When door opened, microwave would turn on
Removed the outer cover to access the door switches. Turns out there were three switches, but I determined that only two were bad. When the small colored tab on the switch is pushed in it should make a clicking sound. The two bad switches had no resistance and did not make any noise when pressed. Removing the switch is relatively easy, you simply pull it away from a couple small tabs holding them in place. After reconnecting the wire leads, insert back into the holding tabs and install the cover.
Parts Used:
-
Tom from SUN PRAIRIE, WI
-
Difficulty Level:Easy
-
Total Repair Time:30 - 60 mins
-
Tools:Pliers, Screw drivers
3 of 3 people
found this instruction helpful.
Was this instruction helpful to you?
Thank you for voting!
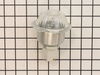
Oven Light Assembly damaged
I have a double oven and coincidently I had to replace the two Oven Light Assemblies.
I am really glad about your web site because once I got the number from my oven model you guys were the first ones that came up. Thanks to your prompt and reliable service my oven is back to its original state.
Jose Figueroa
I am really glad about your web site because once I got the number from my oven model you guys were the first ones that came up. Thanks to your prompt and reliable service my oven is back to its original state.
Jose Figueroa
Parts Used:
-
Jose from Frederick, MD
-
Difficulty Level:Really Easy
-
Total Repair Time:15 - 30 mins
-
Tools:Nutdriver, Pliers
5 of 10 people
found this instruction helpful.
Was this instruction helpful to you?
Thank you for voting!
Unit would run when door is opened
Two screws to remove upper from vent. Two screws to remove the didgit panel lift ip to remove and put aside remove the two screws that hold the door sensors. Depress the tab to remove the defective sensor disconnect the electrical connector and replace the new sensor snap it back into the holder install the two screws, install the didgital panel and vent panel to complete the job. Please be aware that there is a video of this procedure on Y tube
Parts Used:
-
Ernest from RIVERSIDE, CA
-
Difficulty Level:Very Easy
-
Total Repair Time:Less than 15 mins
-
Tools:Screw drivers
3 of 4 people
found this instruction helpful.
Was this instruction helpful to you?
Thank you for voting!
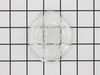
broken light cover
-
Francis from LAKE ELSINORE, CA
-
Difficulty Level:Very Easy
-
Total Repair Time:Less than 15 mins
2 of 2 people
found this instruction helpful.
Was this instruction helpful to you?
Thank you for voting!
Replace Thermostat
Pull oven out away from the wall, unplugged from outlet, removed center cover by removing 5 sheet metal screws. disconnected thermostat sensor from control cable. Opened oven door and removed screw that holds thermostat sensor. Pulled thermostat sensor out replaced with new sensor. Plugged sensor in to control cable. Replace panel and screws. Then my wife made me clean the oven. I recommend making the repair when your wife is not home.
Parts Used:
-
Russell from Morgantown, WV
-
Difficulty Level:Really Easy
-
Total Repair Time:Less than 15 mins
-
Tools:Socket set
2 of 2 people
found this instruction helpful.
Was this instruction helpful to you?
Thank you for voting!
Frost build up on bottom to ice bin and delivery chute in door creating ice blockage
Remove the ice bin.
Turn the ice maker selection to "OFF"
Use small flat blade screwdriver to open the plastic ears on the electic plug in connectiion
Use #2 Phillips screwdriver to remove the screw on the front left side of the ice maker
Pull the ice maker forward until free of the two studs in the left side rear of the freezer wall
Check to see if the supplied water chute is the correct size for your application, if not remove the water chute from the old ice maker and place it on the new one.
Place the new ice maker in the freezer connecting the slots on the left read with the studs on the left wall
NOTE; IF THE ICE MAKER DOES NOT APPEAR TO BE LEVEL HORIZONTALLY REMOVE IT AND CAREFULLY REINSTALL IT TO ACHIEVE LEVEL
NOTE: ENSURE THE WATER DELIVERY TUBE RESTS IN THE RECEIVER TRAY
Reconnect the electrical plug ( needle nose pliers may be helpful in aligning the male plug with the female plug)
Move the selector from "OFF" to "ON"
Replace the ice bin and close the freezer door
Turn the ice maker selection to "OFF"
Use small flat blade screwdriver to open the plastic ears on the electic plug in connectiion
Use #2 Phillips screwdriver to remove the screw on the front left side of the ice maker
Pull the ice maker forward until free of the two studs in the left side rear of the freezer wall
Check to see if the supplied water chute is the correct size for your application, if not remove the water chute from the old ice maker and place it on the new one.
Place the new ice maker in the freezer connecting the slots on the left read with the studs on the left wall
NOTE; IF THE ICE MAKER DOES NOT APPEAR TO BE LEVEL HORIZONTALLY REMOVE IT AND CAREFULLY REINSTALL IT TO ACHIEVE LEVEL
NOTE: ENSURE THE WATER DELIVERY TUBE RESTS IN THE RECEIVER TRAY
Reconnect the electrical plug ( needle nose pliers may be helpful in aligning the male plug with the female plug)
Move the selector from "OFF" to "ON"
Replace the ice bin and close the freezer door
Parts Used:

-
Ronald from PONCA CITY, OK
-
Difficulty Level:Really Easy
-
Total Repair Time:15 - 30 mins
-
Tools:Pliers, Screw drivers
3 of 5 people
found this instruction helpful.
Was this instruction helpful to you?
Thank you for voting!
Stove overheated with an F2 error
Removed screws holding temp sensor, pulled wire out from behind wall until found connector, disconnected old sensor.
Measured resistance of old sensor and compared with new sensor, they measured nearly the same. Installed the new sensor and tested the stove. Came up to temp ok. No problem since, about 2 weeks.
Measured resistance of old sensor and compared with new sensor, they measured nearly the same. Installed the new sensor and tested the stove. Came up to temp ok. No problem since, about 2 weeks.
Parts Used:
-
Richard from PHOENIX, AZ
-
Difficulty Level:Easy
-
Total Repair Time:15 - 30 mins
-
Tools:Nutdriver
2 of 2 people
found this instruction helpful.
Was this instruction helpful to you?
Thank you for voting!
Turkey grease got inside oven door & ruined double-pane interior glass
1. Removed oven door
2. Took out all screws
3. Took all components of door apart
4. Took out all the ruined insulation
5. Removed double-paned window frame assembly
6. Installed new insulation
7. Replaced window frame assembly
8. Put all components back together again. Put in all screws.
9. Replaced oven door- works like new!
2. Took out all screws
3. Took all components of door apart
4. Took out all the ruined insulation
5. Removed double-paned window frame assembly
6. Installed new insulation
7. Replaced window frame assembly
8. Put all components back together again. Put in all screws.
9. Replaced oven door- works like new!
Parts Used:

-
Robert from RALEIGH, NC
-
Difficulty Level:Easy
-
Total Repair Time:1- 2 hours
-
Tools:Nutdriver, Screw drivers
2 of 2 people
found this instruction helpful.
Was this instruction helpful to you?
Thank you for voting!
Still runs even the door was open
Pulled it from the wall remove the front vent covers removed the control panel remove the door switches by a special screw driver bit which looks a star remove the electrical terminals pressed the plastic clip pulled the switch replaced it with new one then followed initial steps backward
Parts Used:
-
Erwin from CONROE, TX
-
Difficulty Level:Really Easy
-
Total Repair Time:30 - 60 mins
-
Tools:Pliers
2 of 3 people
found this instruction helpful.
Was this instruction helpful to you?
Thank you for voting!
Burned out GE oven bake element
Turned off the power and it took less than 5 minutes to use a ratchet set to remove the old element and connect the new one
Parts Used:
-
Bill from SEATTLE, WA
-
Difficulty Level:Really Easy
-
Total Repair Time:Less than 15 mins
-
Tools:Socket set
2 of 3 people
found this instruction helpful.
Was this instruction helpful to you?
Thank you for voting!
microwave Quit working but lights worked
-
Rick from Muncie, IN
-
Difficulty Level:Really Easy
-
Total Repair Time:15 - 30 mins
-
Tools:Screw drivers
5 of 12 people
found this instruction helpful.
Was this instruction helpful to you?
Thank you for voting!