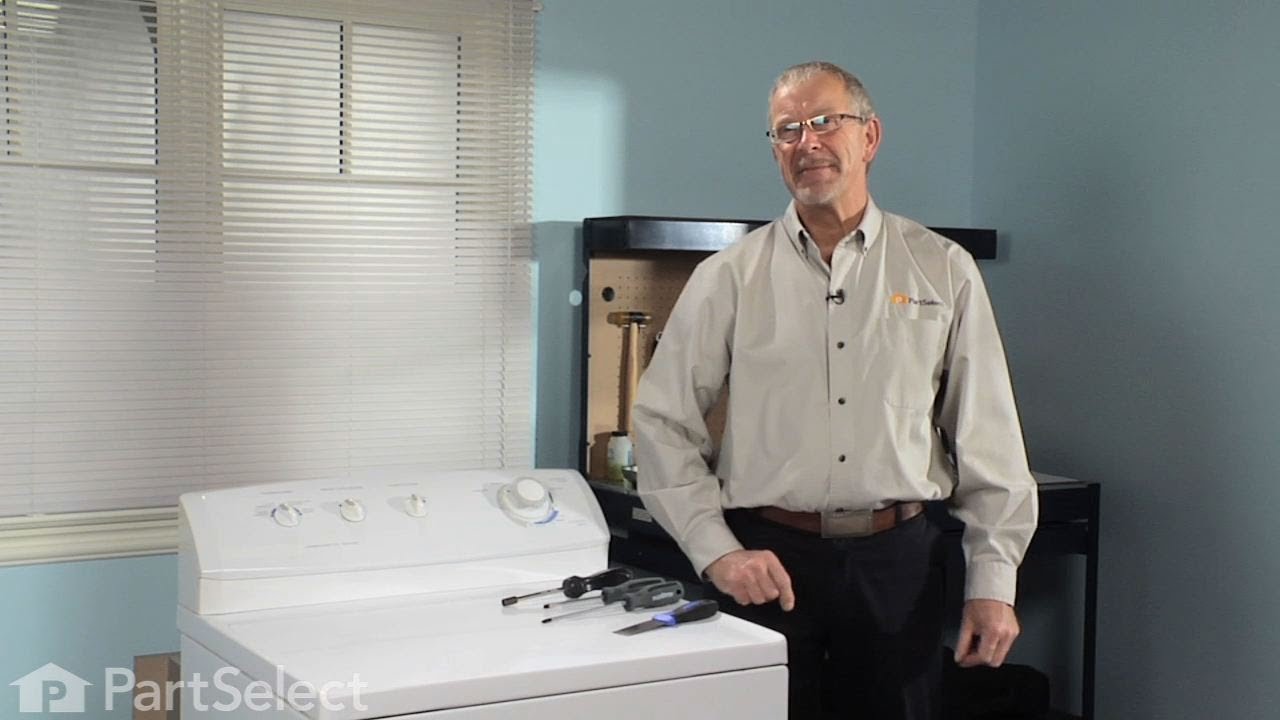
What it does. Why it matters. Everything you need to know for an easy fix.
Rear Drum Bearing Kit Specifications
This kit includes one bearing, one ball shaft, one ball bearing, one ball bearing retainer, a small tube of high temperature lubricant, and installation screws.
Part #5303281153
Manufactured by
Frigidaire
for Frigidaire, Kenmore, Gibson, Kelvinator
Real ratings from other people who bought this part.
Average Rating:
★★★★★
★★★★★
89 Reviews
4.8
Out of 5
5 Stars
73
4 Stars
13
3 Stars
2
2 Stars
1
1 Star
0
Search reviews left by others. DIY doesn't mean you have to do it alone. Use simple keywords like "fit", "broken", "easy", or "quality" to find reviews that match!
Search filter:
Clear Filter
Your search term must have 3 or more characters.
Sort by:
Prev
1
2
3
Next
Sorry, we couldn't find any existing reviews that matched. Try using some different or simpler keywords.
★★★★★
★★★★★
Clayton M - June 27, 2024
Verified Purchase
Timely purchase
Drier has been squealing for sometime and I had tried everything except removing the drum.
The part arrived quickly and changing it went smoothly. Highly recommend partselect.
★★★★★
★★★★★
Edo J - January 20, 2022
Verified Purchase
Works great!
The part came with everything needed for an easy install made easier with the video.
★★★★★
★★★★★
Lucien B - January 19, 2019
Verified Purchase
Easy Repair, proper fit
Proper part , good price , great shipping
★★★★★
★★★★★
Scott A - January 22, 2019
Verified Purchase
Perfect fix
Genuine parts made fix easy
★★★★★
★★★★★
Dan M - November 30, 2021
Verified Purchase
Fit and worked great!
My dryer was a bit different than the model in the video so I had to draw upon a few online resources sacs my own logic, but the part fit perfectly and silenced the banshee. Highly recommend setting aside a few hours for this. It isn’t hard but you’ll be amazed at how much cleaning your dryer needs while it’s open. The tip in the video about pre threading the holes was golden. A second set of hands is handy when getting the drum out. Also, it’s a giant pain to get the belt on and off so prepare for some cursing.
★★★★★
★★★★★
Robert G - January 31, 2019
Verified Purchase
Easy and as in the video
Great fix.
★★★★★
★★★★★
Francois S - October 20, 2018
Verified Purchase
Worked like a charm!
With the help of a fantastic YouTube video, the installation went flawlessly. Parts were exactly as described and great quality.
★★★★★
★★★★★
Ryan W - May 7, 2021
Verified Purchase
As described but not what was needed
Part was exactly as described. Well packed, day later than expected but that's Canada Post (wish there was shipping alternative) one week from mova scotia to ontario not too bad. My specific noise was the plastic exhaust fan, but this went to easy.
★★★★★
★★★★★
ROBERT M - August 1, 2020
Verified Purchase
Easy Repair
The heating coil in my dryer had burnt out so having the dryer apart I thought it was a good time to replace the bearing. I contacted EasyPart to make sure of the part number. Took about a week to arrive but once I had it I replaced the bearing kit and installed a new heating coil in 30min and had the dryer fixed, together and running in 45 min. The dryer is now working better than before. It was a great DIY project which saved me a lot of cash. Watching a Youtube video of the repair before I started the project was very helpful.
★★★★★
★★★★★
Luke W - January 14, 2019
Verified Purchase
Great part
Parts came fairly quick to hamilton ontario, the installation video makes it a breeze to install. Subscribe to pewdiepie
Prev
1
2
3
Next
Repair Tips
See how others fixed this model. Time, tools, difficulty, and steps that lead to victory!
Easy
1- 2 hours
Average repair rating from 139 real customers like you
Sort by:
Prev
1
2
3
Next
Search repair tips from other customers using simple keywords like "replace", "fit", "remove", "inspect". DIY doesn't mean you have to do it alone!
Search filter:
Clear Filter
Your search term must have 3 or more characters.
Sorry, we couldn't find any existing installation instruction that matched.
Dryer squealed like a pig and at times the drum stopped rotating
690 of 707 peoplefound this instruction helpful.
charles from new holland, OH
A Bit Difficult
1- 2 hours
Screw drivers, Socket set
First thought the problem was a stretched drum belt or bad idler pulley. Ordered a new belt and idler assy plus spring. Replaced those items with relative ease following suggestions obtained at this site.However, problem persisted and I now suspected a bad drum bearing. Odered the bearing kit and replaced same using the following procedu
... Read morere. 1. Removed the cover from the back of the dryer (held in place via two phillip head screws) 2. Pushed down on the idler assy and removed the idler spring to release the drum belt. 3. Inserted flat tip screwdriver between the top panel and the dryer main body in the front of the dryer to pry the top loose from the two retaining clips. 4. used phillips screwdriver to remove the two retaining screws (one left, one right) that hold the front panel to the main body of the dryer. (about a foot down from the top of the dryer). 5. disconnected the wiring plug on the top right hand side at the top of the dryer. 6. lifted the front panel slightly removing it from the main body and placed it to the side. 7. lifted the rear of the drum to release it from the bearing bracket and removed the drum belt. 8. Pulled the drum through the front of the dryer body and moved it to an open work area. 9. Reached into the Dryer and loosened the two bearing bracket screws with a nut driver. Here's where another pair of hands would have come in handy. Holding the ground bar on the back of the drum with on hand, reached into the dryer and finished removing the bracket screws somehow managing not to drop the tiny grounding ball (size of a BB) Removed the badly damaged plastic bracket, grounding bar, and grounding ball and set them aside to be discarded later. 10. Used impact driver with phillips attachment to remove two of the three screws that hold the bearing to the back of the drum (these are on the inside) The third screw's head stripped out and I had a very difficult time removing it. Had it not been for that, the job would have taken less than an hour. 11. I had my wife hold the bearing in place while I started the three retaining screws. 12. My wife also got behing the dryer and held the grounding bar in place while I installed the new bearing bracket . (this kept me from loosing the grounding ball) I just reversed the rest of the procedures to install the drum belt, drum, front panel, etc. The dryer works like new now, doesn't squeal. Also replaced the on/off switch knob (just pulled the old one from the stem and slid the new one on.
well, i started at the top and worked my way down. by taking the top off, it gave me more room to get the dryer tub out. took the two screw`s out of the vented plate on the back of the machine to undo the belt. this is a stackable washer-dryer combo, so next i took off the white plate on front between washer & dryer. took off the control
... Read morepanel, unpluged it, then took dryer door front off. then removed the two screw`s that hold that bracket on ,in the back of dryer, pulled the drum out & replaced the belt, but before replacing anything i took the shopvac to it , there was alot of lint in there.when replacing the Grounding Ball Clip & Grounding Ball, i took a one inch by two inch magnet and used it to hold the Grounding Ball & Clip in place so i could get the two screws started in the Drum Support Bearing & Bearing Bracket. after installing that i put the shaft in place & lined the dryer tub up with the 3 screw hole`s ,and boom, bang, pow...nothing to it. it`s easy...parts came very fast....Thx PartsSelect.com...i`ve told all my friend`s about PartsSelect
1. Unplug dryer from outlet 2. Using Lg. flat screwdriver, pry under the front edge of the top and release two spring tabs 3. Lift up top and tilt back out of your way 4. Unscrew two phillips scews on inside of front panel 5. Lift up and out the front panel. Two spring clips at bottom. 6. Rlease tension on drum be
... Read morelt at the motor. Access panel at rear of dryer. 7.Unscrew 3 screws from inside, center rear of drum. 8. Remove drum through the front of the dryer. You may have to spread the sides apart a little bit for it to fit 9. Lift up on the rear drum bearing to remove it from the bearing retainer. ( U shaped plastic socket) 10. unsrew 2 screws and remove the bearing retainer, ground ball. Ball retainer is on outside of dryer. 11. Vacuum everything--duct, blower, lint trap, ect. 12. Intall new bearing retainer and grounding ball, an assistant is helpful at this time, one to hold ball retainer on rear of dryer, one to screw it in from the inside 13. reassemble remainder of parts in reverse order.
Read less
Was this helpful?
Thank you for voting!
clothes got caught , burned and ripped on front of drum
160 of 238 peoplefound this instruction helpful.
john from owego, NY
A Bit Difficult
More than 2 hours
Screw drivers, Socket set, Wrench set
I felt ,if I was going to replace the top drum glide and lower basket seal, I might as well replace the belt ,bearing assembly and the idle pulley assembly and avoid having to replace these sooner than later. All of the parts showed alot of wear and the belt like all drive belts, should be changed every 5-6 years. DISCONNECT ELECTRI
... Read moreCITY and GAS LINES 1.popped top by pushing and prying at front /top clips about 2-3in. in from side edges. lifted it off 2. removed the front panel by removing the 2 top front screws from the inside, then the two lower screws from the front after removing the small white plastic hole covers. disconnected the multiplug electric connector top right. set panel aside. 3.remove small back panel.and loosened belt.(observe belt path and idle pulley assy. 4. lifted drum and slid it out the front. 5. using socket, removed rear plastic bearing housing and replaced the same. be careful of observing the small ball bearing and the small piece on outside back panel. replace the same. you wil probably need a second set of hands to hold the piece on the outside when screwing in the screws from the inside. 6. unscew the "bearing" from the rear of the drum and replace with new one.(the screws are self-tapping and go in HARD!!) 7. apply lubricant liberally to plastic bearing holder 8. place new belt around drum(rubber side against drum cloth side out. 9. idle pulley assy. is removed by removing spring and just sliding assy out of holder. replace with new 10. replace drum and belt 11. take front panel and remove top drum glide and lower basket seal.( i marked where the two seal/glide come together with a marker ) 12. scrape and remove as much felt and possible. I then used "goo gone" to remove all the glue. clean well and using the provided high temp adhesive reattached glide and seal. 13. reassemble and enjoy your NEW? dryer
First, I removed the top panel which is held on at the front by pressure clips. Second, I removed the entire front panel which entailed removing 2 screws and 2 wire couplings. Third, I removed the 3 screws on the inside center of the drum which turned out to be unnecessary. Fourth, I slid the drum forward in order to access the rear be
... Read morearing. Lastly, I replaced the entire bearing assembly including the shaft, bracket, bearing, grounding ball and clip. Again, probably not needed but I had ordered the parts in advance in preparation for the worst.
removed top and front of machine. removed drum. replaced shaft, bearing bracket, and support bearing from inside. replaced grrounding ball and clip from outside. reassemble. this should be available as a kit, and should include high temp grease to put in bearing bracket
retainer around drum dryer was wore, back bearing squeeks
90 of 2578 peoplefound this instruction helpful.
Timothy from Manlius, NY
Easy
30 - 60 mins
Nutdriver, Pliers, Screw drivers, Socket set
I look up on the internet on how to disassemble dryer to get to the parts needed. Took off top, found screws to take off front. Removed existing drum riding seal and lower seal. Used laquer thinner to remove excess glue. Cleaned throughly with soap and water. Reapplied new seals.
At the same time removed drum and parts
... Read morein the back of the dryer for ball bearing. great, expeditious help from your store. Thank you
Dryer making squeeking sounds and clothes getting caught in drum causing brown spots
75 of 84 peoplefound this instruction helpful.
Ann from Blanco, TX
Really Easy
1- 2 hours
Nutdriver, Screw drivers
I followed others suggestions with numbered steps and listened to others suggestions about replacing other parts while in the dryer. I took the dryer apart and cleaned it out well. I used acetone to remove the glue from the felt and Drum Glide at the top of the Drum. It worked much better than Goo Gone. By doing the clean up and evalu
... Read moreation one day, I ordered all the parts that I saw were worn or difficult to get to. I replaced the Heating Element only because the old one was very brittle and to get to it again would be difficult. Also, I followed other's advice to photograph the parts before removing. It was easy to remember how things went if I had a photo to refer to.
When the parts arrived it only took about 30 minutes to install them all because the glue removal, lint removal, and parts removal had been done another day. I should add that I am a 66 year old woman and found the job quite simple. Excellent web site. Thanks to others for the step-by-step instructions. Oh, to hold the Drum Glide and felt in place while the glue cured, clothes pins work great. I let the glue cure overnight to make sure that it was really secure.
The high pitch squeel was the result of a failing drum bearing. It was particularly evident when first turning on the dryer, but became softer as the dryer heated up. In order to replace the drum bearing, I removed the top panel and front door panel.
The top panel was easily taken off by removing 2-screws from the back edge o
... Read moref the panel, and sliding it back to release it from the front panel seam.
The front panel is more involved, but still relatively easy for your average "do-it-yourselfer". I removed the front door panel by first removing the control panel (4-screws; 2 on top and 2 from the back of the panel). I removed 2 cable assemblies from the control panel via connecters (different sizes so didn't need to mark) and 2-wires attached to the large control panel mode selector (I marked these 2-wires). I set aside the control panel. I removed the front door panel by taking off 6-screws (2 on top, 2 on the bottom, and the remaining 2 on the inside of the panel on either side of the drum). After removing these 6-screws, I carefully pulled the front door panel away from the front of the dryer, carefully releasing 4-alignment latches (2 on either side). The front door panel was still electrically attached to the machine so I had to disconnect a couple more wires. I carefully disconnected 2-wires from the door light assembly and 3 more wires from the door switch (I marked the 3-wires on the door switch). I set aside the front door panel.
From the back of the dryer, I removed the small motor access panel on the bottom left corner. This panel also provides access to the drum belt. I released the drum belt from the motor drive wheel by releasing spring tension at the tensioner. The belt can easily be disconnected from the motor drive wheel and tensioner assemblies.
Removal of the drum was now possible. With the front door panel removed, the front of the drum is maintained in place via a small plastic stop on the top crossmember. I removed this stop prior to removing the drum. With one hand, carefully grabbing the belt that is was loosely draped across the back of the drum, and the other hand holding the front lip of the drum, I provided a quick and forceful upward motion to the back of the drum in order to dislodge the drum shaft from the bearing housing assembly. Once this was accomplished, I simple pulled the drum out of the dryer housing via the front of the machine.
The drum bearing repair kit ordered came with the replacement ball bearing, bearing housing, drum shaft, high-temperature grease, and attaching hardware.
I replaced the drum shaft on the drum via the 4-screws accessed on the drum rear panel.
I removed the old bearing/bearing housing via the 2-screws holding it in place. I wasn't too concerned about loosing the small ball bearing as the kit provided me a new one. I generously applied some high-temperature grease to coat the interior lining of the new bearing housing. I also placed a dab on the back seat where the new ball bearing sits. This helped hold the bearing in place while reattaching it. I reinstalled the bearing housing to finish replacing the repair parts.
Reassembly of the drum is in the reverse order. I paid particular attention to making sure the new drum shaft properly seated with the new drum bearing housing.
After reinstalling the drum and while the front door panel was still off the dryer, it was easy to inspect the blower housing. I found the squirrel cage had broken loose from the molded nut that attaches it to the motor shaft. That would explain the heat problem; the heat was not being exhausted through the duct.
THE SQUIRREL CAGE IS REVERSE THREADED. I was unable to remove the nut from the motor shaft as the design encompasses a metal bushing molded into a plastic nut shaped form. The plastic would not hold up to the force I was applying trying to loosen the squirrel cage. So I ended up removing the entire motor and blower housing assembly from the base
Had to first remove the top of the dryer this was done by removing the clamps on the back. Next I removed the front of the dryer by removing the two nuts the frong in the inside, these are somewhat hard to reach. Next the drum was removed. then the heating element shield. Replaced, the heating element then secured it into place. repl
... Read moreaced the drum bearing assembly, and put back together.
Ask our experts a question about this part and we'll get back to you as soon as possible!
We may have answered a similar question already! Search questions and answers left by others using simple keywords like "fit", "broken", "easy", or "quality" to find questions that match.
Search filter:
Clear Filter
Your search term must have 3 or more characters.
Sort by:
Prev
1
2
3
Next
Sorry, we couldn't find any existing answers that matched.Try using some different or simpler keywords, or submit your new question by using the "Ask a Question" button above!
Seamus
July 20, 2017
I cannot seem to detach the drum to install my drum bearings. Do you have any tips or tricks?
Hi Seamus, if you are having troubles detaching the drum we suggest lifting it from the back to lift it out of the cup, and remove it. I hope this helps!
31 peoplefound this instruction helpful.
Was this helpful?
Thank you for voting!
Katie
July 20, 2017
I think I am installing the rear drum bearings incorrectly because they keep failing prematurely. Is there something different I should be doing? Is there another part I should be checking that could affect the performance of the bearings? Thanks
Hello Katie, the most common reason for this happening is a restricted or overly long dryer ducting. If there is too much heat and not enough air flow it will cause a blow back into the cabinet, which would greatly affect your bearings. This is also harmful to other mechanical and electrical features in your dryer. We recommend inspecting your dryer ducting before replacing the drum bearings again. Best of luck with this repair!
20 peoplefound this instruction helpful.
Was this helpful?
Thank you for voting!
Beth
July 20, 2017
I’m replacing the drum bearings but I also need to replace the felt seal (front). Do you have any advice on how to do this?
Hello Beth, to replace the felt seal you will need to remove the top panel and the mounting screws on the back. After that the control panel assembly should come off. Then the front panel of the dryer can be removed. From here you can install the new felt seal 134440200 (which can be glued down). To get to the bearings you will need to remove the belt, then the tub can be lifted out of the front of the unit. From there you can change the bearings. Please let us know if you have any further questions.
17 peoplefound this instruction helpful.
Was this helpful?
Thank you for voting!
Manny - For model number GLGR642AS5
November 4, 2017
I order a rear drum bearing kit about two years ago its going bad again is this normal or should it last longer?The drum glide is this one piece or do I need upper and lower.
Hi Manny, Thank you for the question.Normally the bearing will last longer. I suggest making sure the appliance is level and The appliance requires 2 and they are sold individually. Hope this helps!
10 peoplefound this instruction helpful.
Was this helpful?
Thank you for voting!
Carlos
January 28, 2018
Hello, I replaced the rear drum kit. The loud squeaking stopped, but the noise has now been replaced with a loud robust sound. I took the drum out and tried resetting it. What should I check now?
Hello Carlos,
Thanks for your question. Without the dryer model number we can only give general information, but you may wish to also check the drive belt, the drum roller axles, the blower wheel, drum glides, and the idley pulleys for any signs of wear and tear. If all else fails, it could be the drive motor.
I hope this helps.
7 peoplefound this instruction helpful.
Was this helpful?
Thank you for voting!
Jerry Jasso - For model number Kenmore 417.97812701
March 28, 2018
Do you all sale rear drum bearing kit for my dryer.
Hello Jerry, thank you for your question. The rear drum bearing kit for your model is part number 5303281153. Please enter the part number into the site for current price and availability. Good luck with your repair!
7 peoplefound this instruction helpful.
Was this helpful?
Thank you for voting!
Jennifer - For model number Frigidaire gler341as2
November 13, 2018
Hello,
My Frigidaire dryer gler341as2 started making a thumping noise with each rotation. will replacing the rear drum bearing fix this? are there any other parts that i need to replace? i replaced the dryer drum belt 2 years ago and the drum glides 8 months ago, in case that helps.
thank you!
jennifer
Hello Jennifer, Thank you for the question. We would recommend replacing the Rear Drum Bearing Kit
Part Number: PS459829. Sounds like an issue with the small ball bearing and clip or the support, both come with this kit. Hope this helps, good luck with this repair!
7 peoplefound this instruction helpful.
Was this helpful?
Thank you for voting!
Fred - For model number 4178204101
October 5, 2017
My dryer makes a low-pitch rumbling sound -- not the high-pitch screech -- and the exhaust of air seems to pulse. Is a bad rear drum bearing likely to be my problem? Thanks.
Hi Fred,
Thank you for your inquiry. There are some parts that you will need to check to see which one is causing the issue. You will need to check the rear drum bearing kit, the drum support bearing, the drum belt, the drum glide, the front lower drum seal, the bearing bracket, and the ball hitch. I hope this helps. Thank you and have a great day!
5 peoplefound this instruction helpful.
Was this helpful?
Thank you for voting!
Trevor - For model number GLER341AS2
July 9, 2019
Hi what is the white plastic piece that appears to attach to the interior of the dryer connecting to the barrel and front at the top
Hello Trevor, Thank you for contacting us. I have researched the model you have provided and have found the part you are looking for is PartSelect Number PS5574052 Drum Glide. Please note: these are sold individually, however there are two of these in your appliance. We recommend that these be replaced at the same time, this allows for optimal performance and ensures they wear evenly. Hope this helps!
Front of drum dropped down clothes are getting ruined. What could be the problem ? I can push up on the front of the drum.
Hello Stephen, Thank you for the question. I suggest checking the support for the rear bearing, Part Number: PS418807 and other parts of the Read Drum Bearing kit, Part Number: PS459829, If they are wore or or damaged, it will cause the drum to fall or to be loose. Thank you for your inquiry, good luck with this repair!



 My Orders